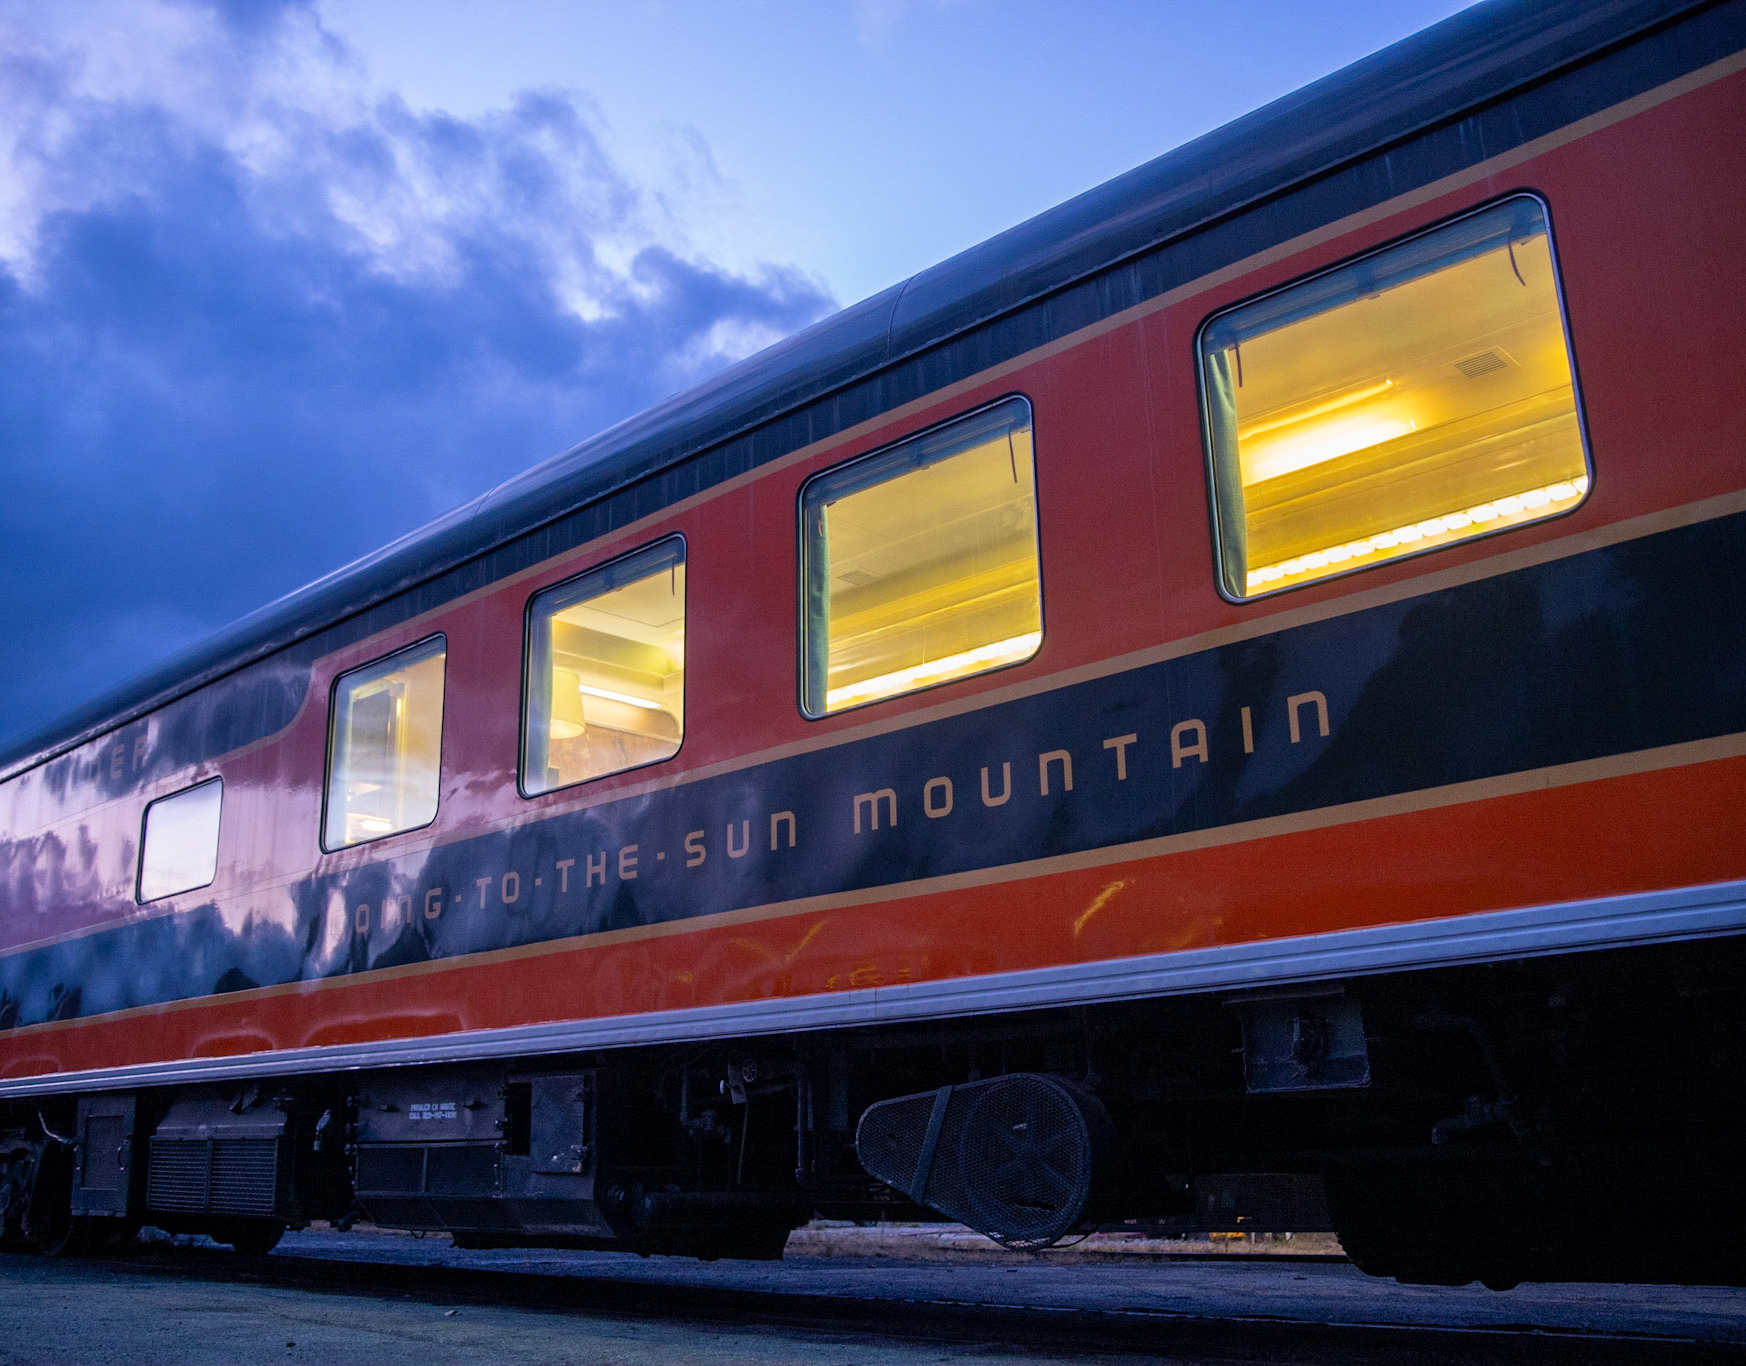
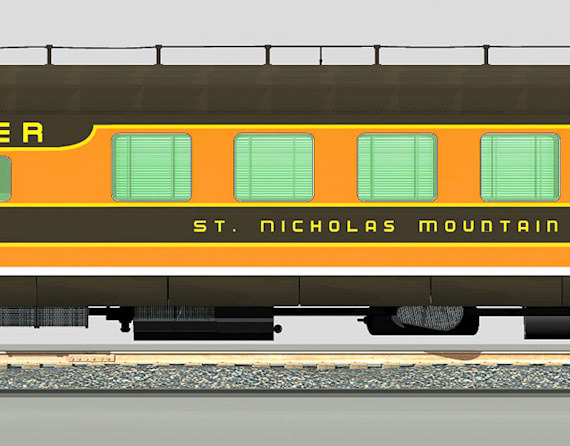
This page documents the restoration of a Gyralite unit assembled from components from two surviving Great Northern Mountain series cars, No. 1291, St. Nicholas Mountain, and No. 1292, Going-to-the Sun Mountain. These cars are owned by Ben Ringnalda, and are currently undergoing restoration.
For further information about the restoration of Ben's cars, see this page >>>
Missing components were either re-manufactured using 3D printing process, or suitable substitute parts were acquired from various sources.
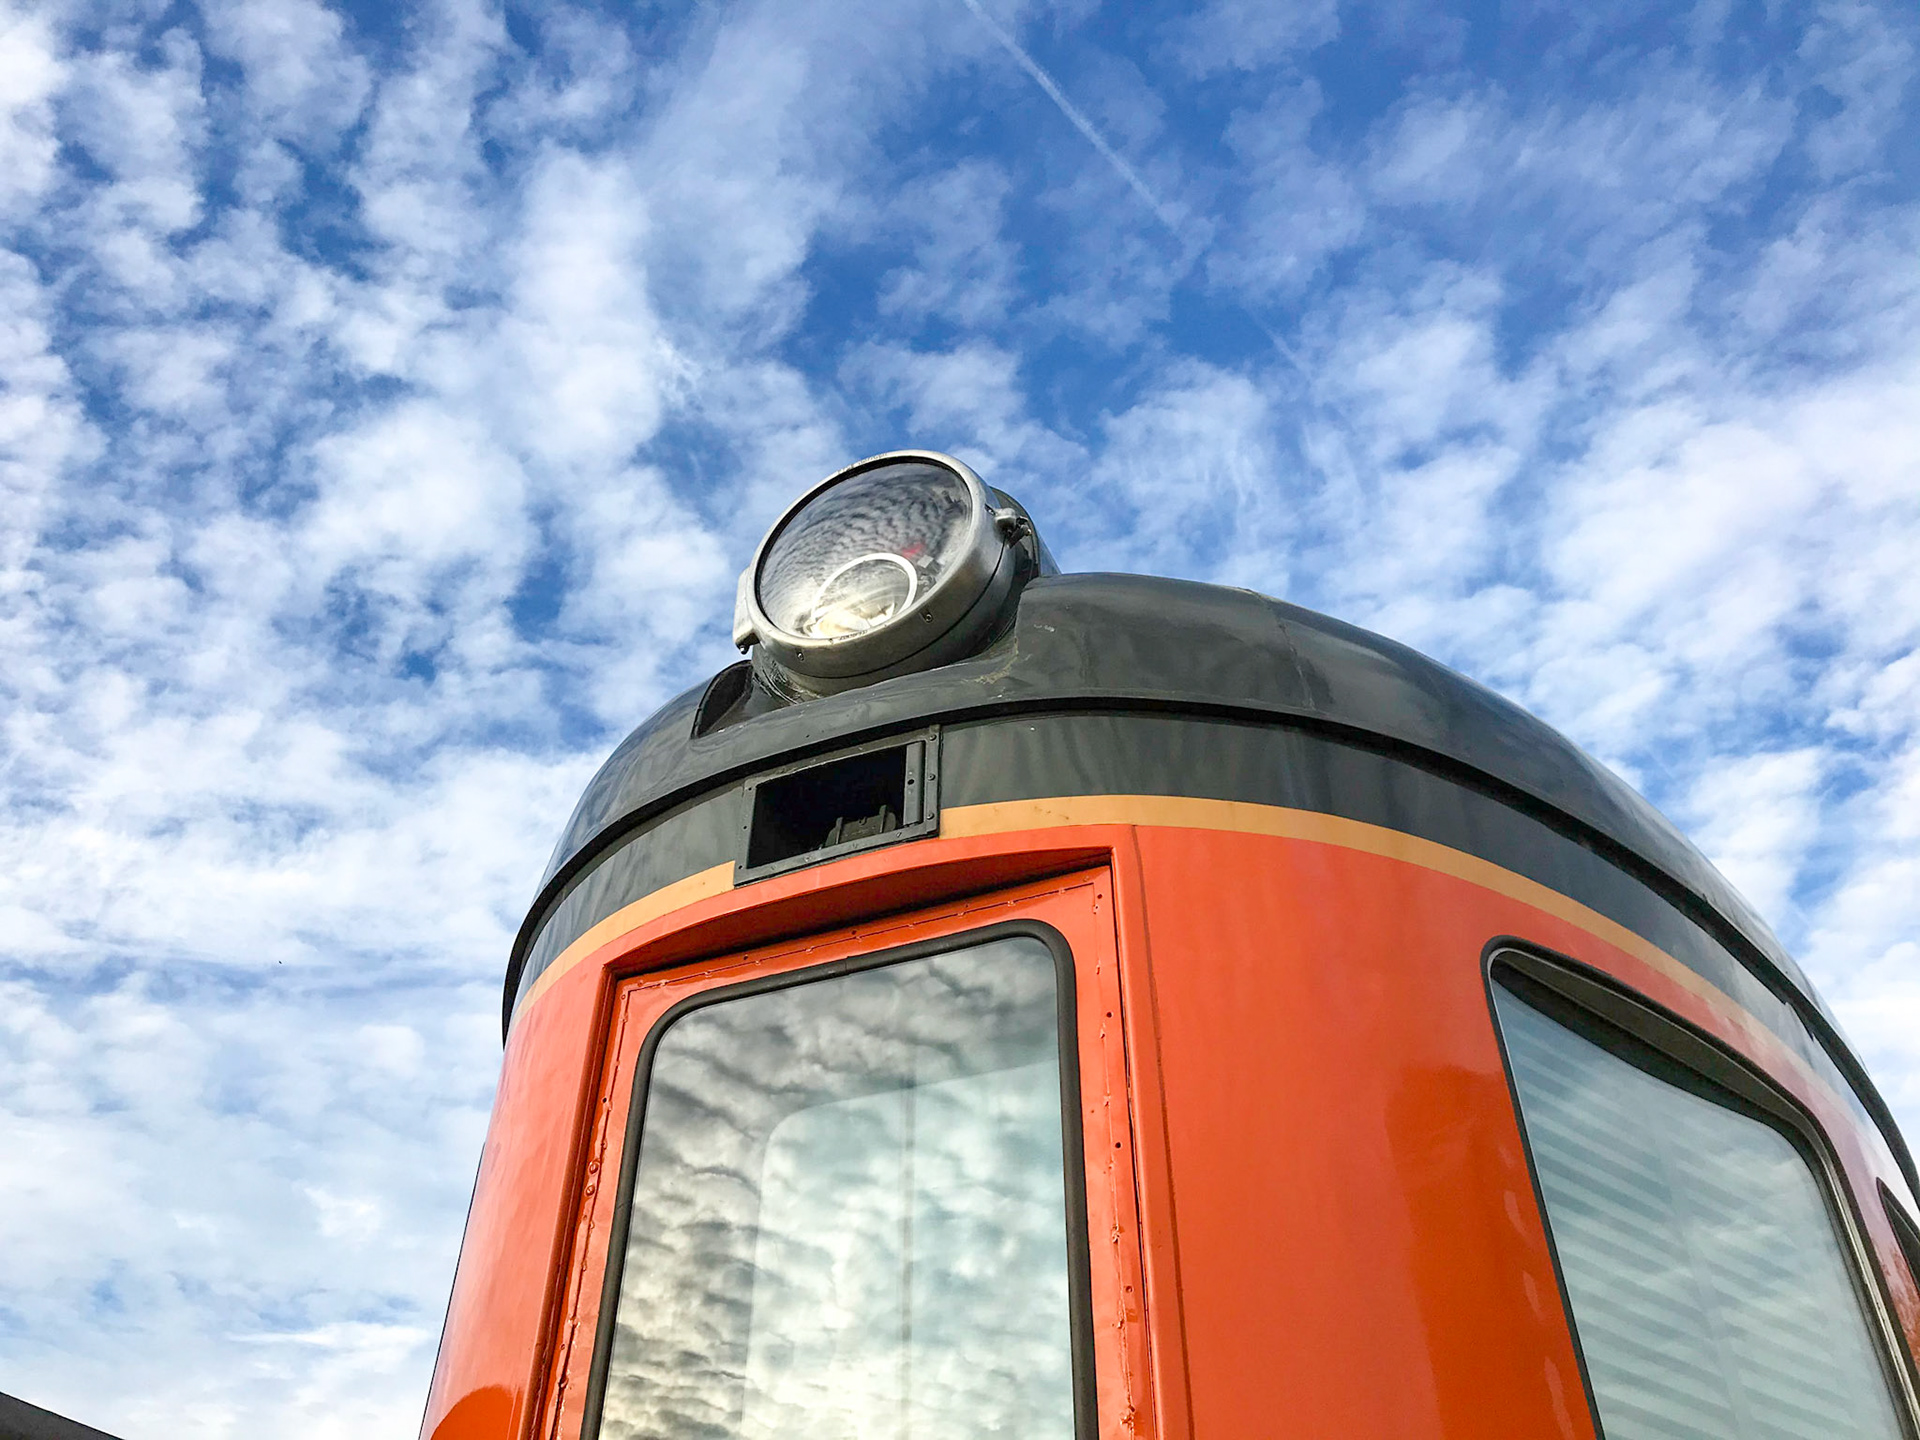
The Gyralite in place, but before the proper Pyle headlight bezel had been found.
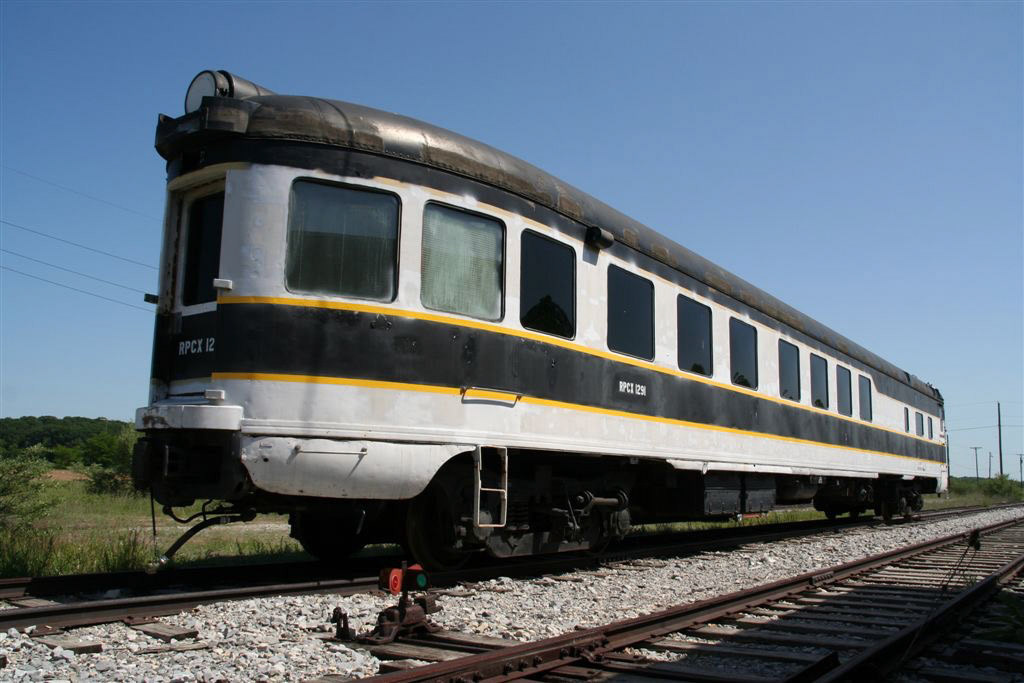
1291 St. Nicholas Mountain

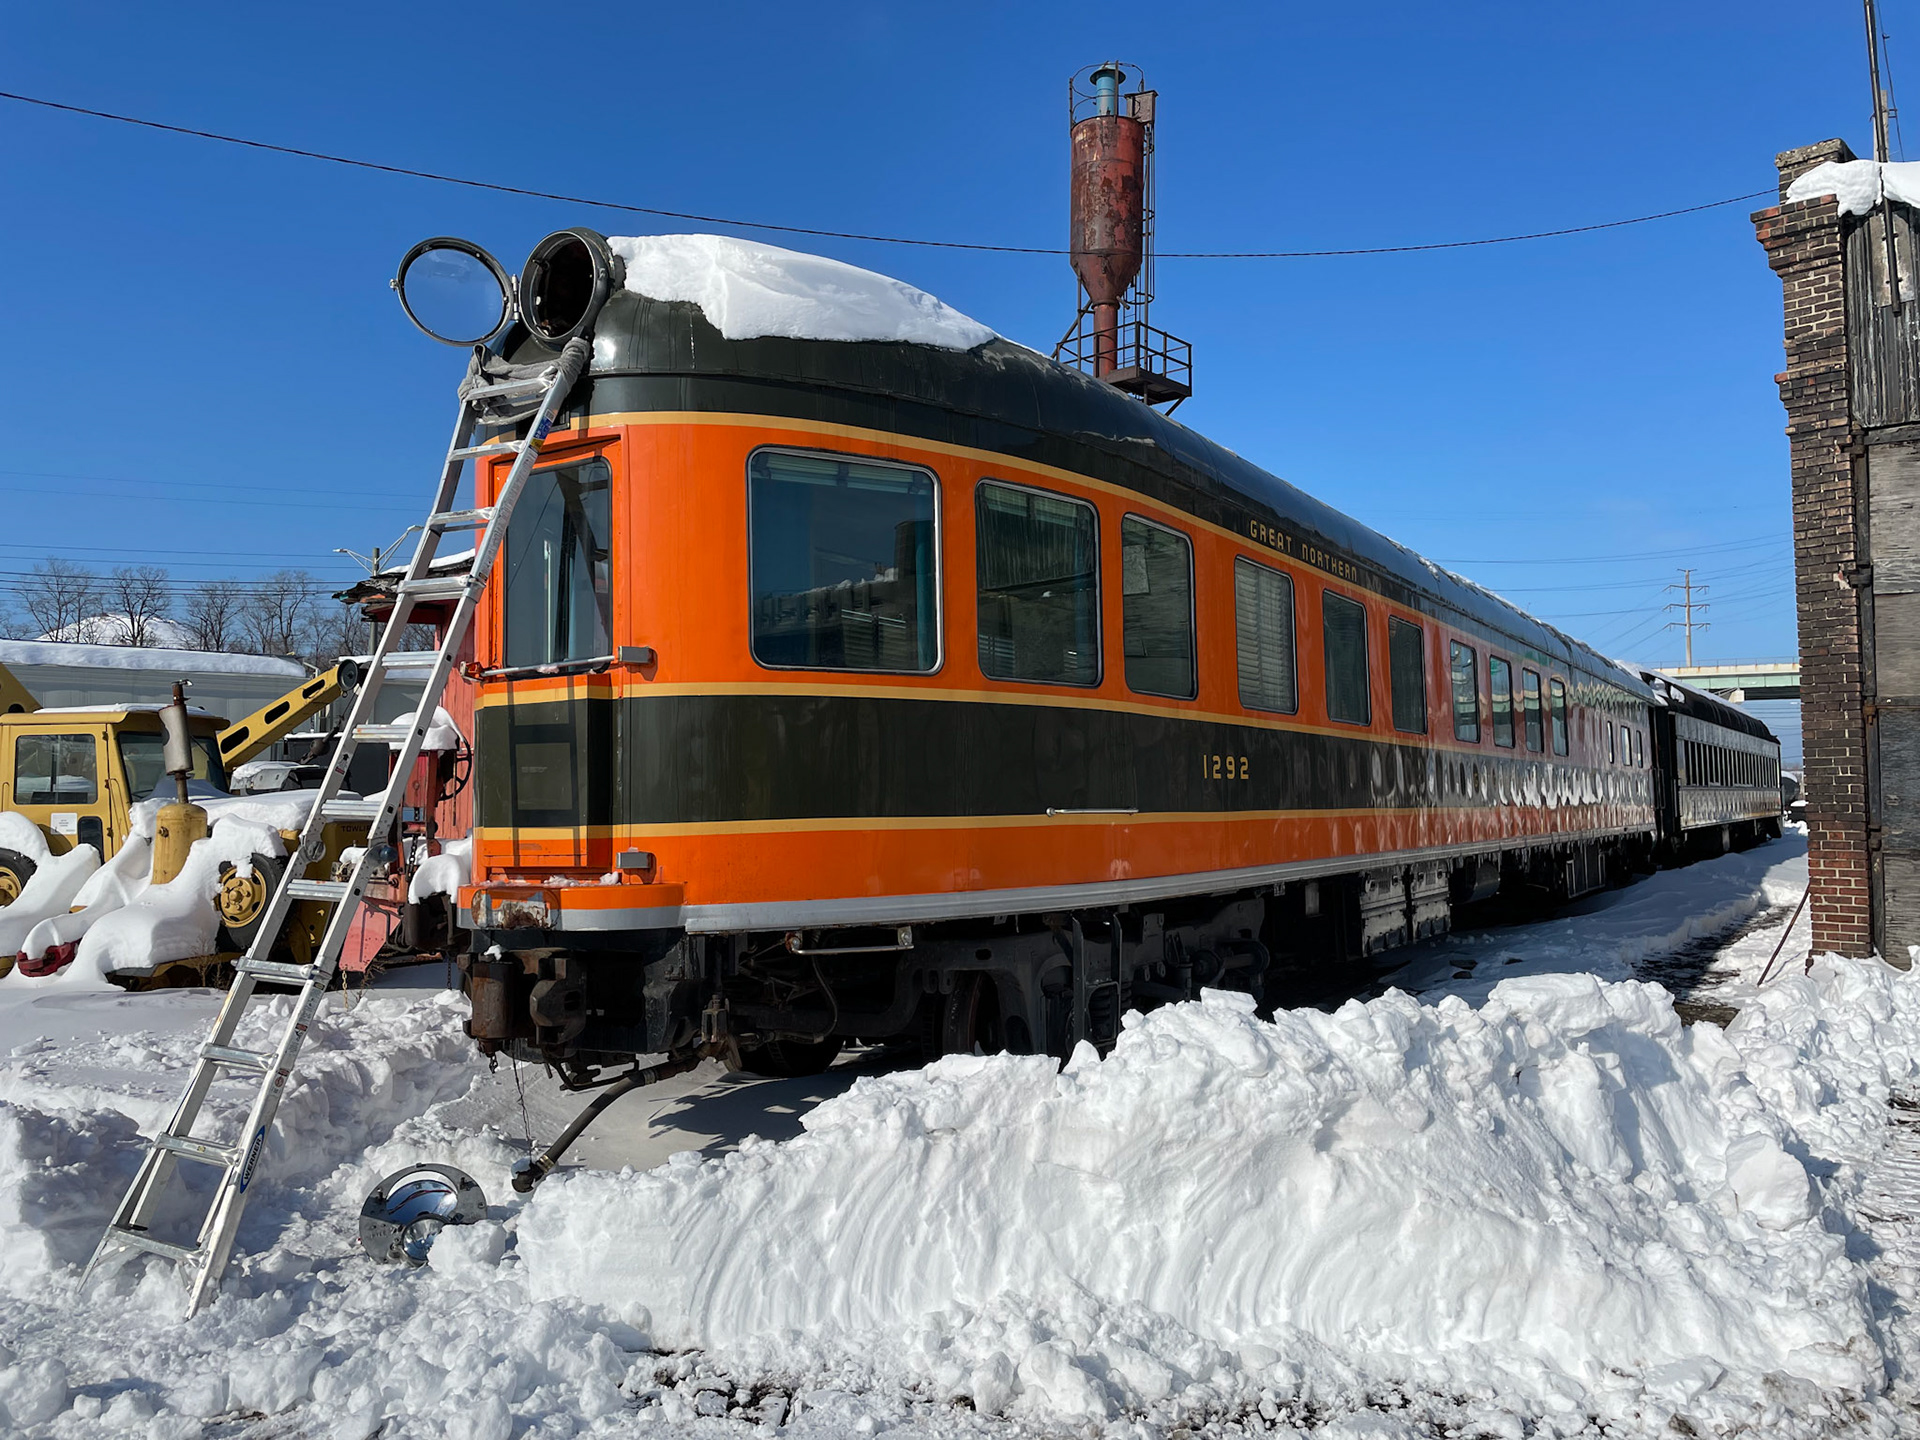
1292 Going-to-the-Sun Mountain
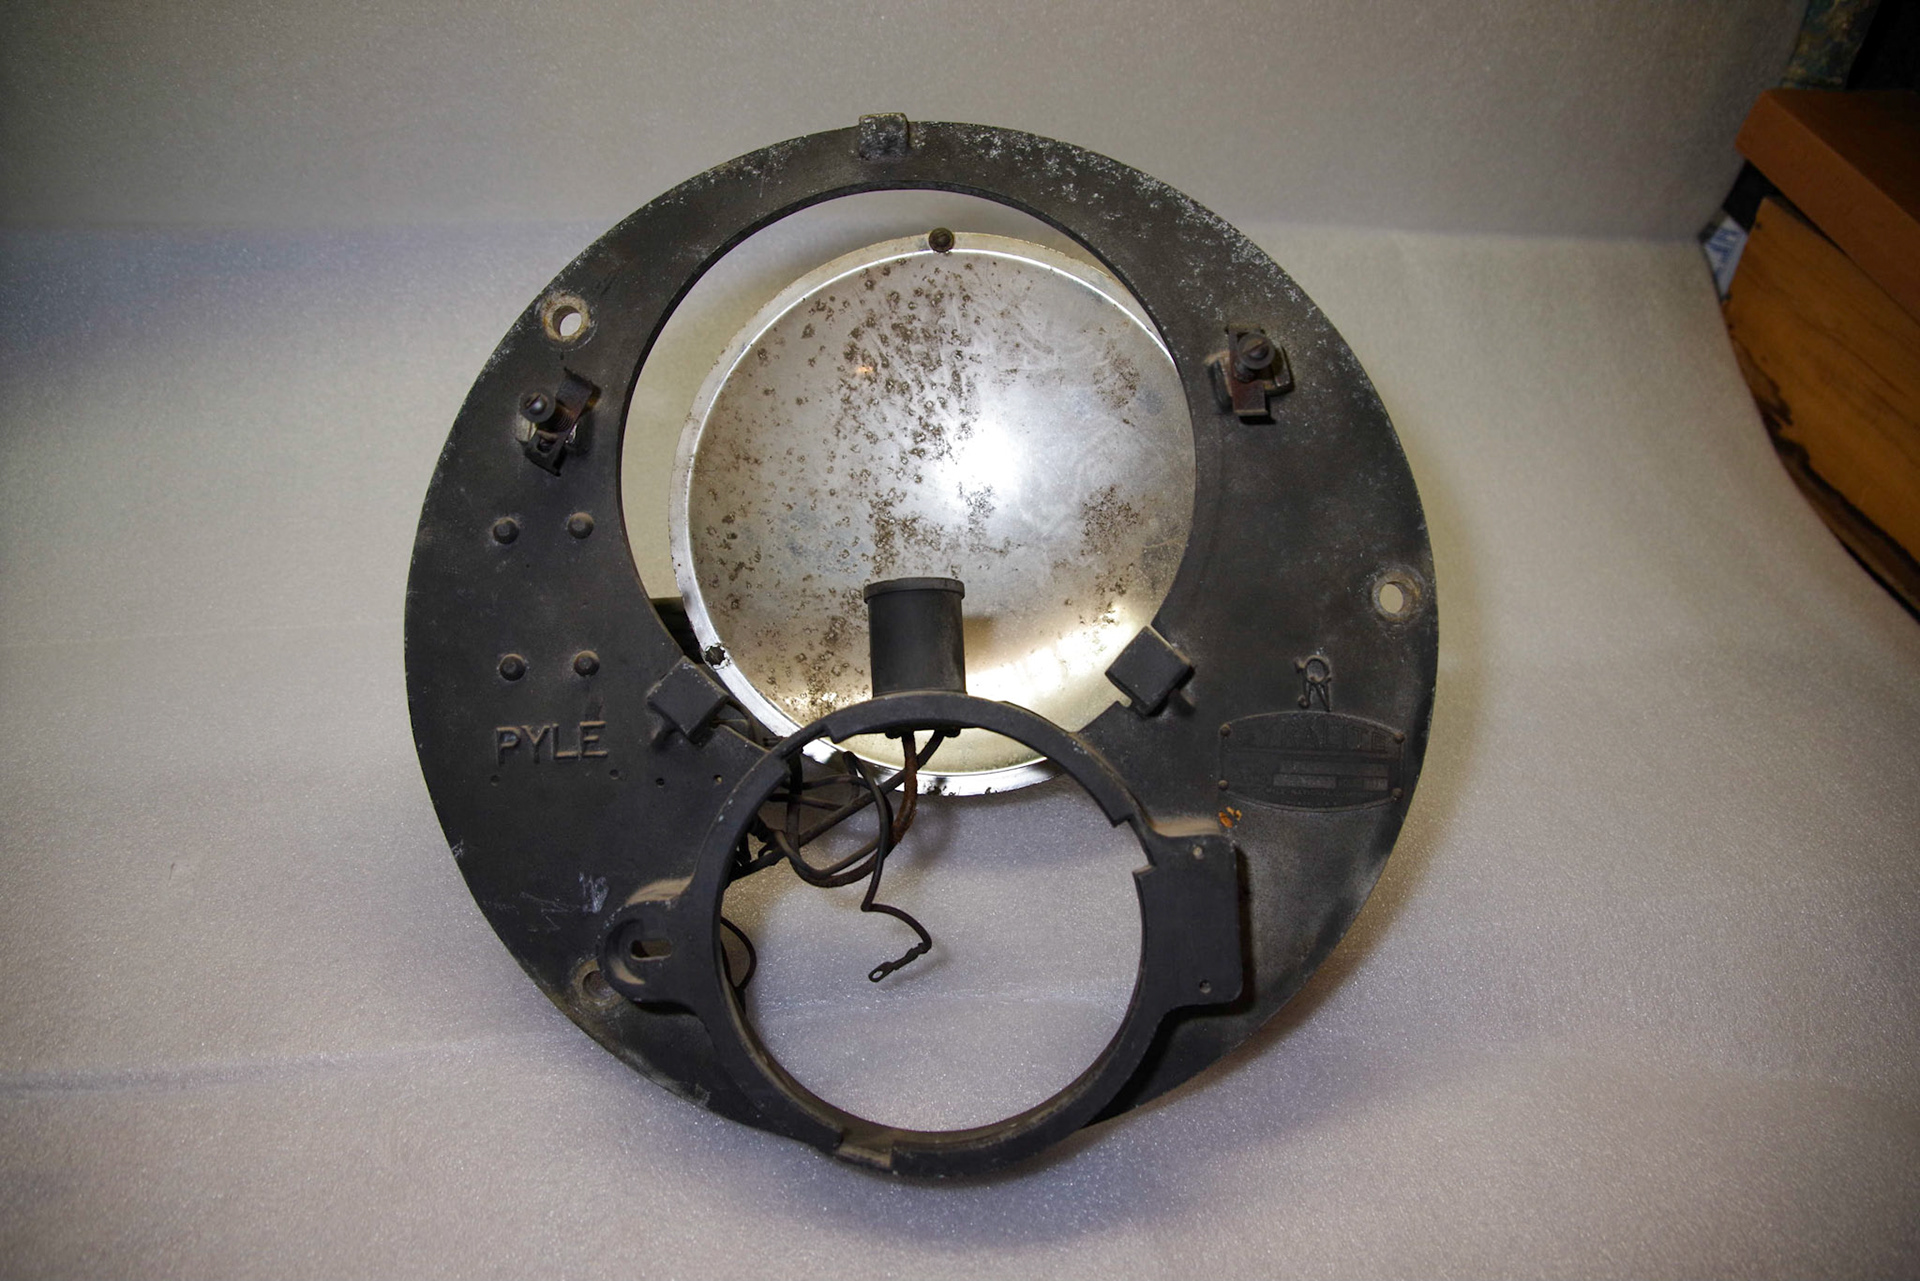
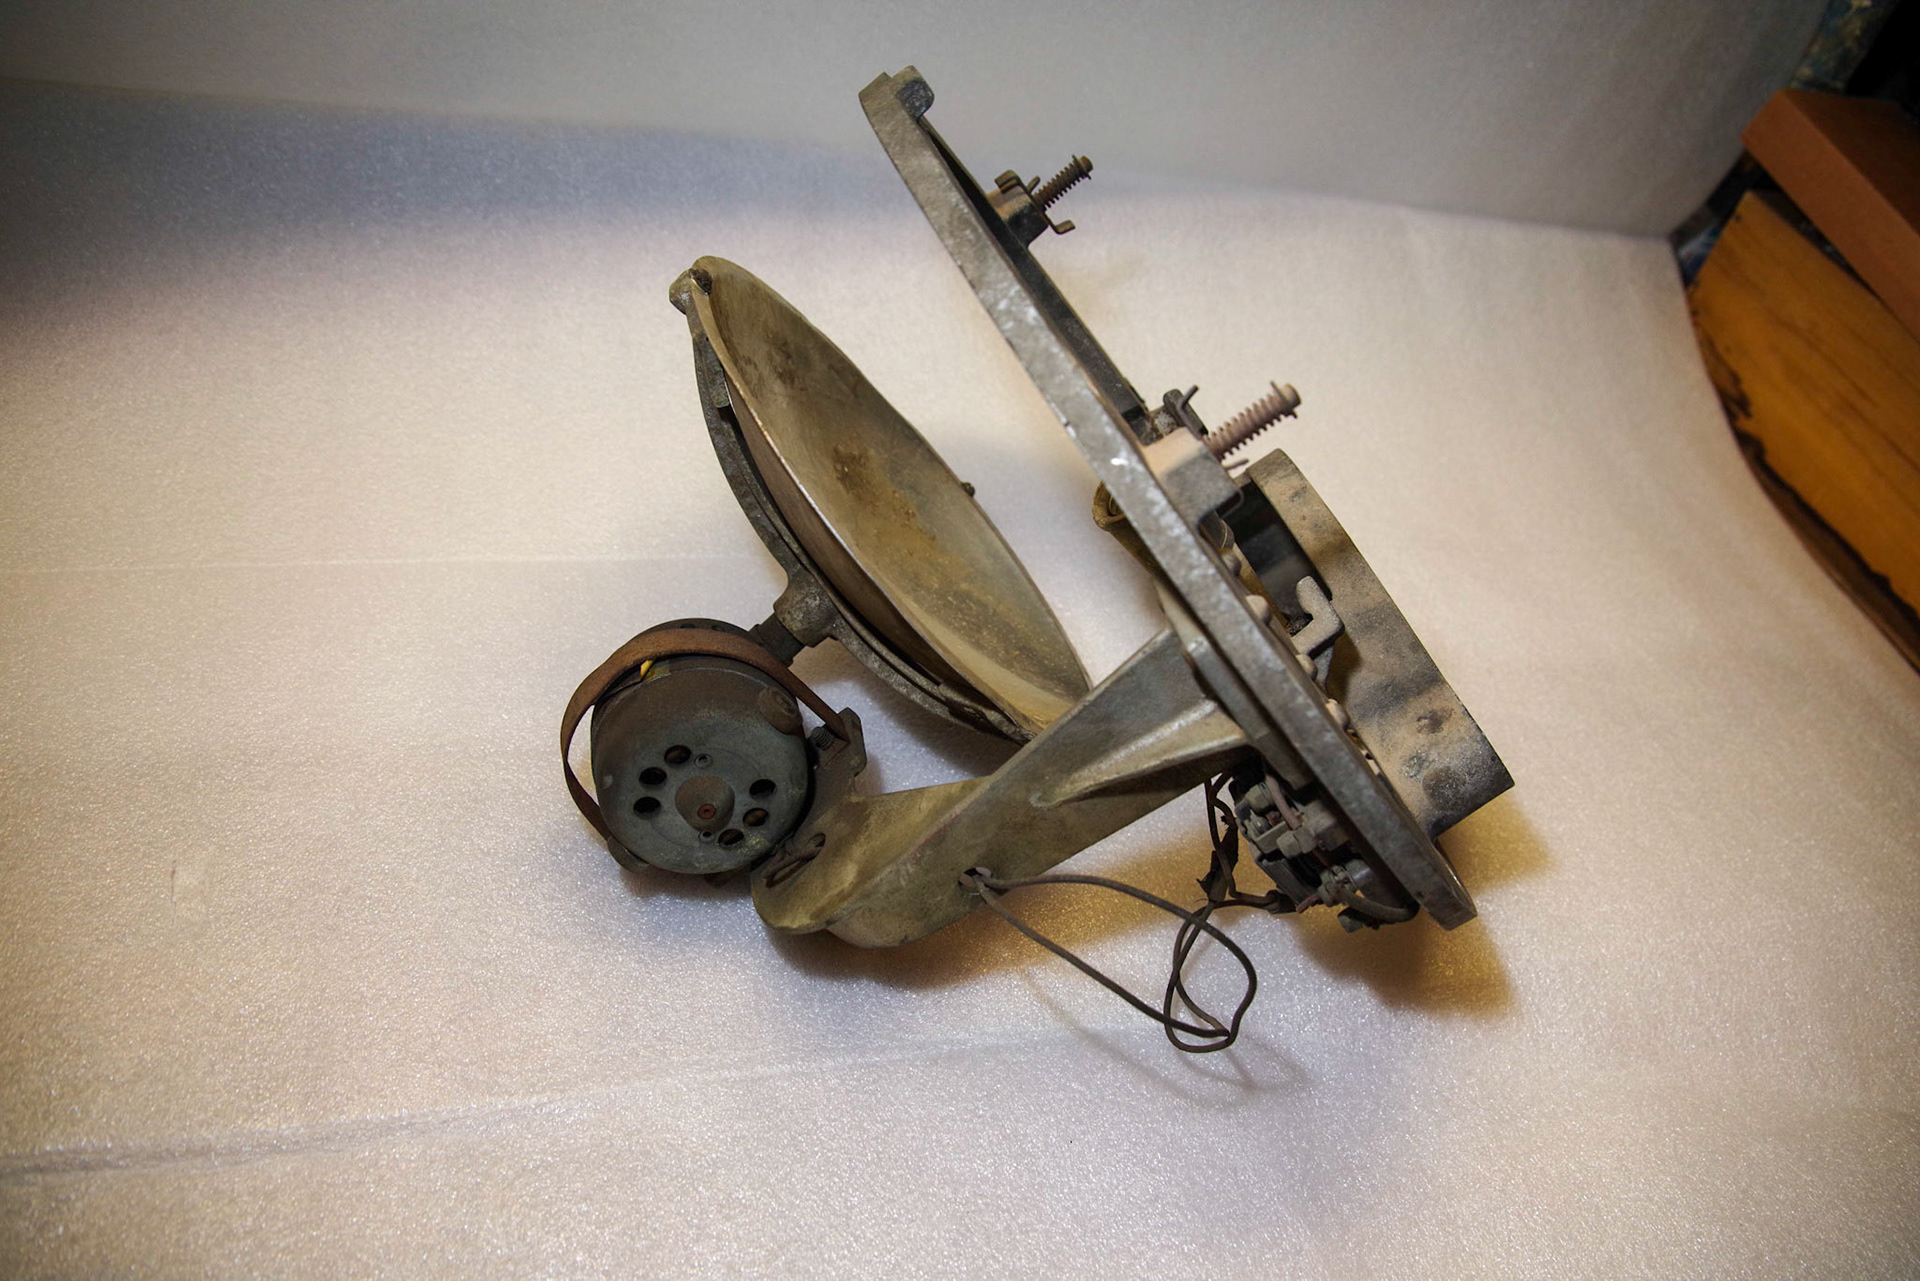
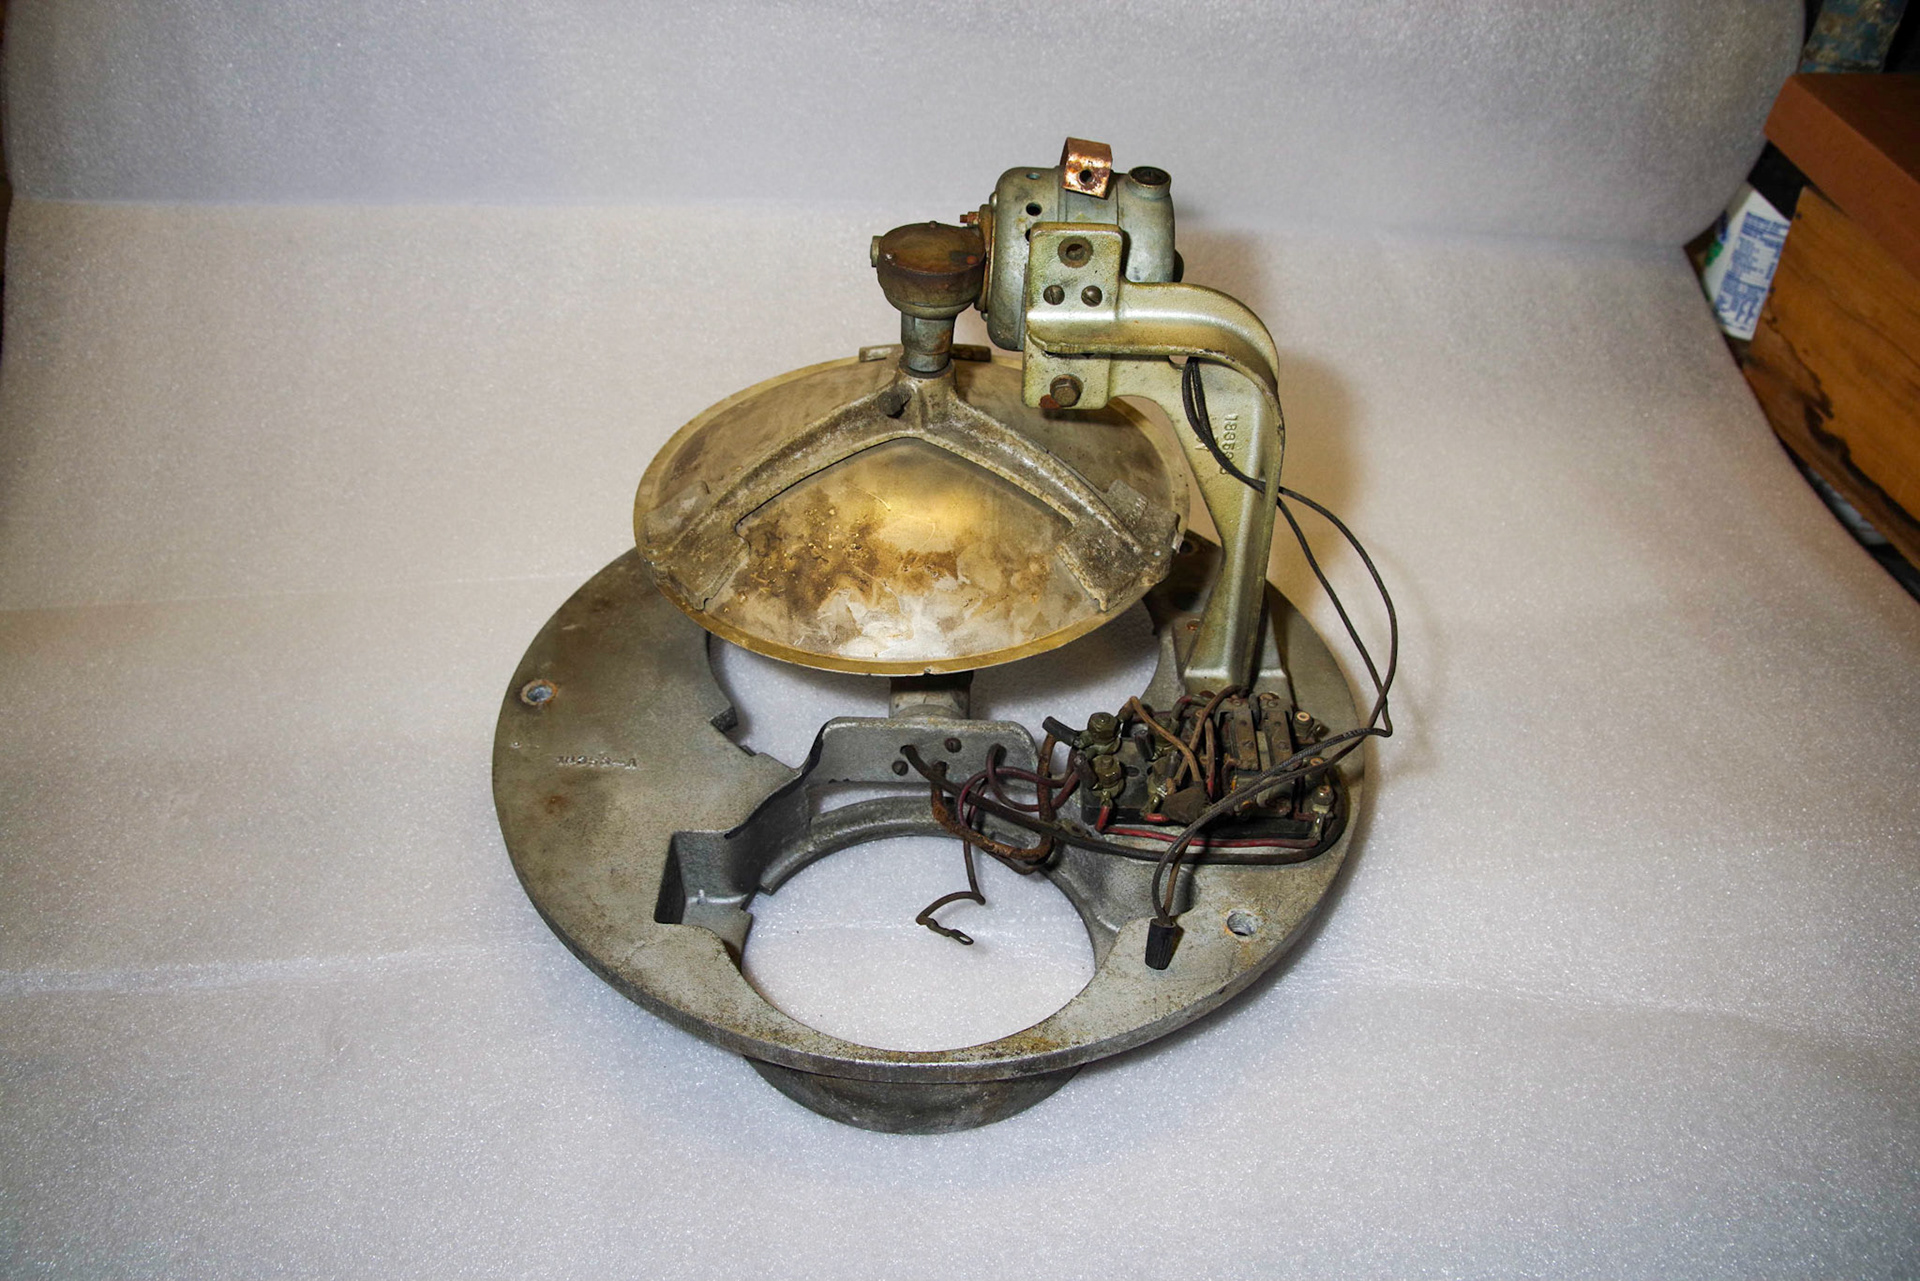
The 1291 had all of its aluminum mounting assembly, but here were no surviving interior components. The lens in the door had been replaced with a flat piece of white acrylic sheet. The 1292 retained its mostly intact Gyralite mechanism, and still had the half of the aluminum housing that amounted to the roof opening, but was missing the outer door assembly. The outer lens was a fresnel glass lens from another type of Pyle light mounted onto the aluminum base with an improvised brass ring. Between the two cars there were enough parts to work with to start with to get a complete Gyralite.
The most difficult part to replace has been the 16" domed glass outer cover, which is similar to steam-era headlight glass. Finding a glass replacement has proven to be impossible so far, but we found a suitable replacement from EZtops International, located in Maine, a manufacturer of custom acrylic and Lexan skylights for RVs in many shapes and sizes that could make a part to our specifications. Their 1/4" thick x 16" diameter Lexan dome skylight fit the Gyralite door housing, and with automotive rubber window seals around the edges, it worked out splendidly.
It was also hard to find a replacement for the red lens, but a 10" vintage 1940s darkroom lens made by the National XRay Reflector Co. sourced on Ebay fit perfectly.
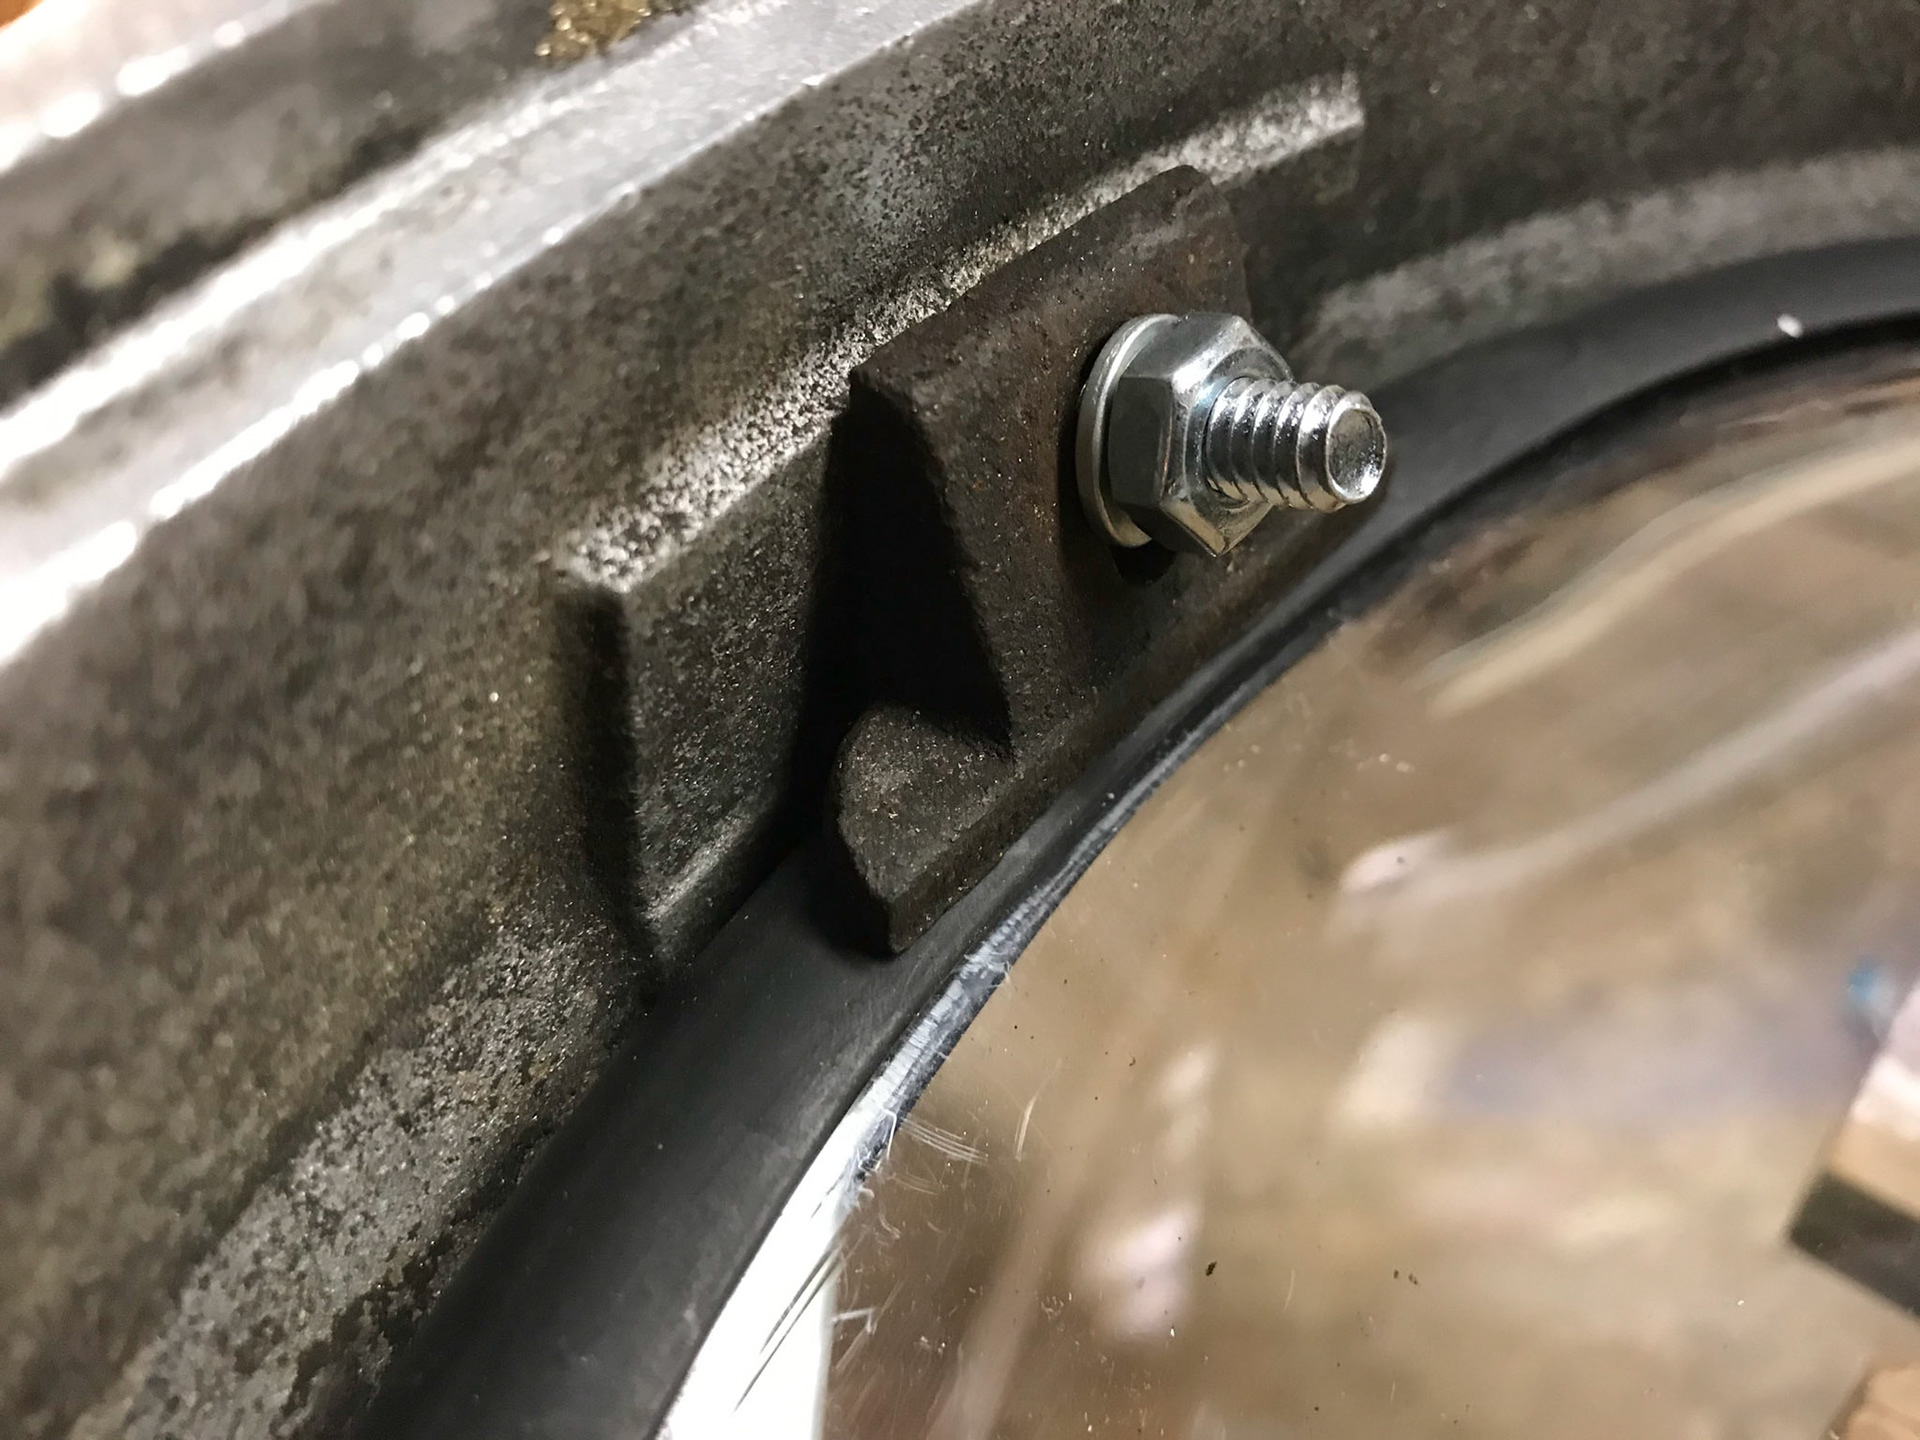
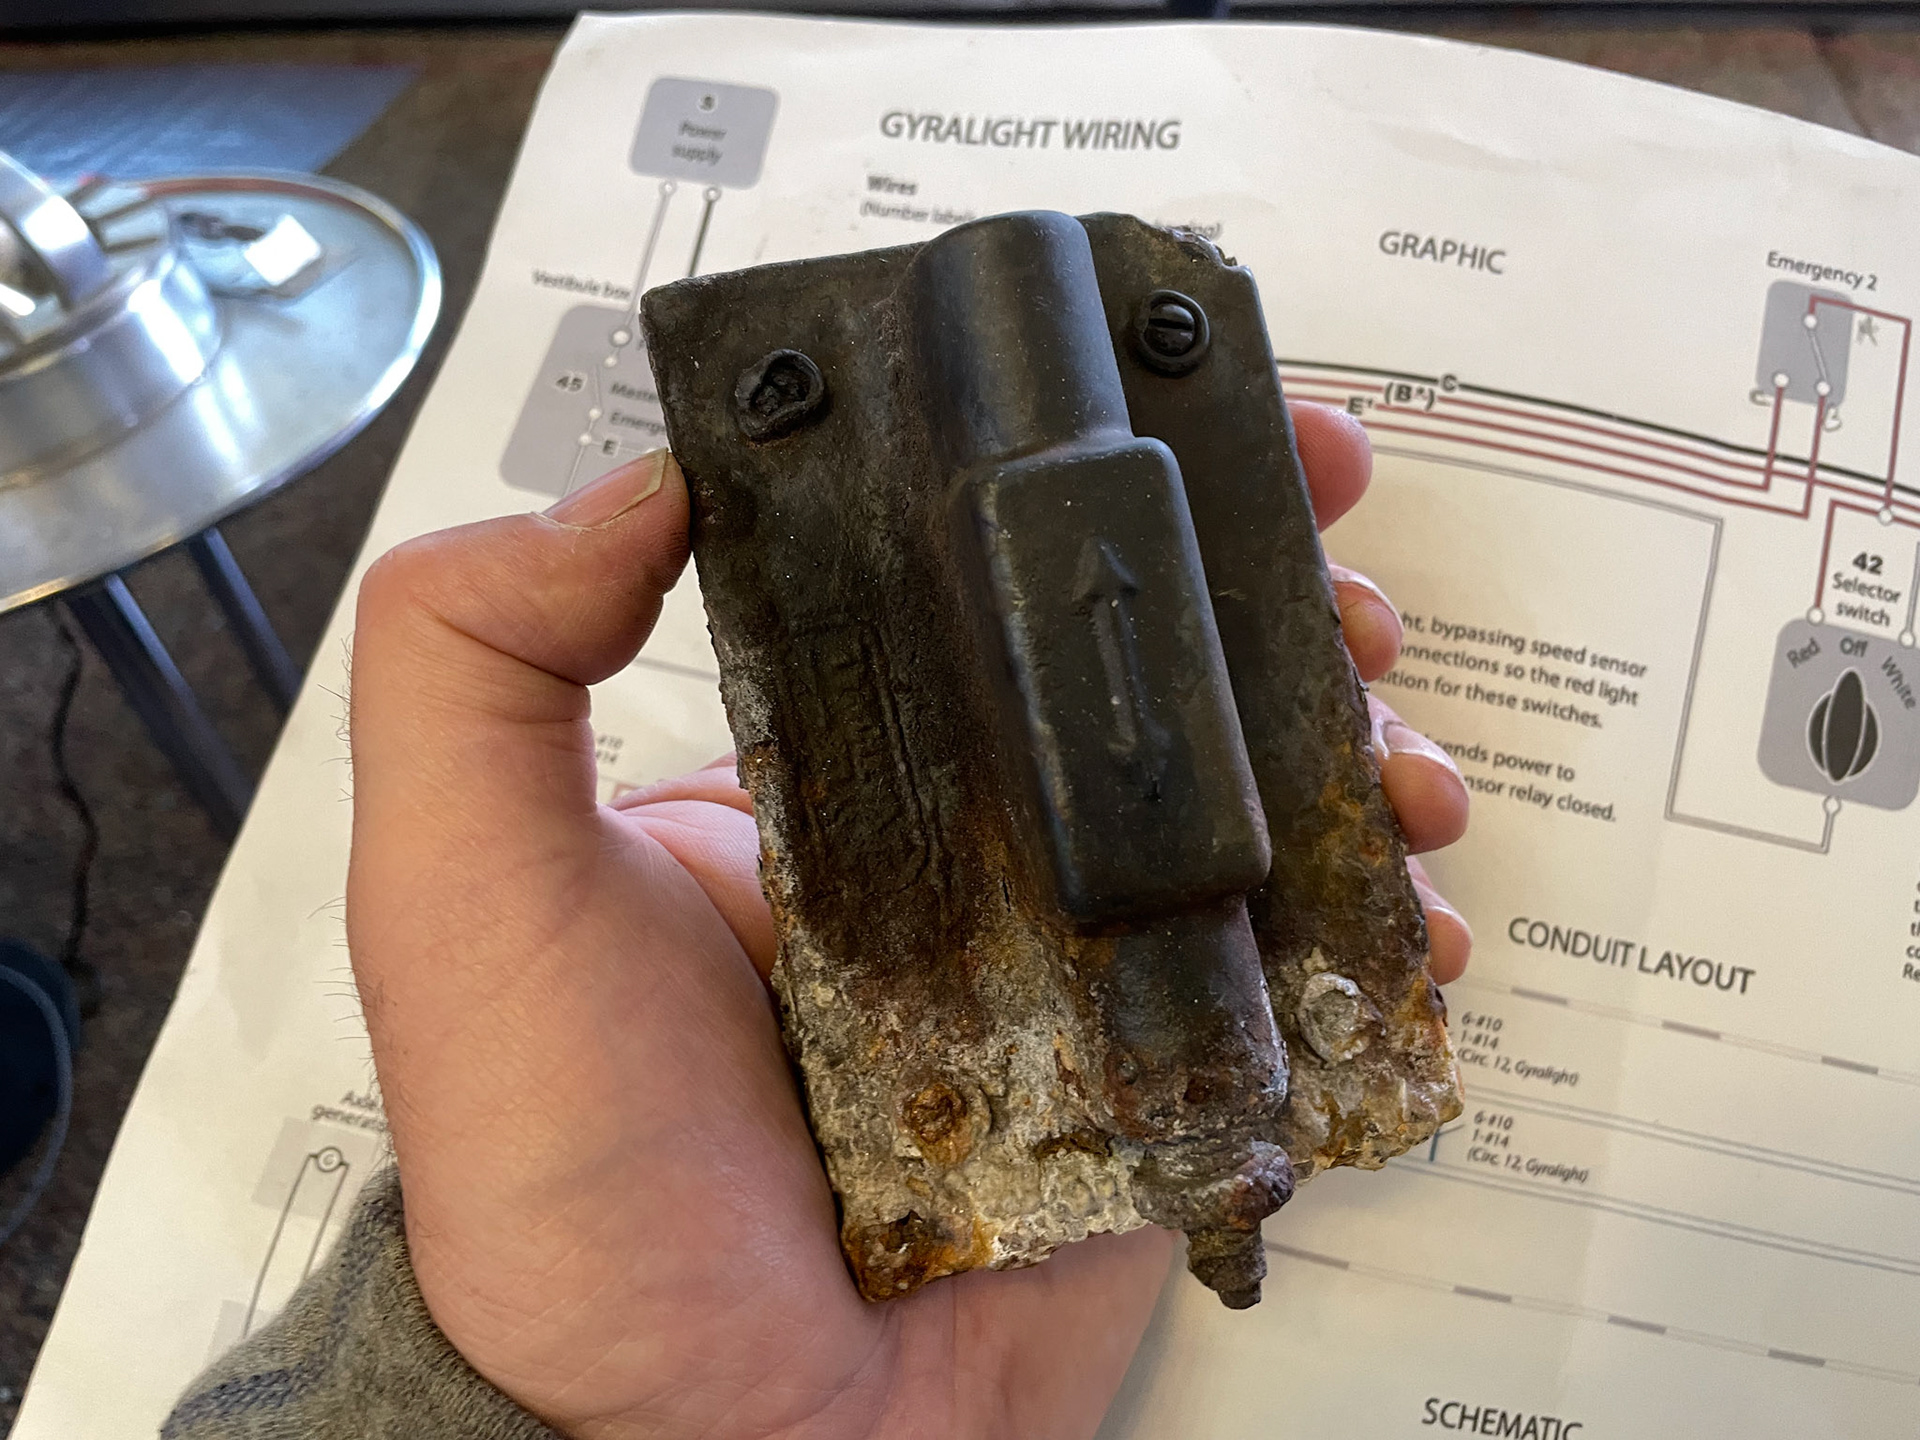
A further problem was the missing headlight retainer ring, but we had with a similar part from a GE headlight donated by Bob McCown that had worked fine until a Pyle part was eventually located.
Several of the cast steel retaining clamps for the glass cover were missing and were remanufactured by James Snyder using CAD and 3D printing technologies.
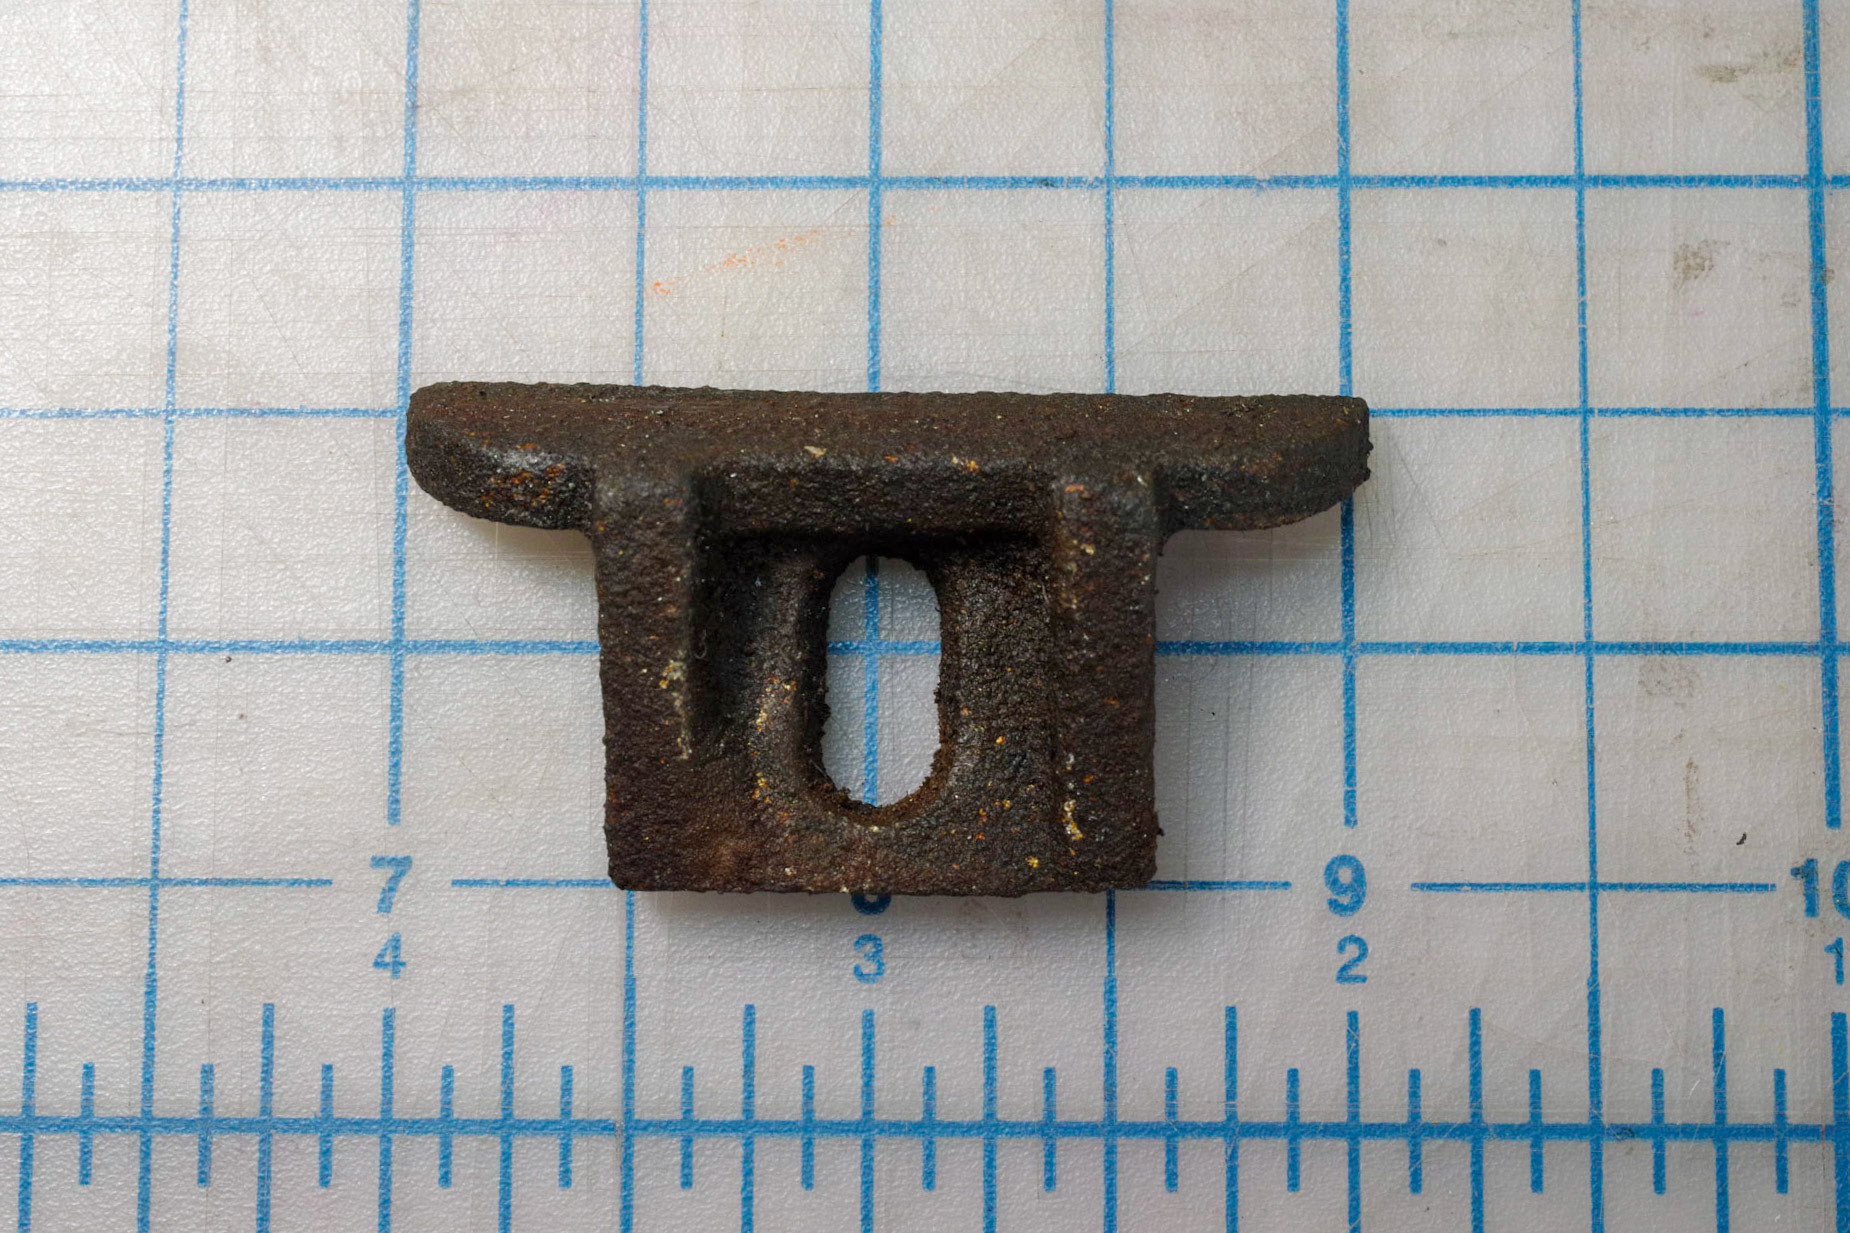
Glass retainer bracket
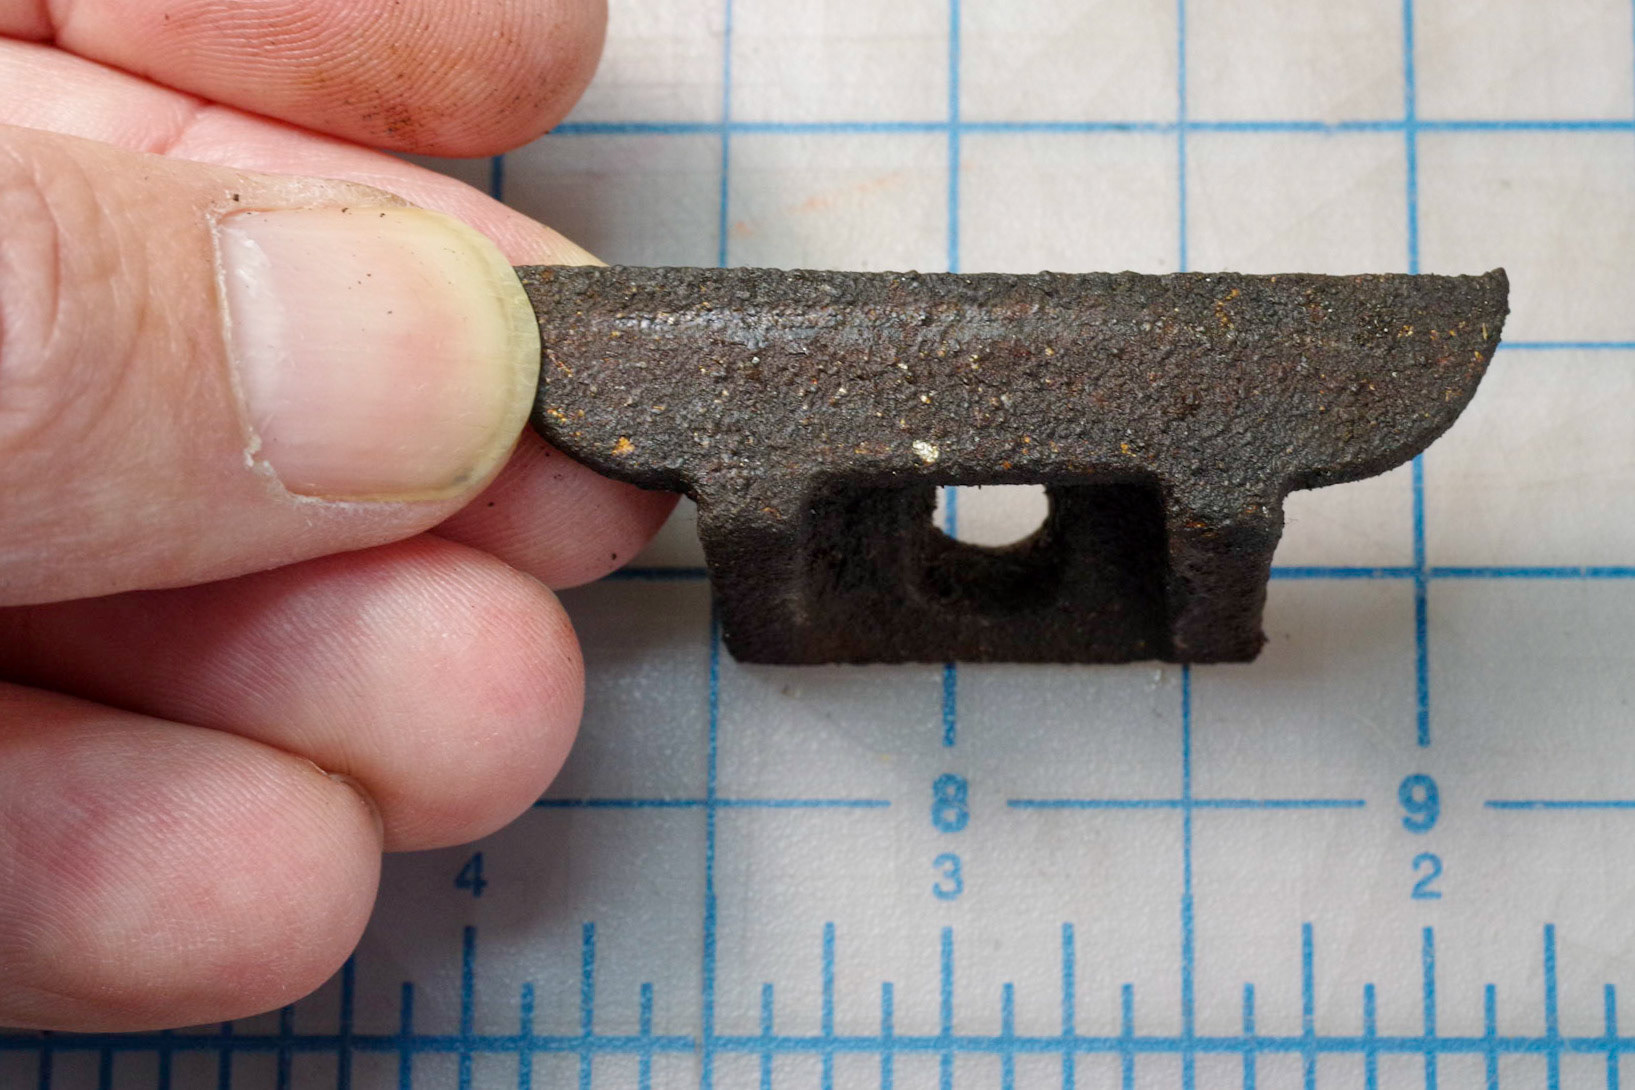
Glass retainer bracket
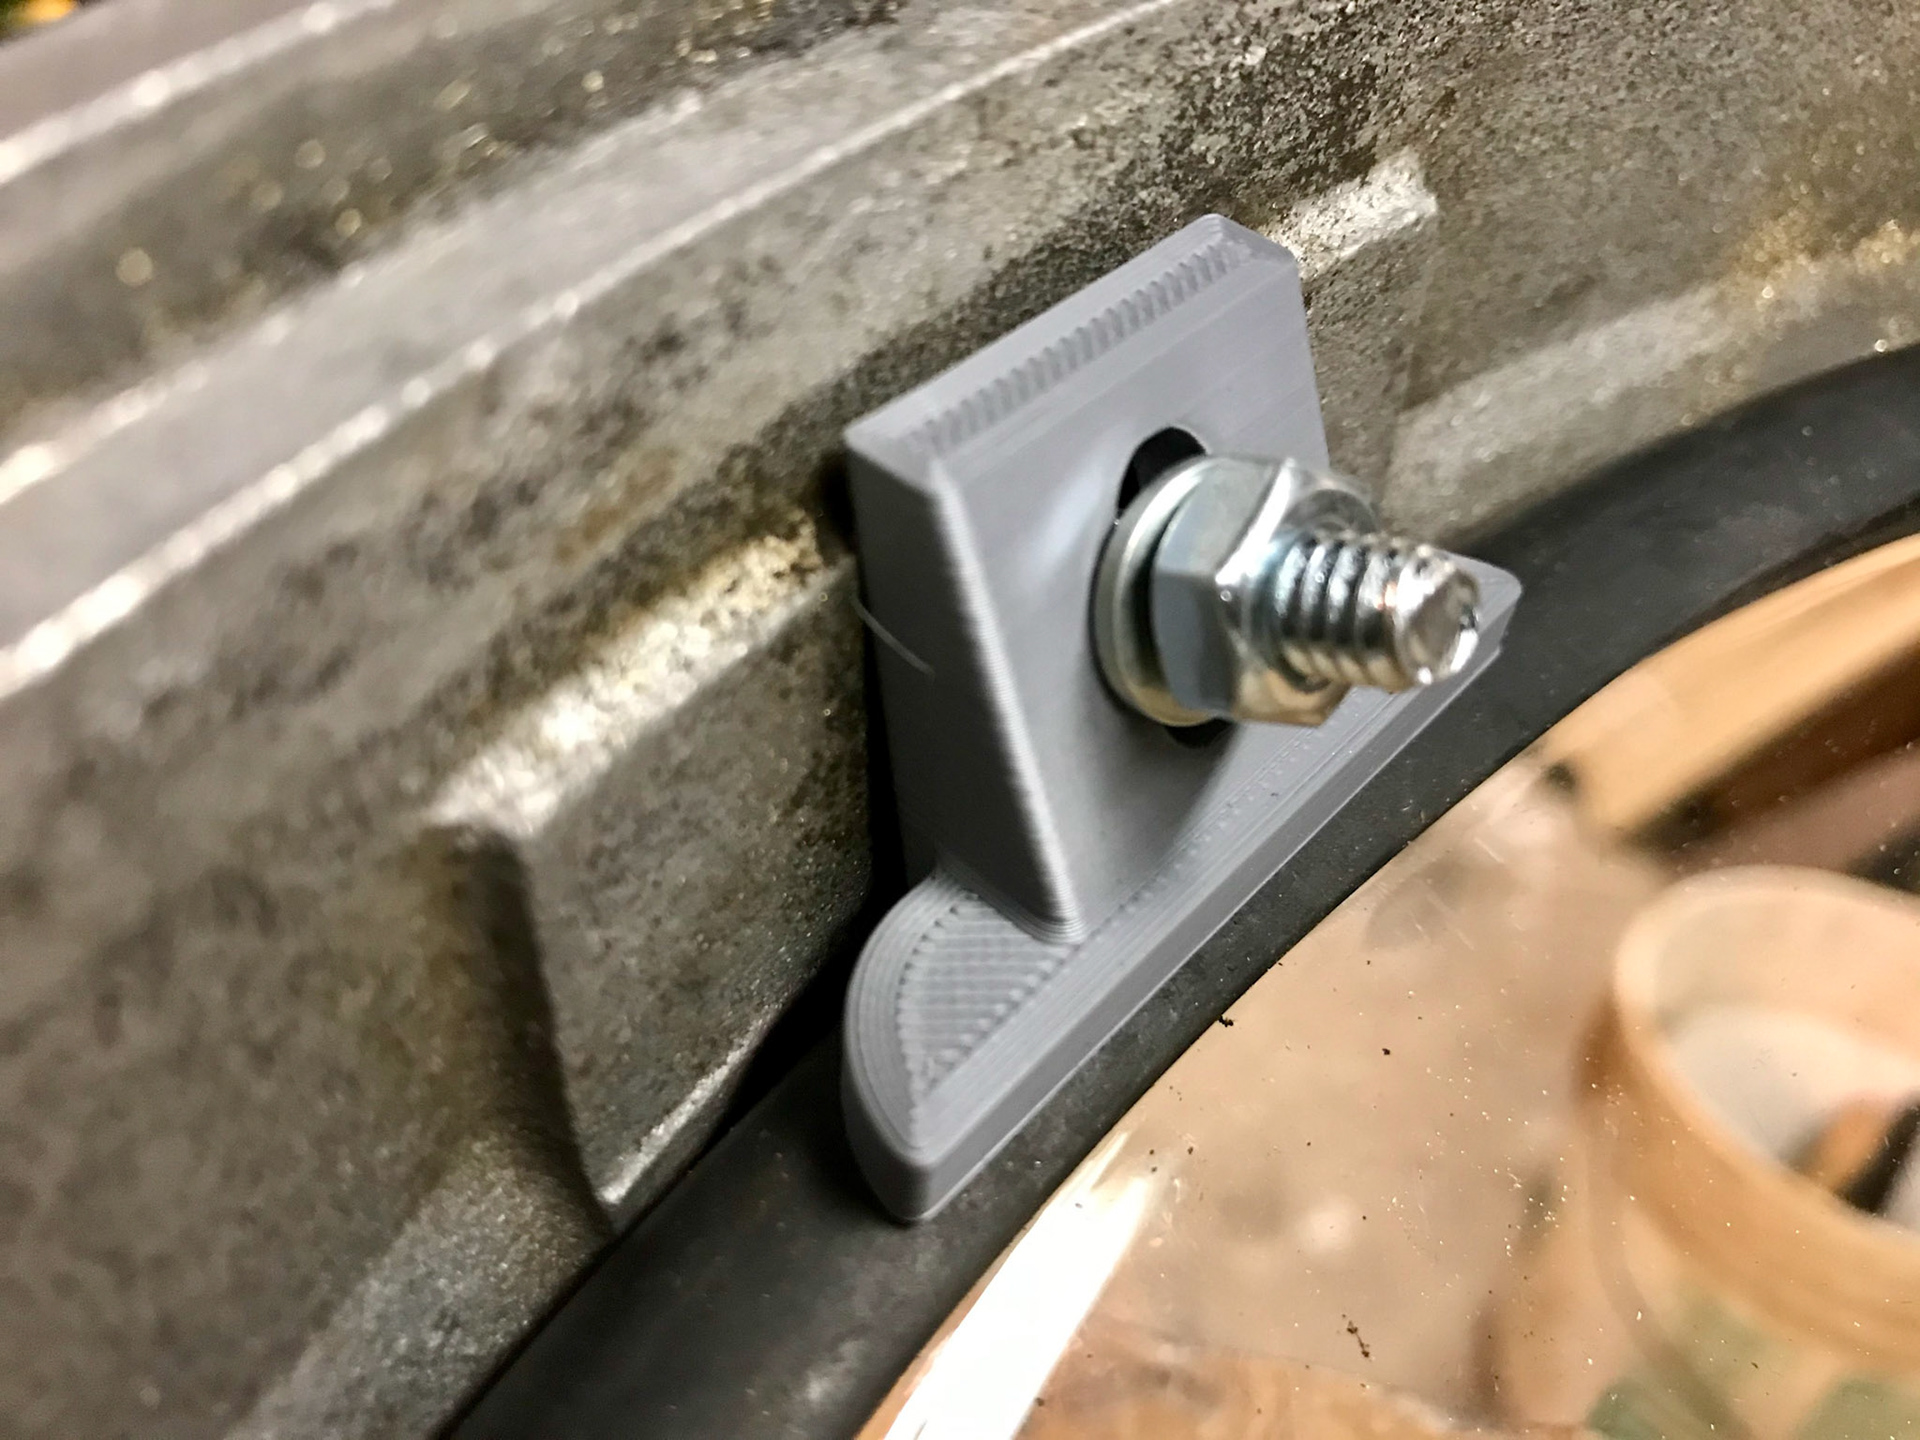
3D printed replacement
Having the pages from the Gyralite manual, and ACF drawings of the roof housing helped immensely.
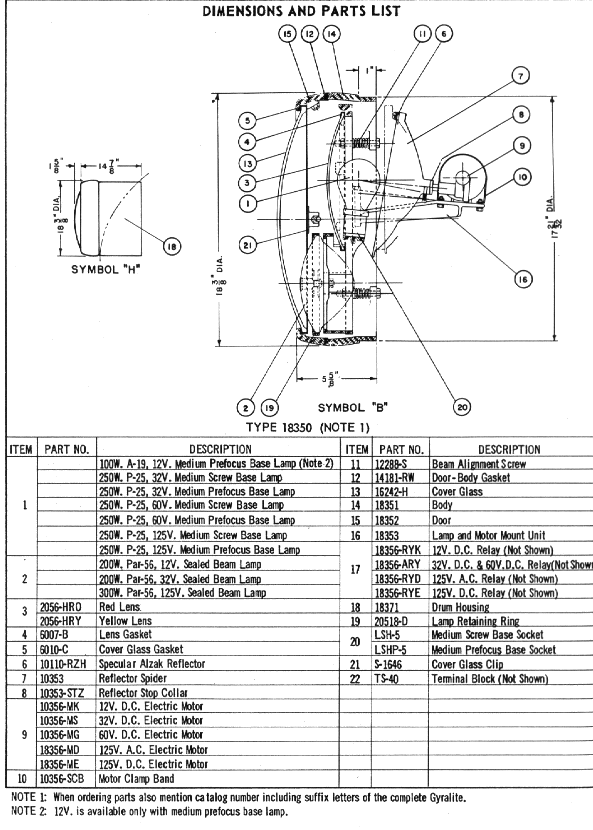
From parts manual
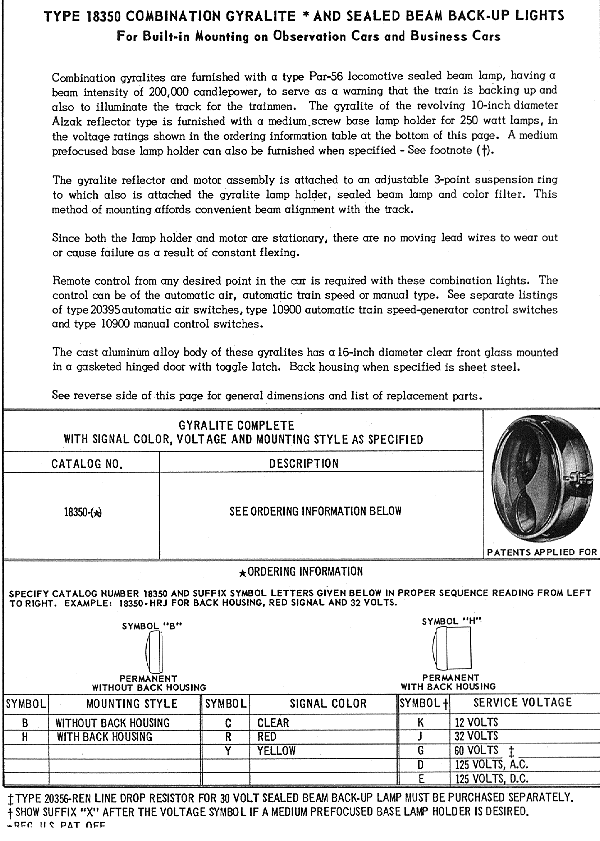
Parts list
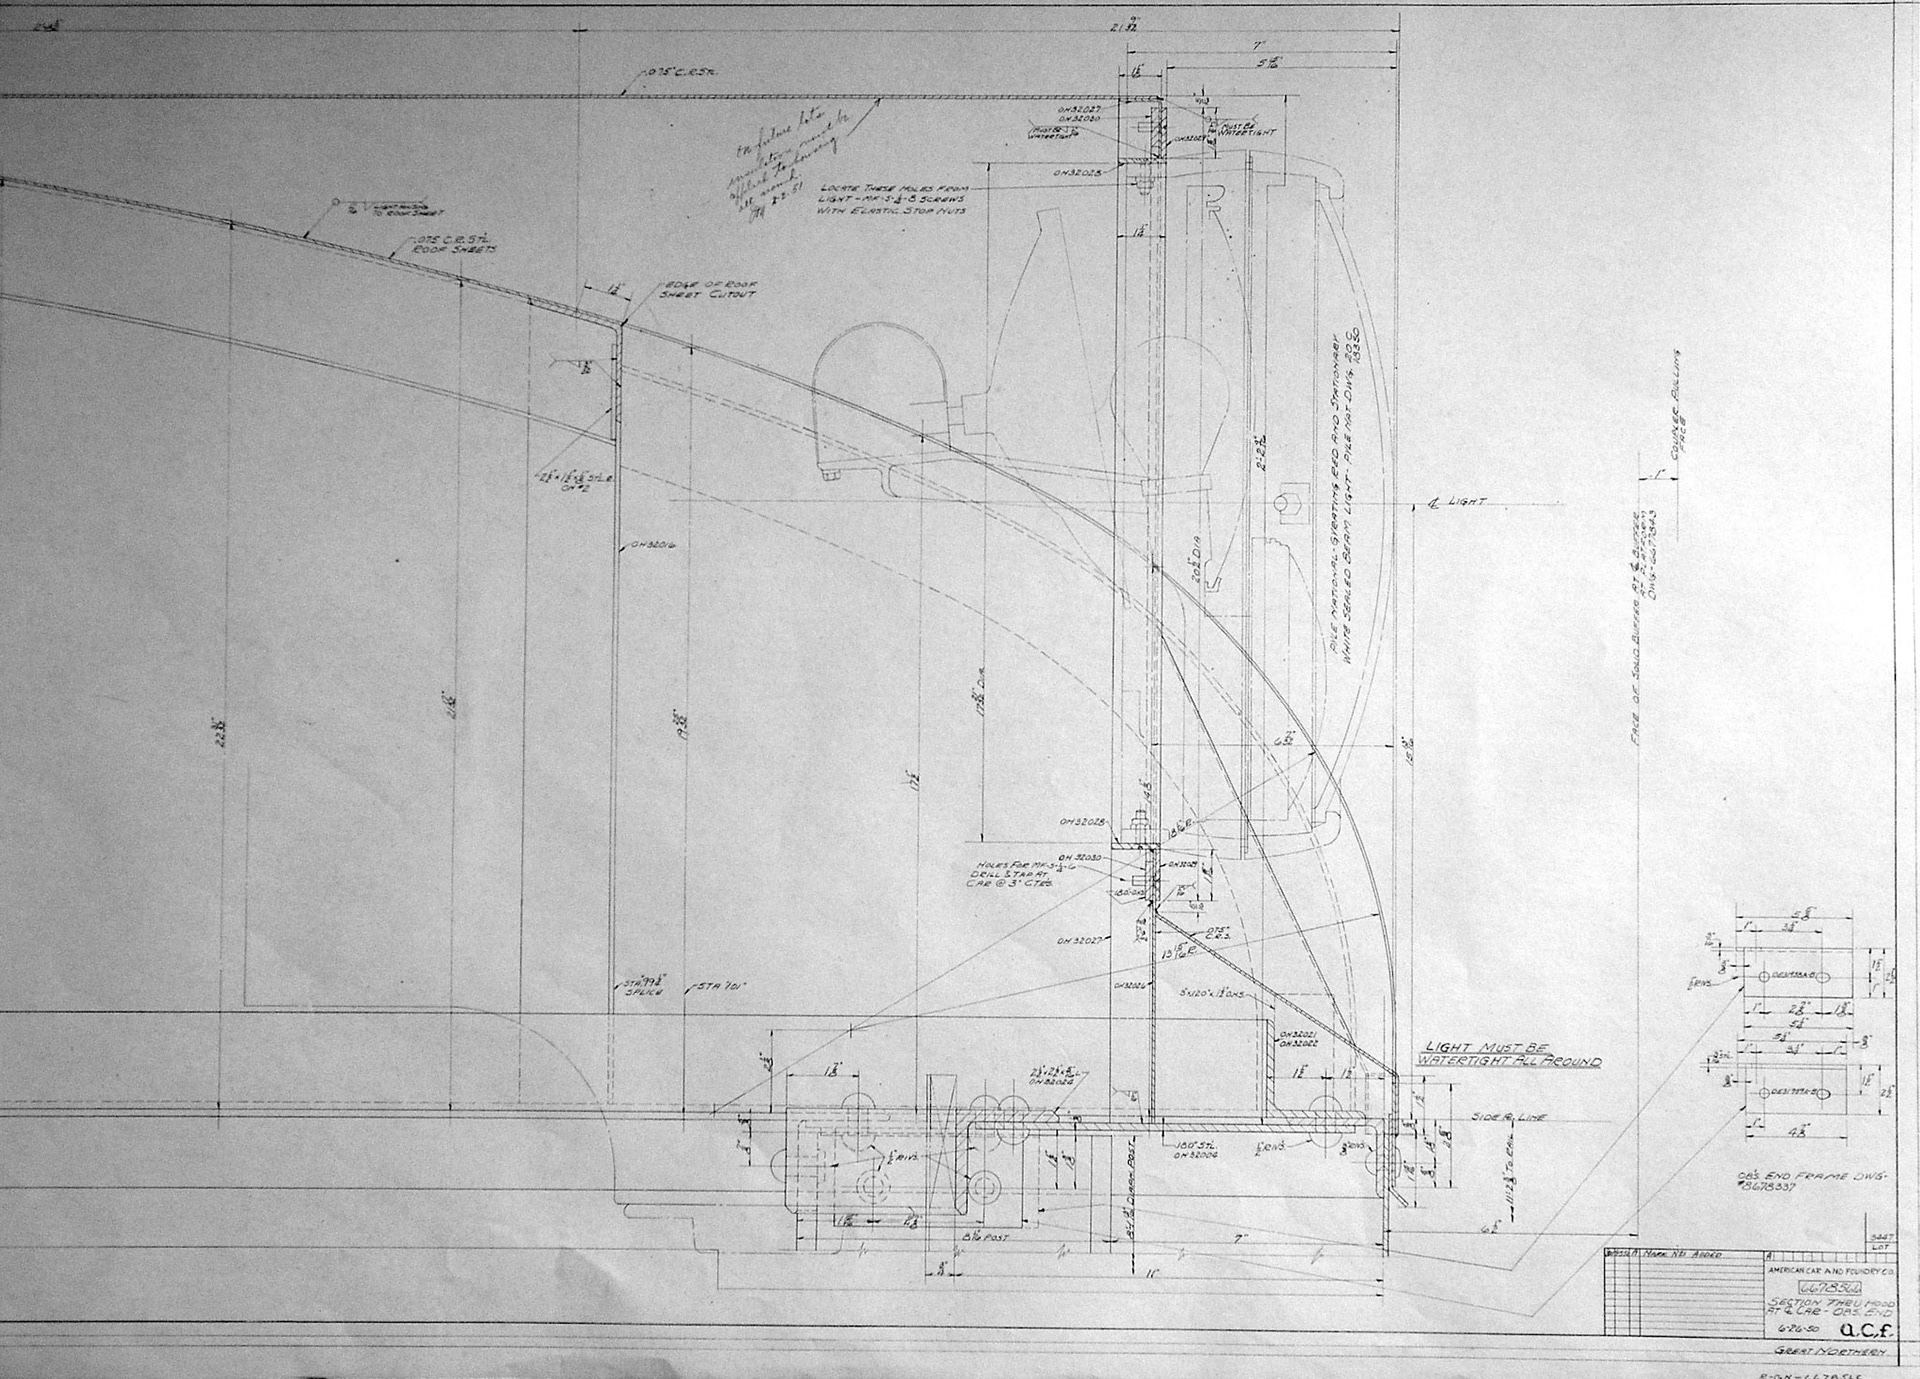
The ACF drawing shows the general arrangement of Gyralite components
Ben acquired Going-to-the-Sun Mountain in 2019, and when it arrived, we weren't sure if there was anything left of the Gyralite mechanism. The outer door and glass assembly had been replaced with a textured lens and screwed-in retainer ring, so we couldn't see what was inside there. It wasn't until Ben climbed up in the dark and wrestled the outer lens off to see what was inside. Happily, we found the mechanism was intact, but it was missing the red lens, headlight and its headlight bezel retaining ring. Luckily, the motor worked fine the first time 32v D.C. was applied to its terminals.

Ben liberating the Gyralite mechanism from 1292
The gyralite front had been painted black
The red lens and headlight retainer ring were missing
Luckily the motor worked fine
With the housing door from 1291 and the housing mount from 1292 we had a complete set to work with, but it took some time and effort (Thanks, brother Jeff!) to liberate the housing mount from 1292 due to corroded and hard-to-access mounting screws. Once all the pieces were together, a new hinge rod was added, the aluminum cleaned up, and the new lexan lens installed.

Jeff liberates the aluminum housing
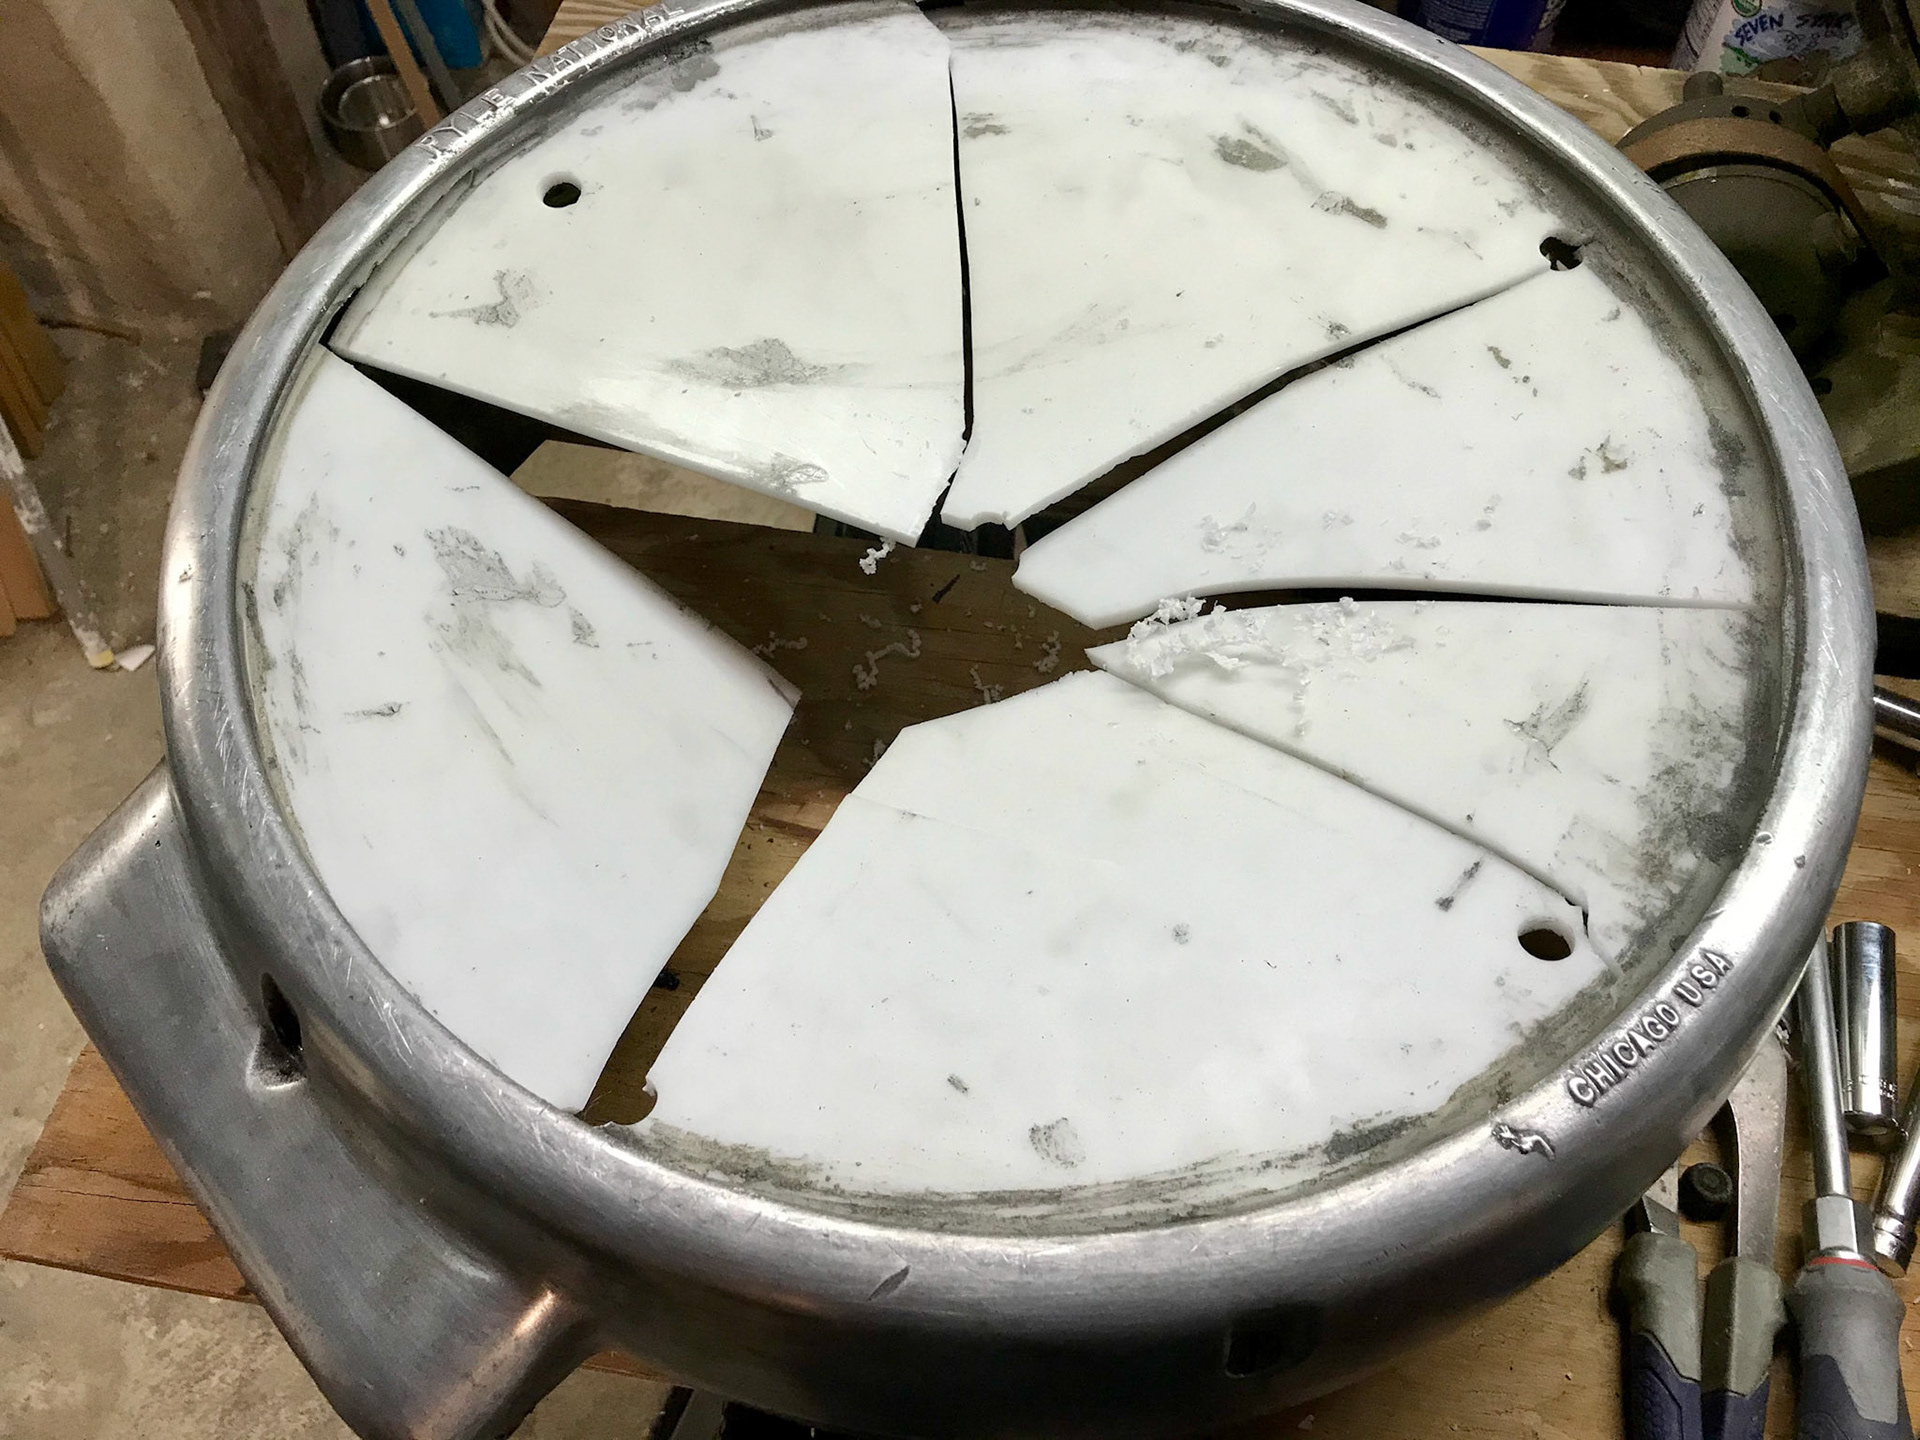
St. Nick's lens had been replaced with a piece of plastic

Door and housing together

Cleaning up
Retaining clamp
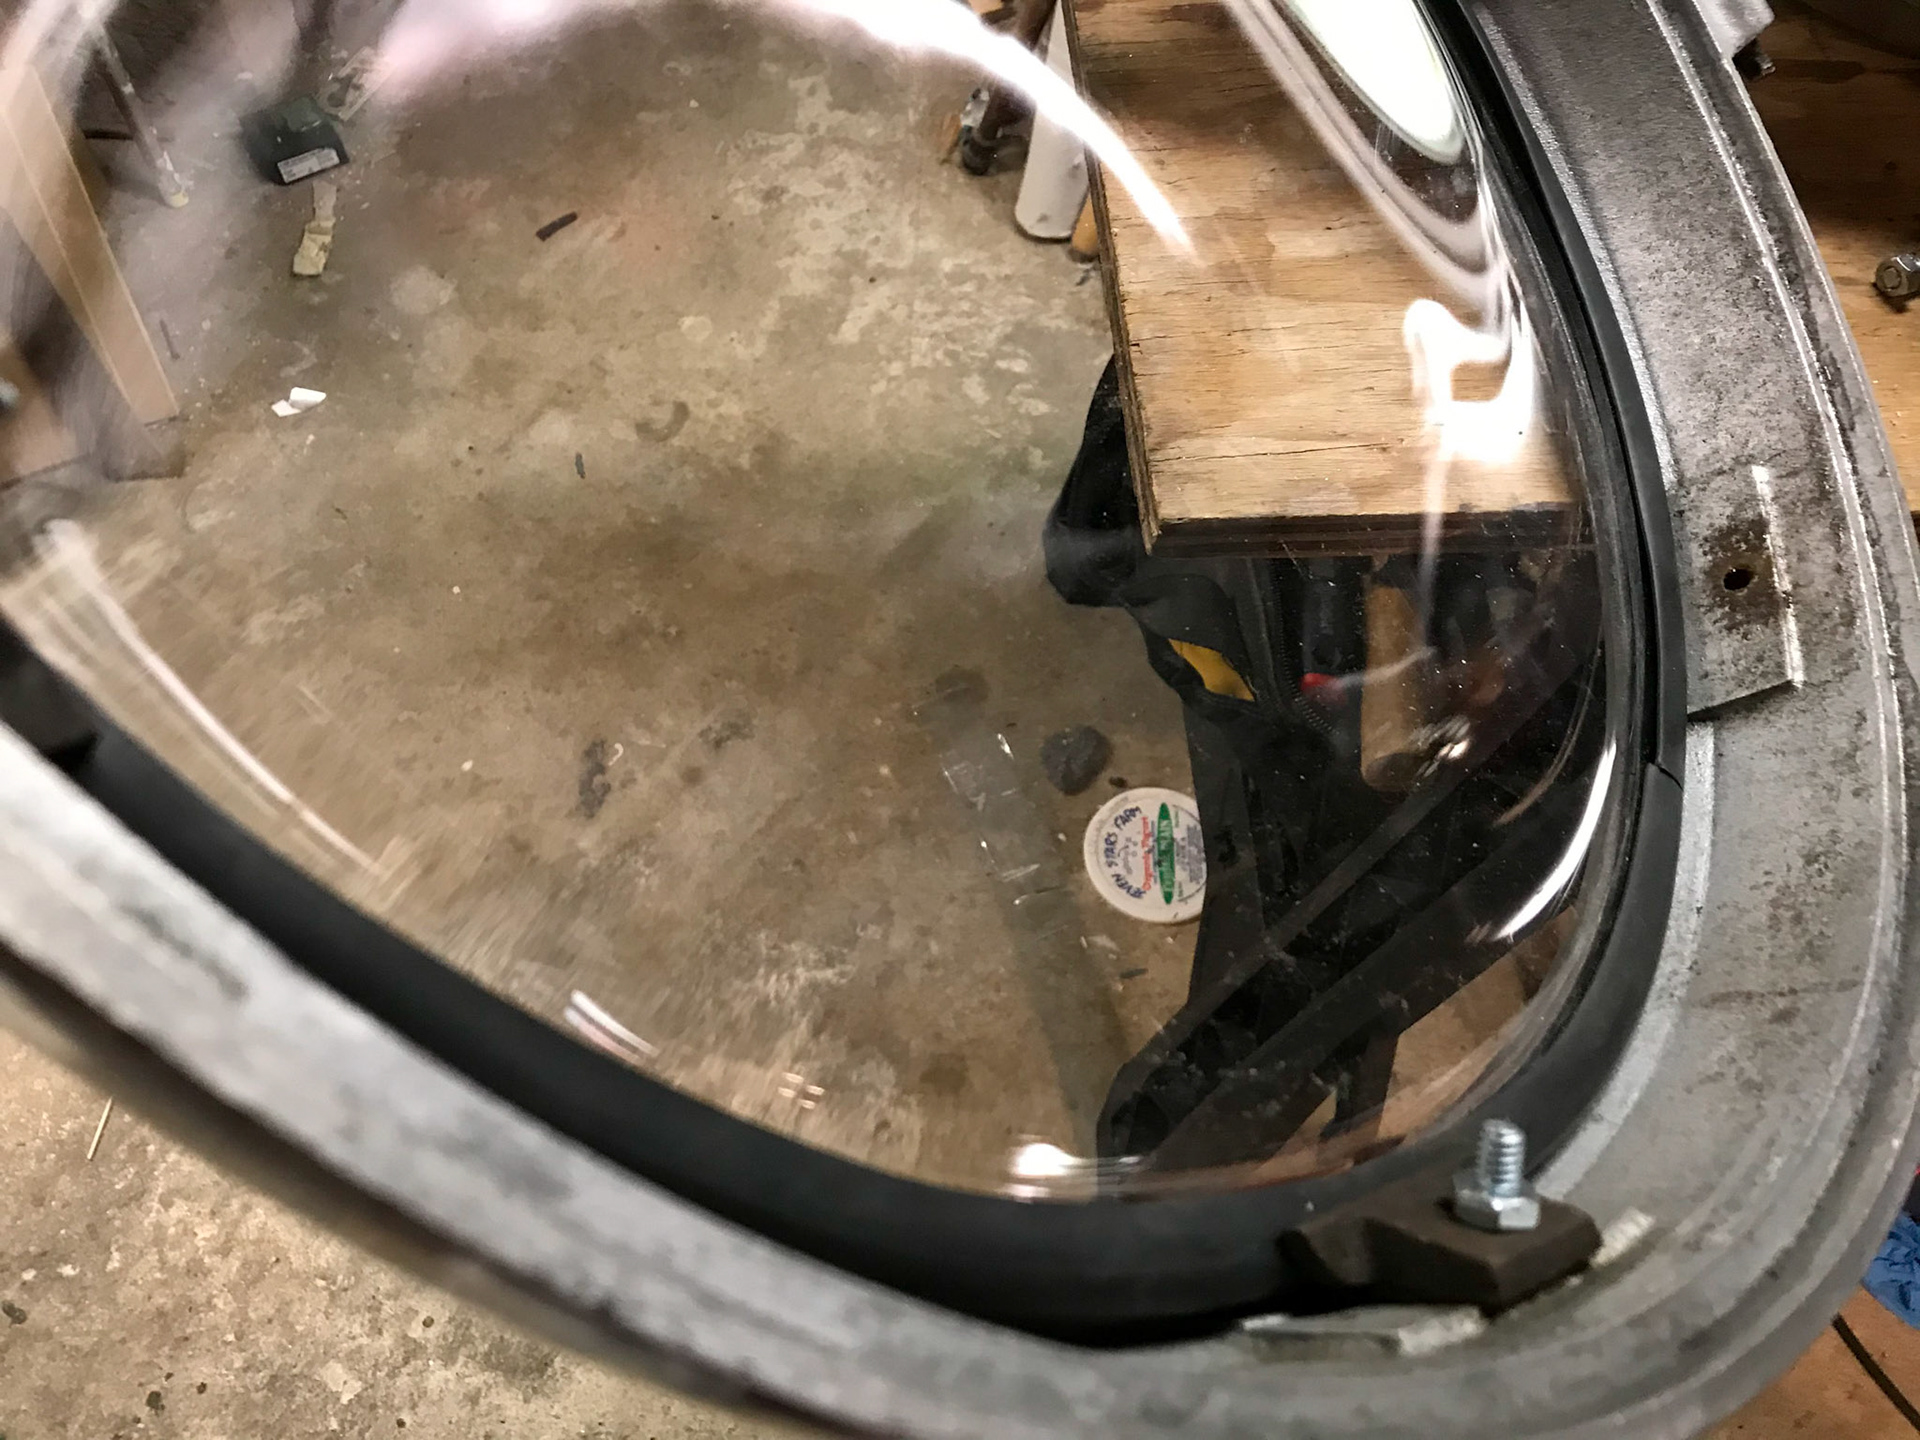
New lens installed
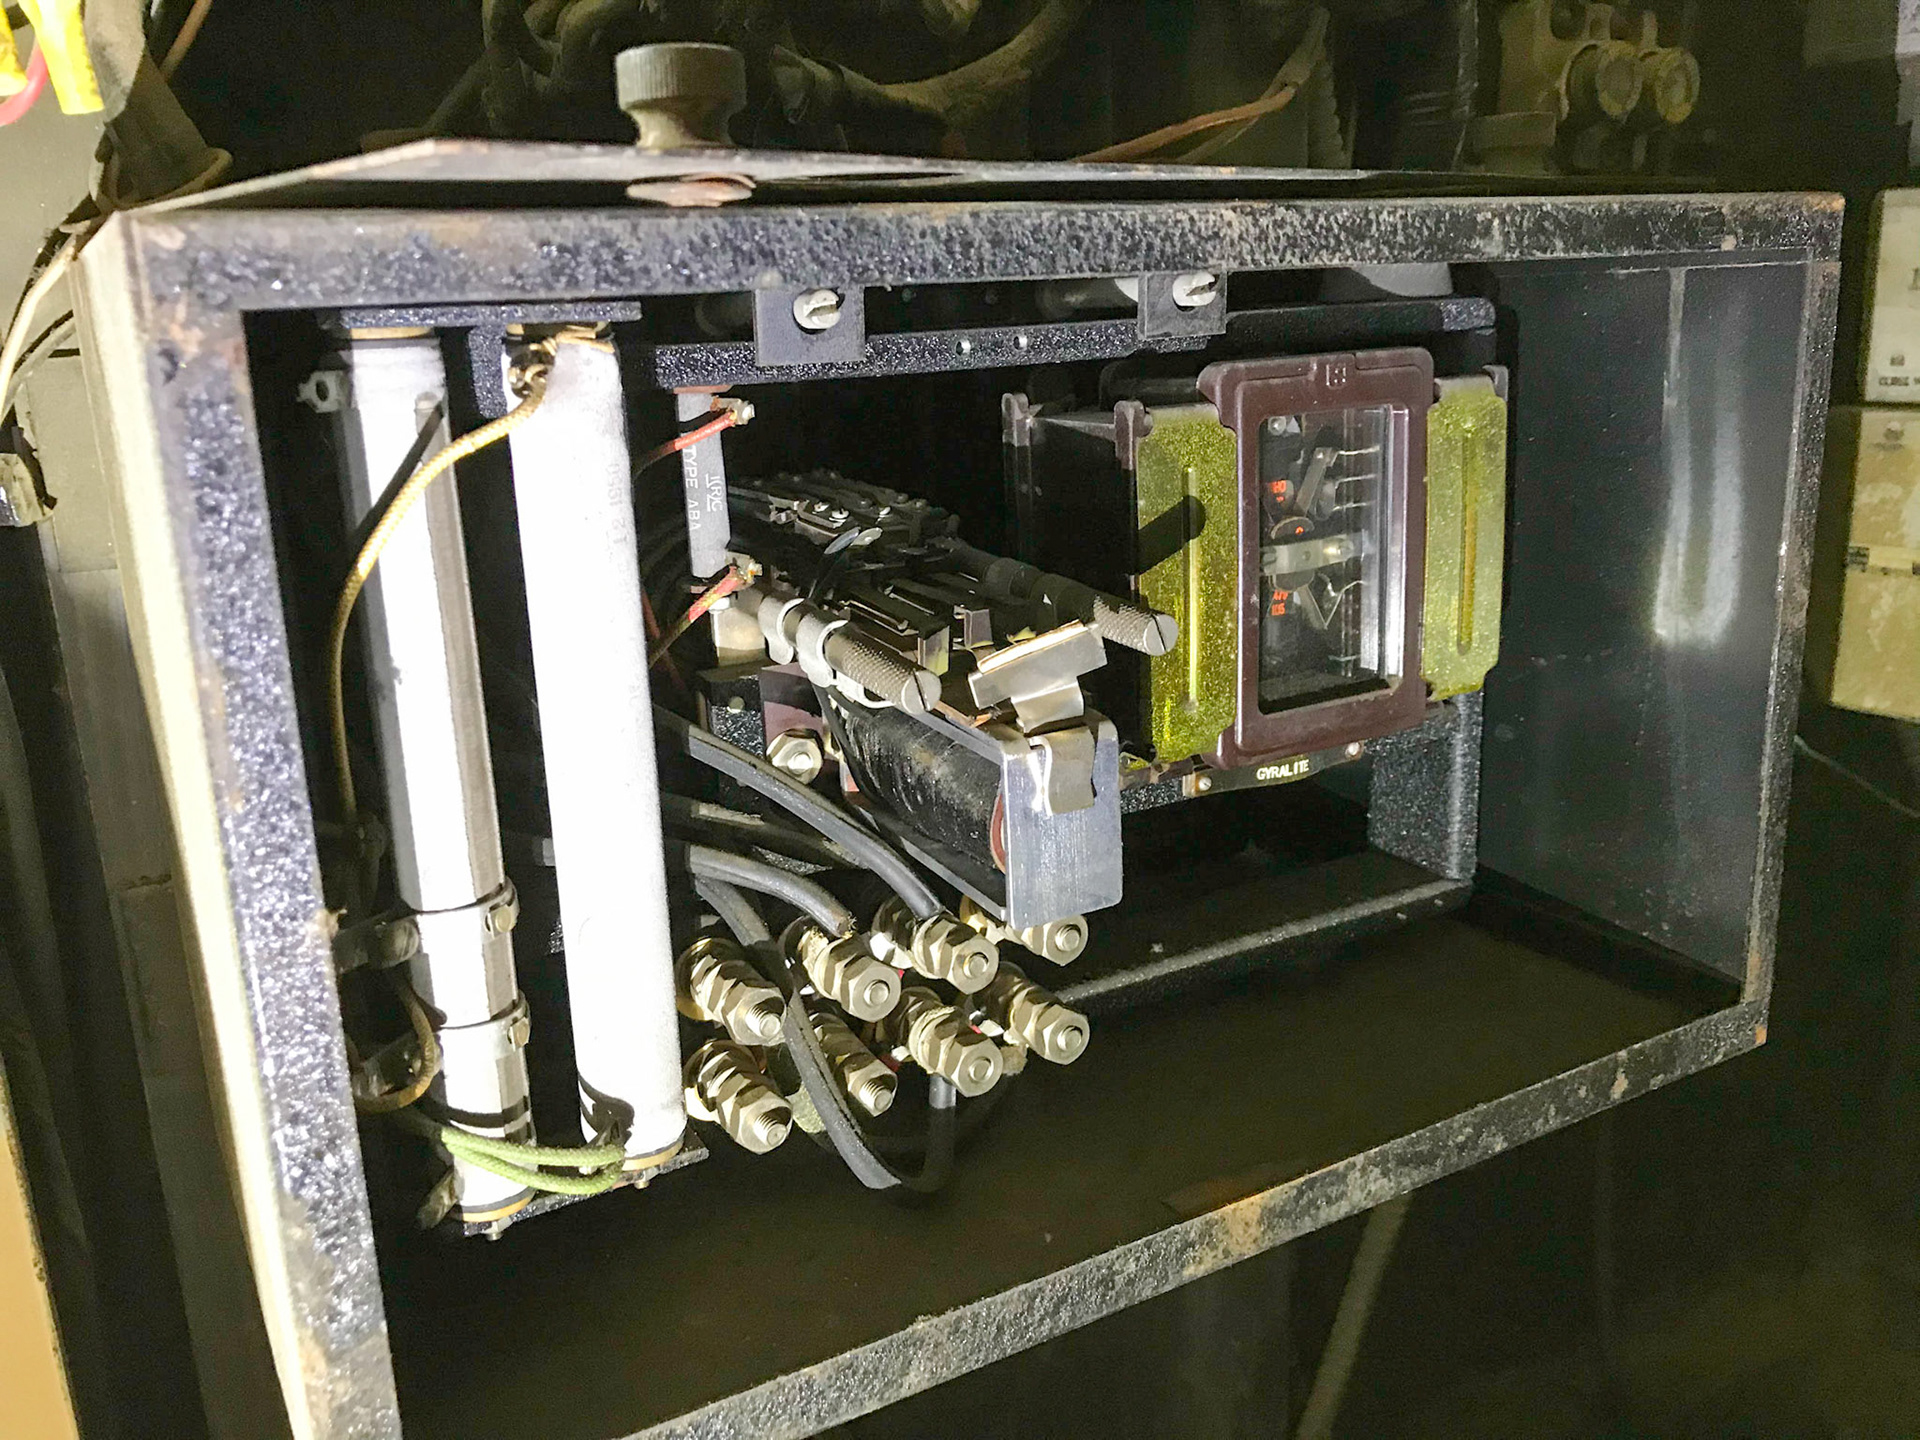
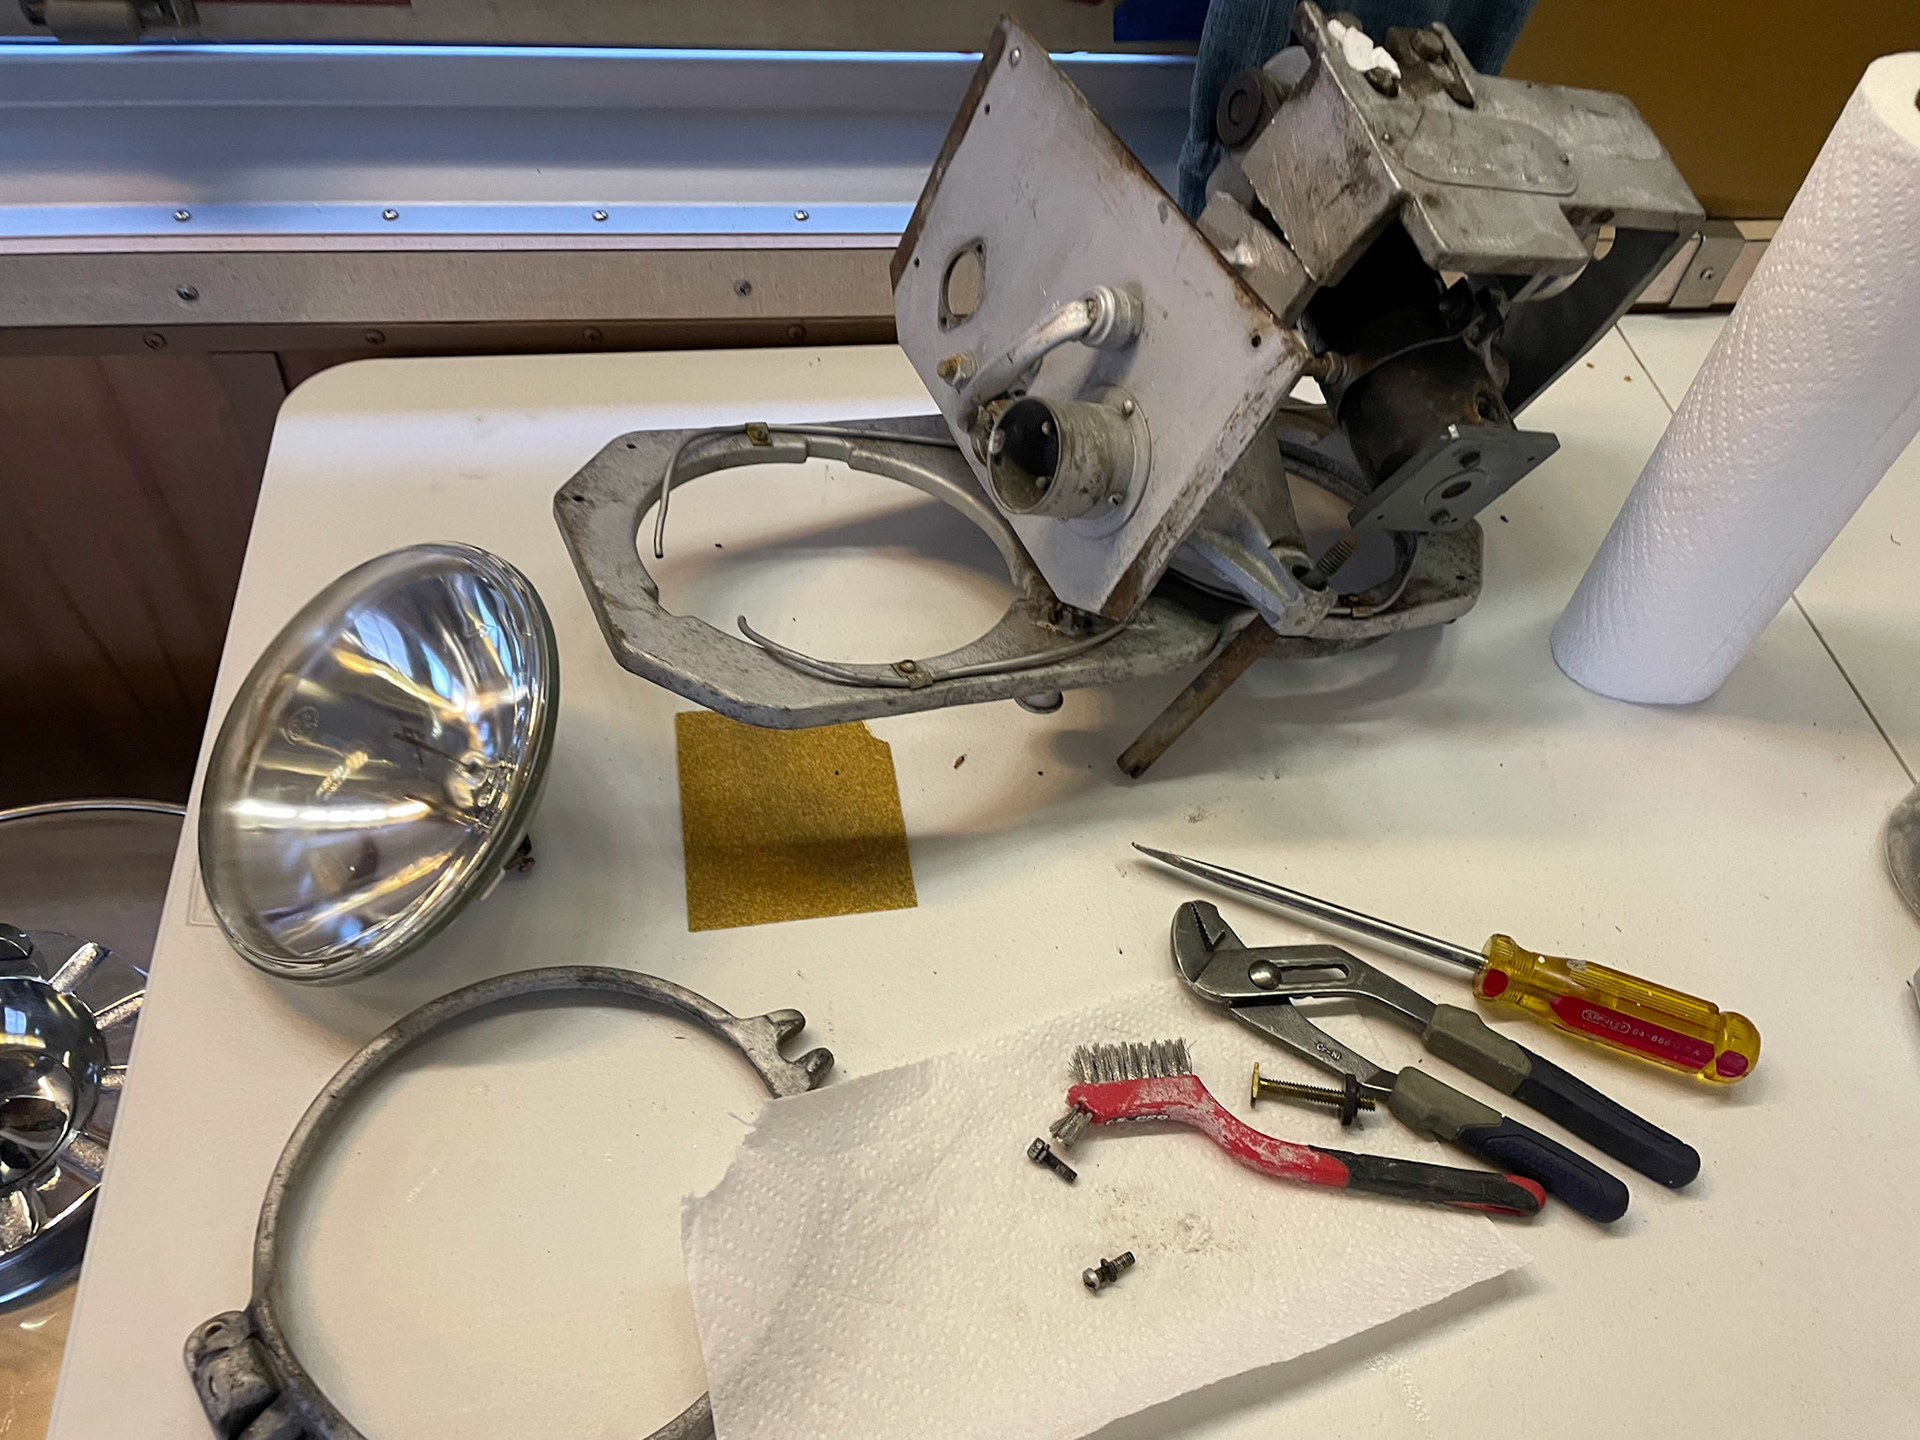
The motor was cleaned and tested, the reflector polished and the relay and electrical components cleaned and rewired where necessary.
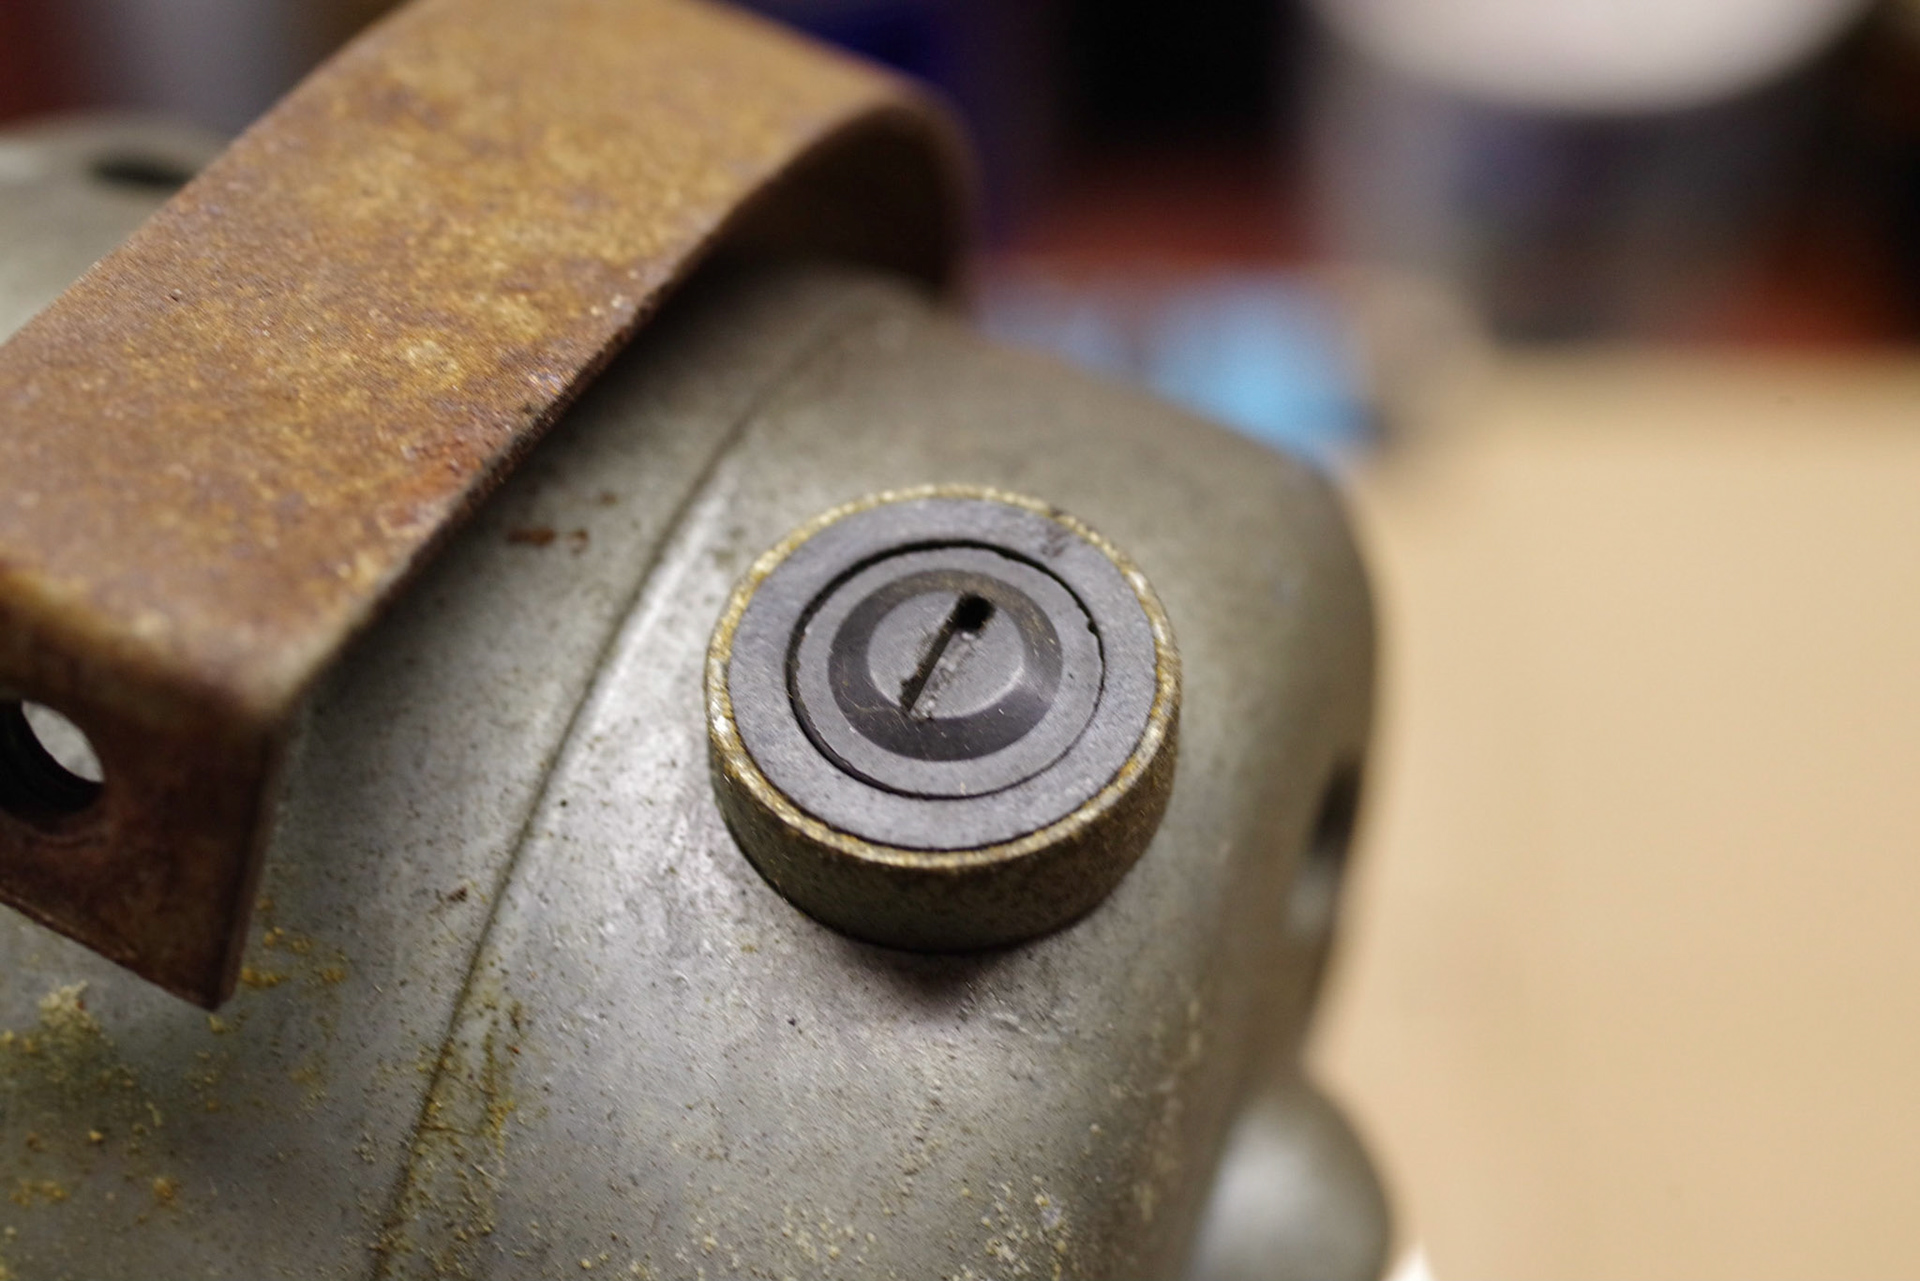
Brush housing
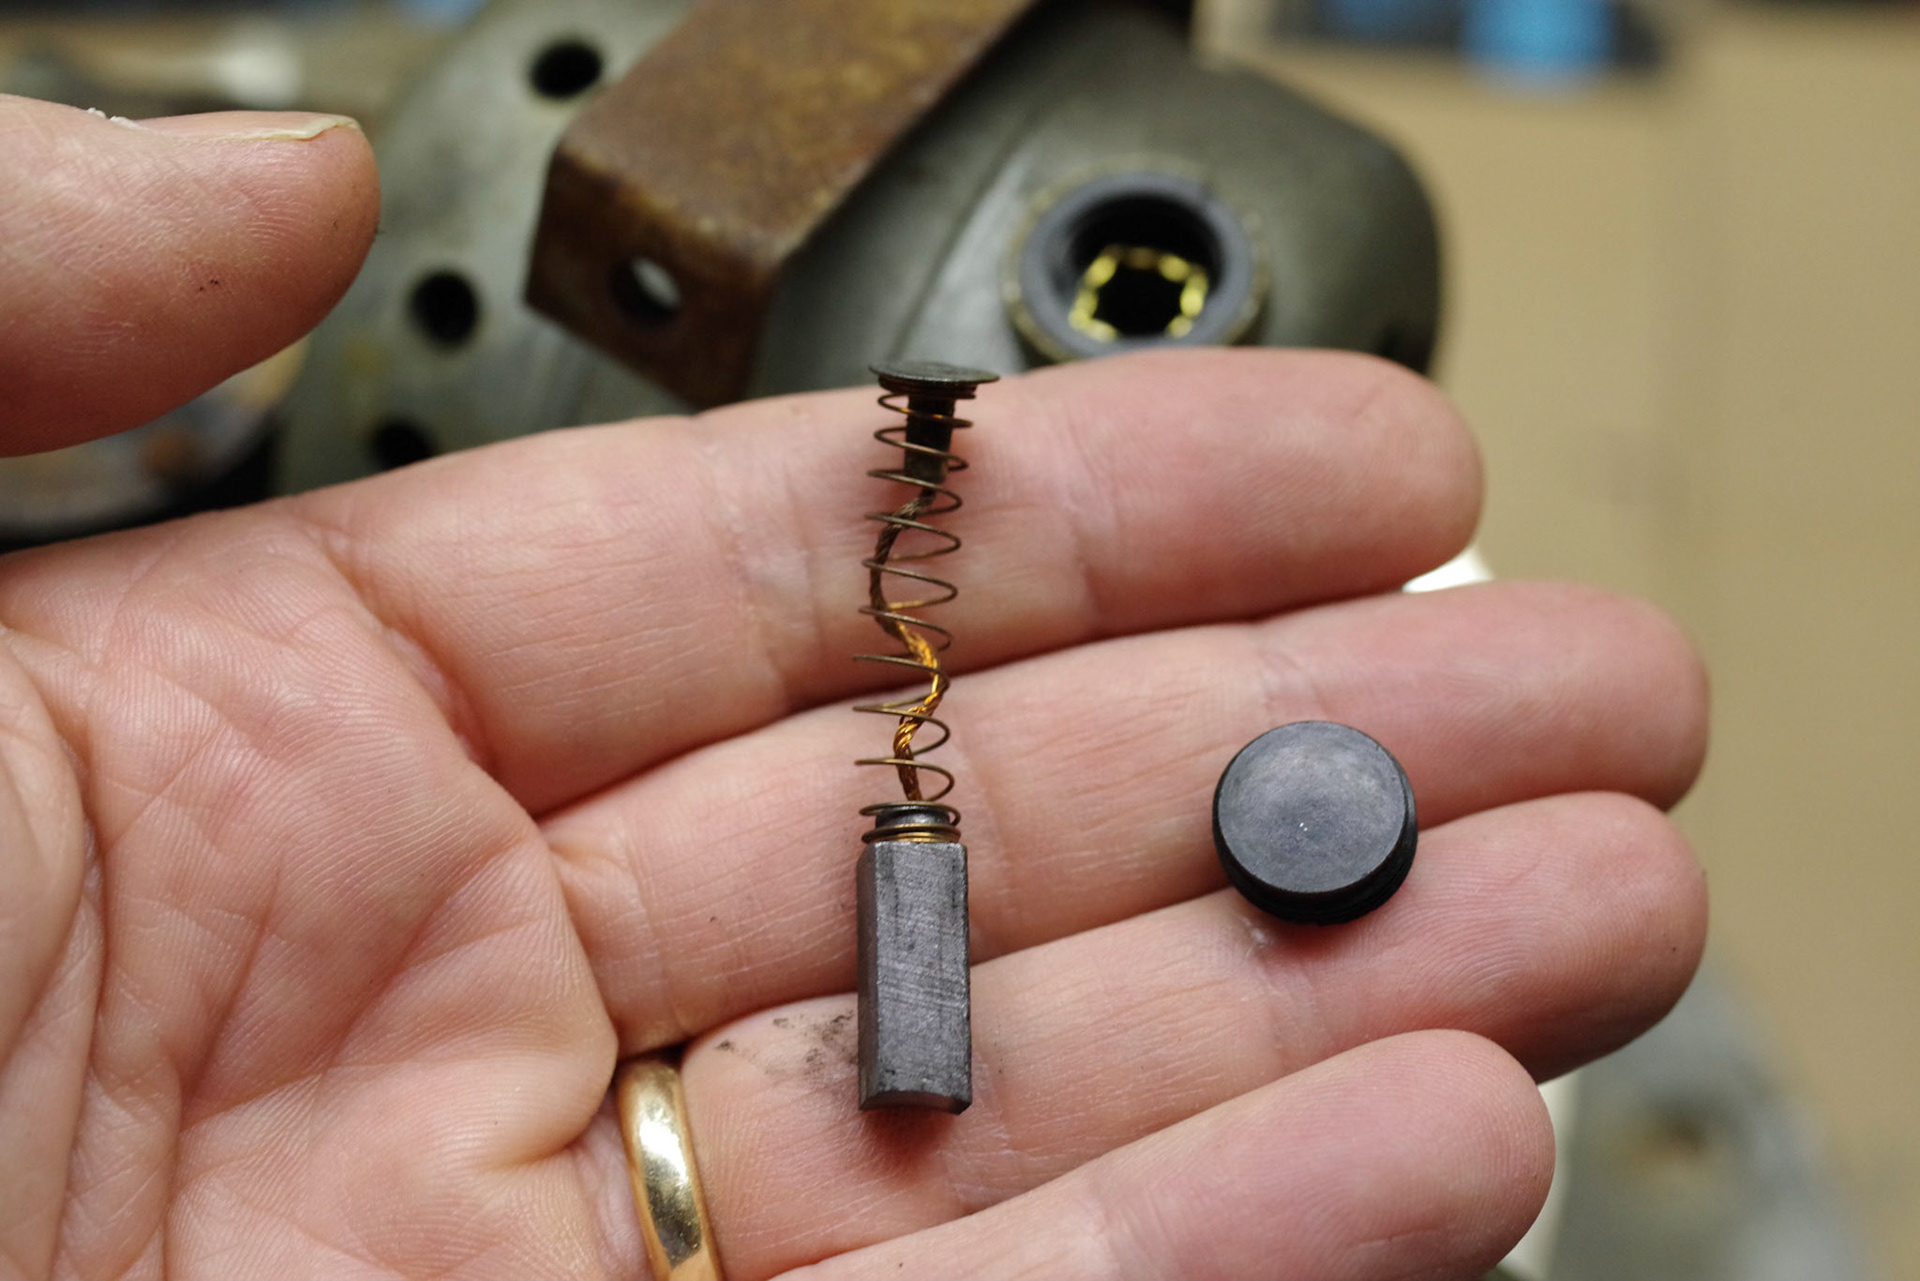
Motor brush
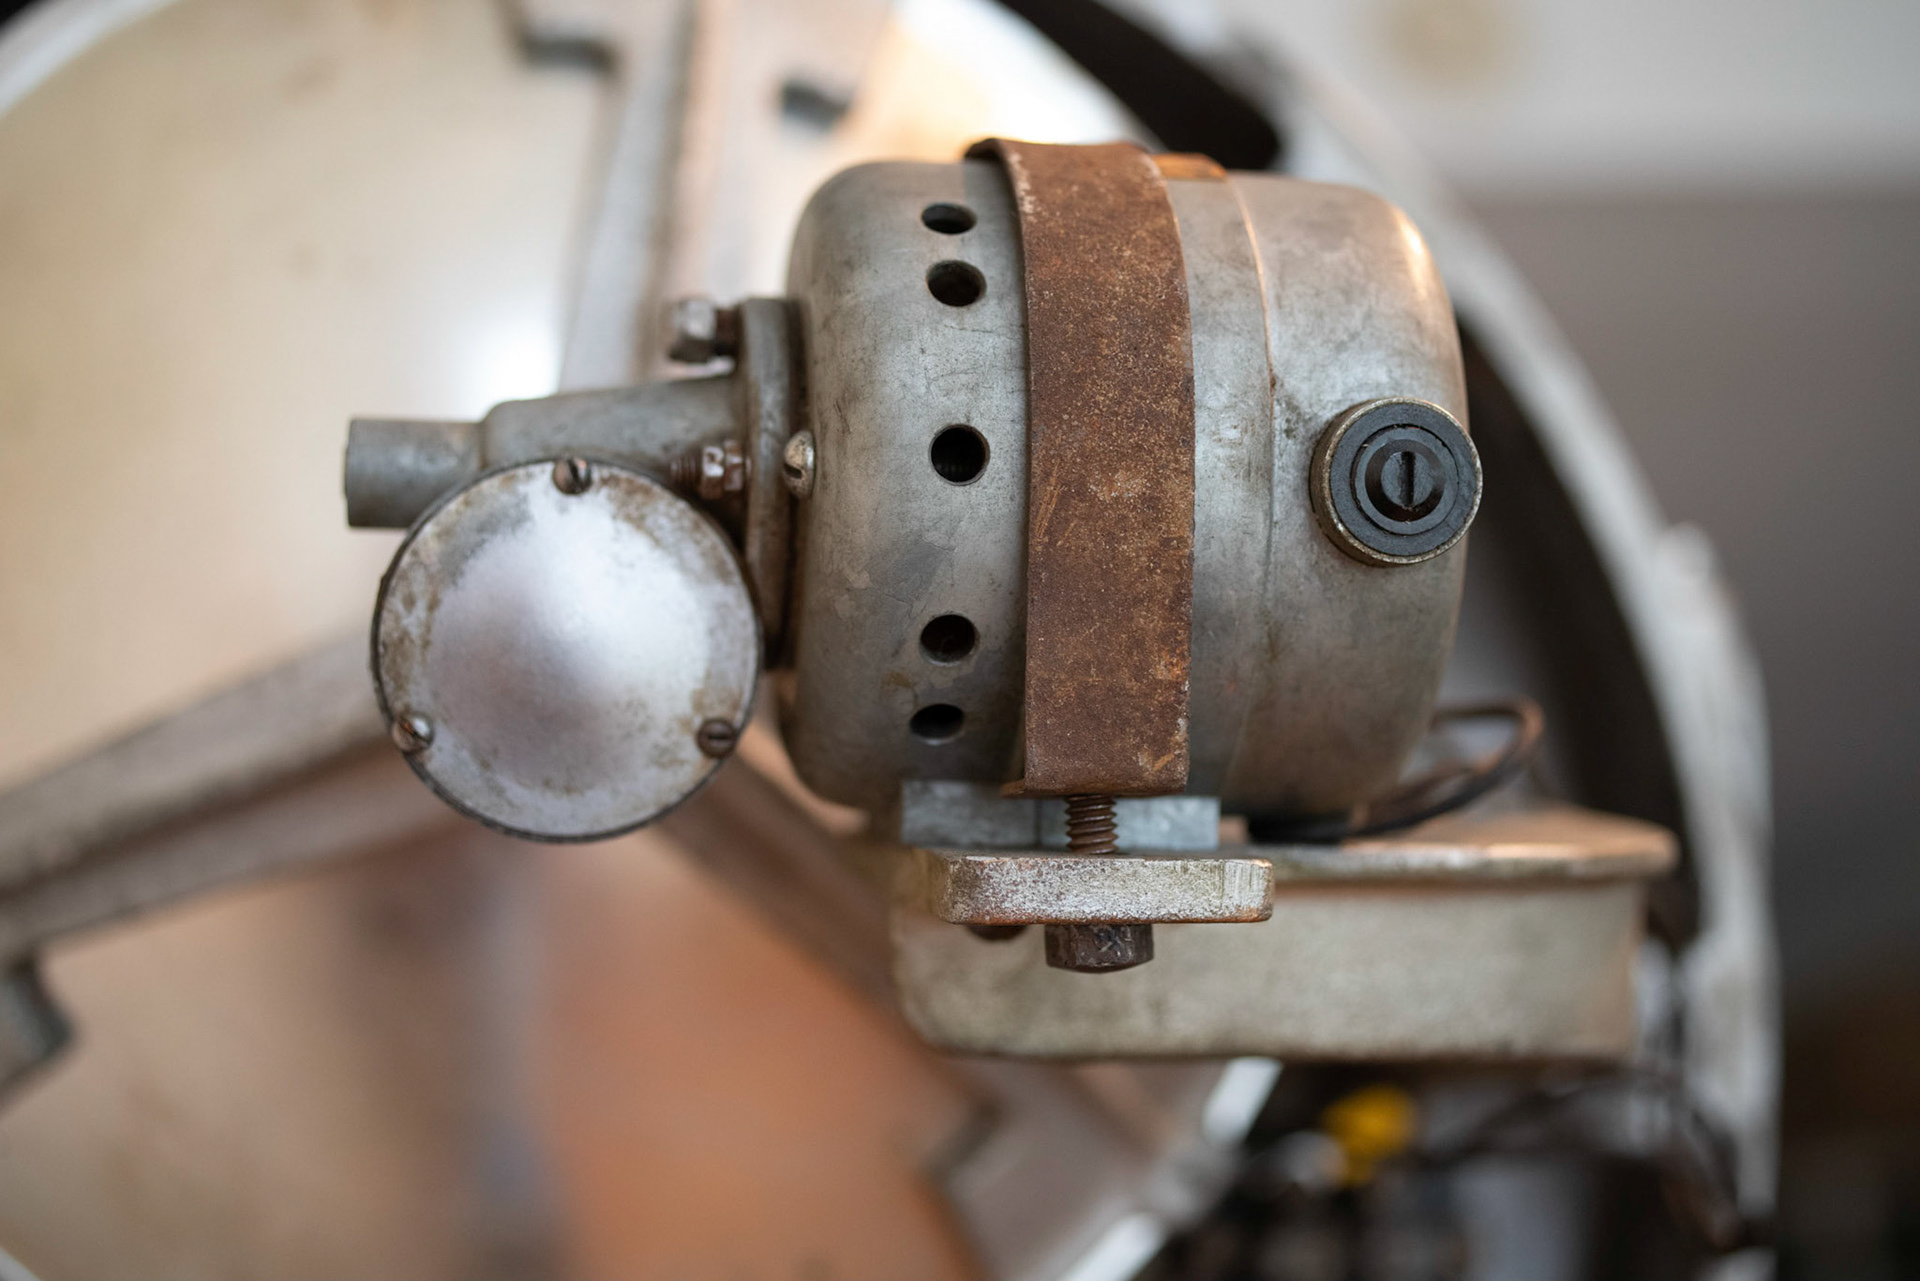
Motor and gear assembly
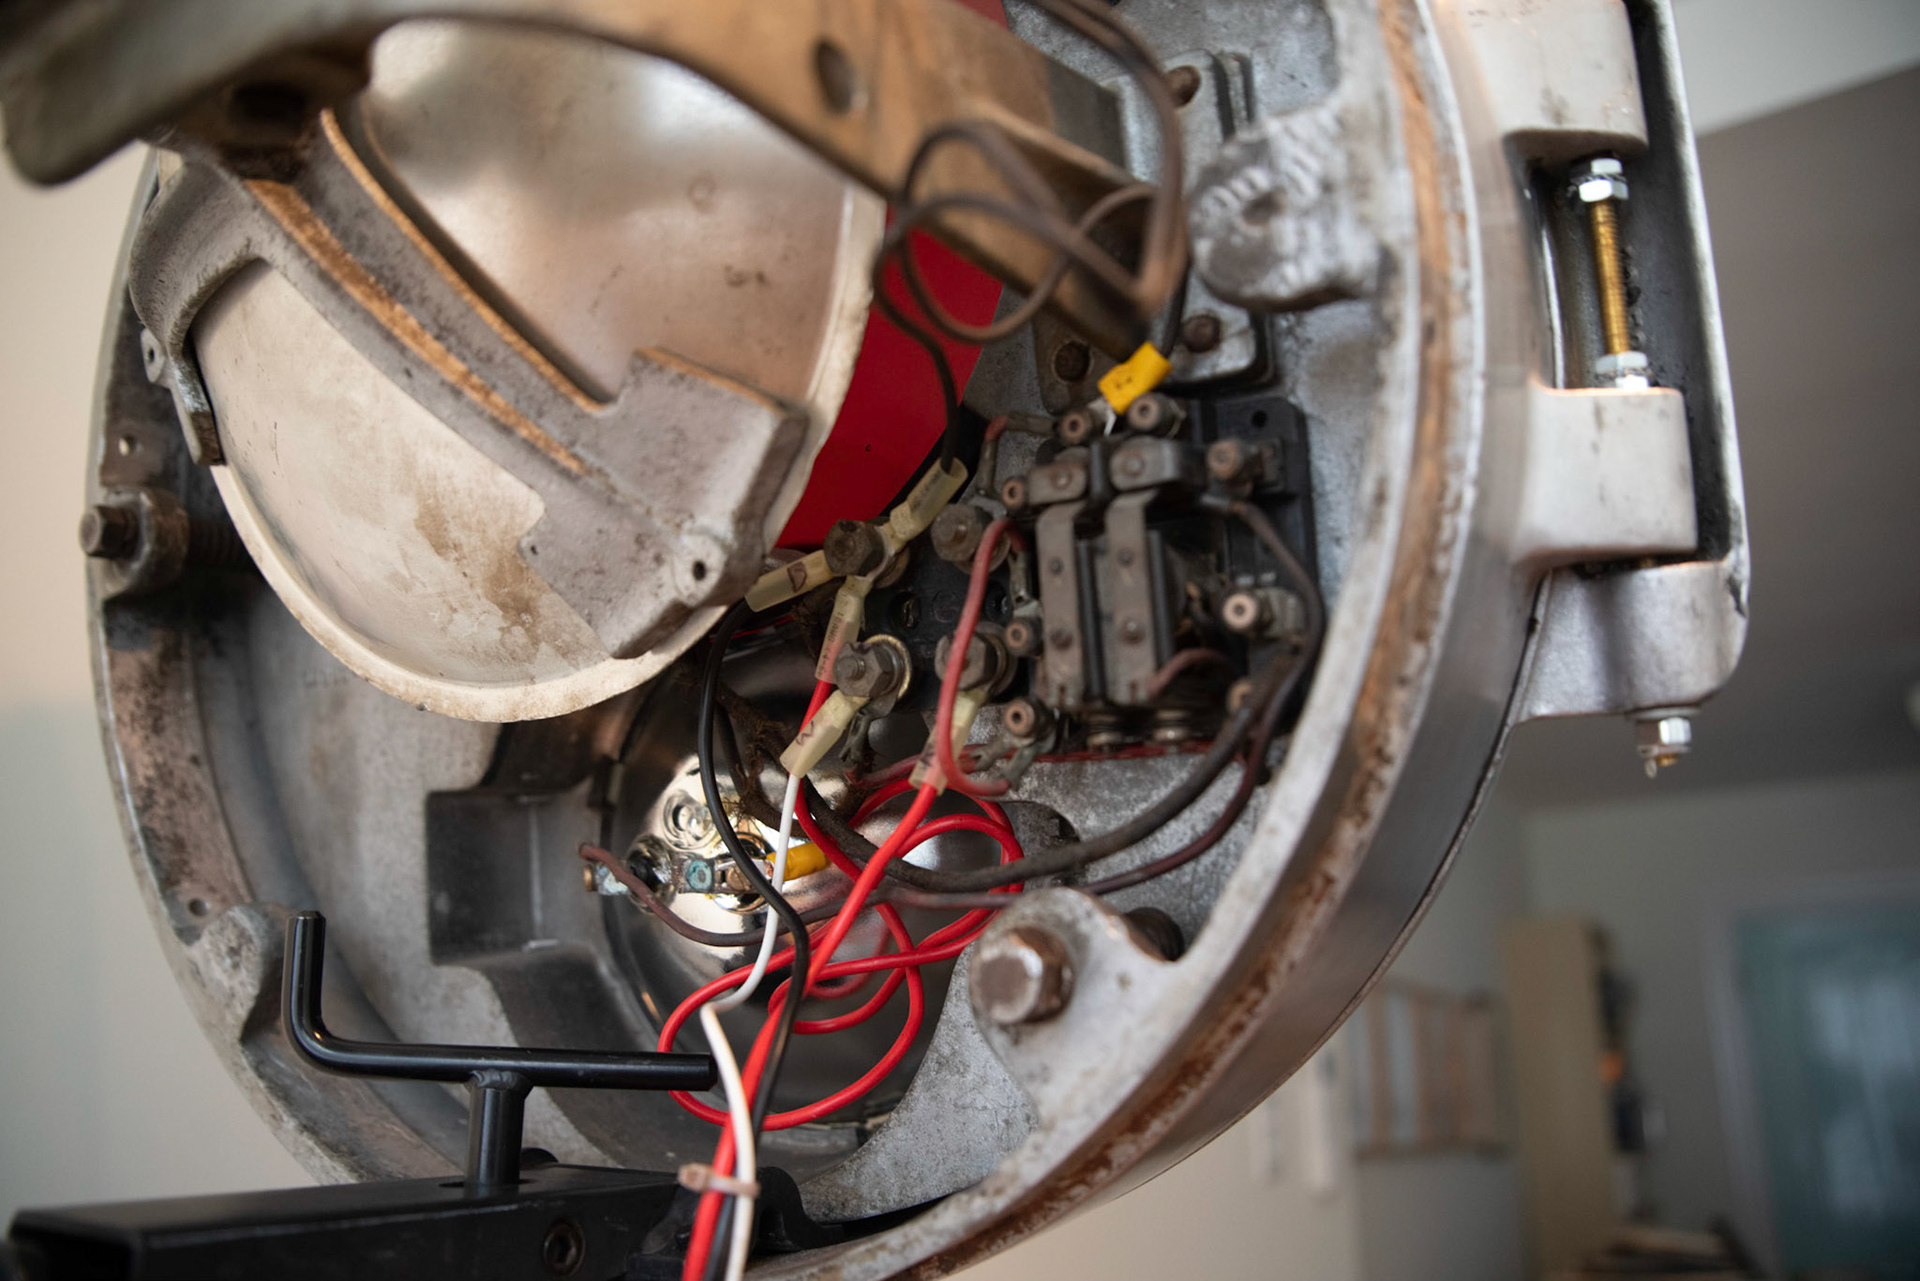
Electrical components
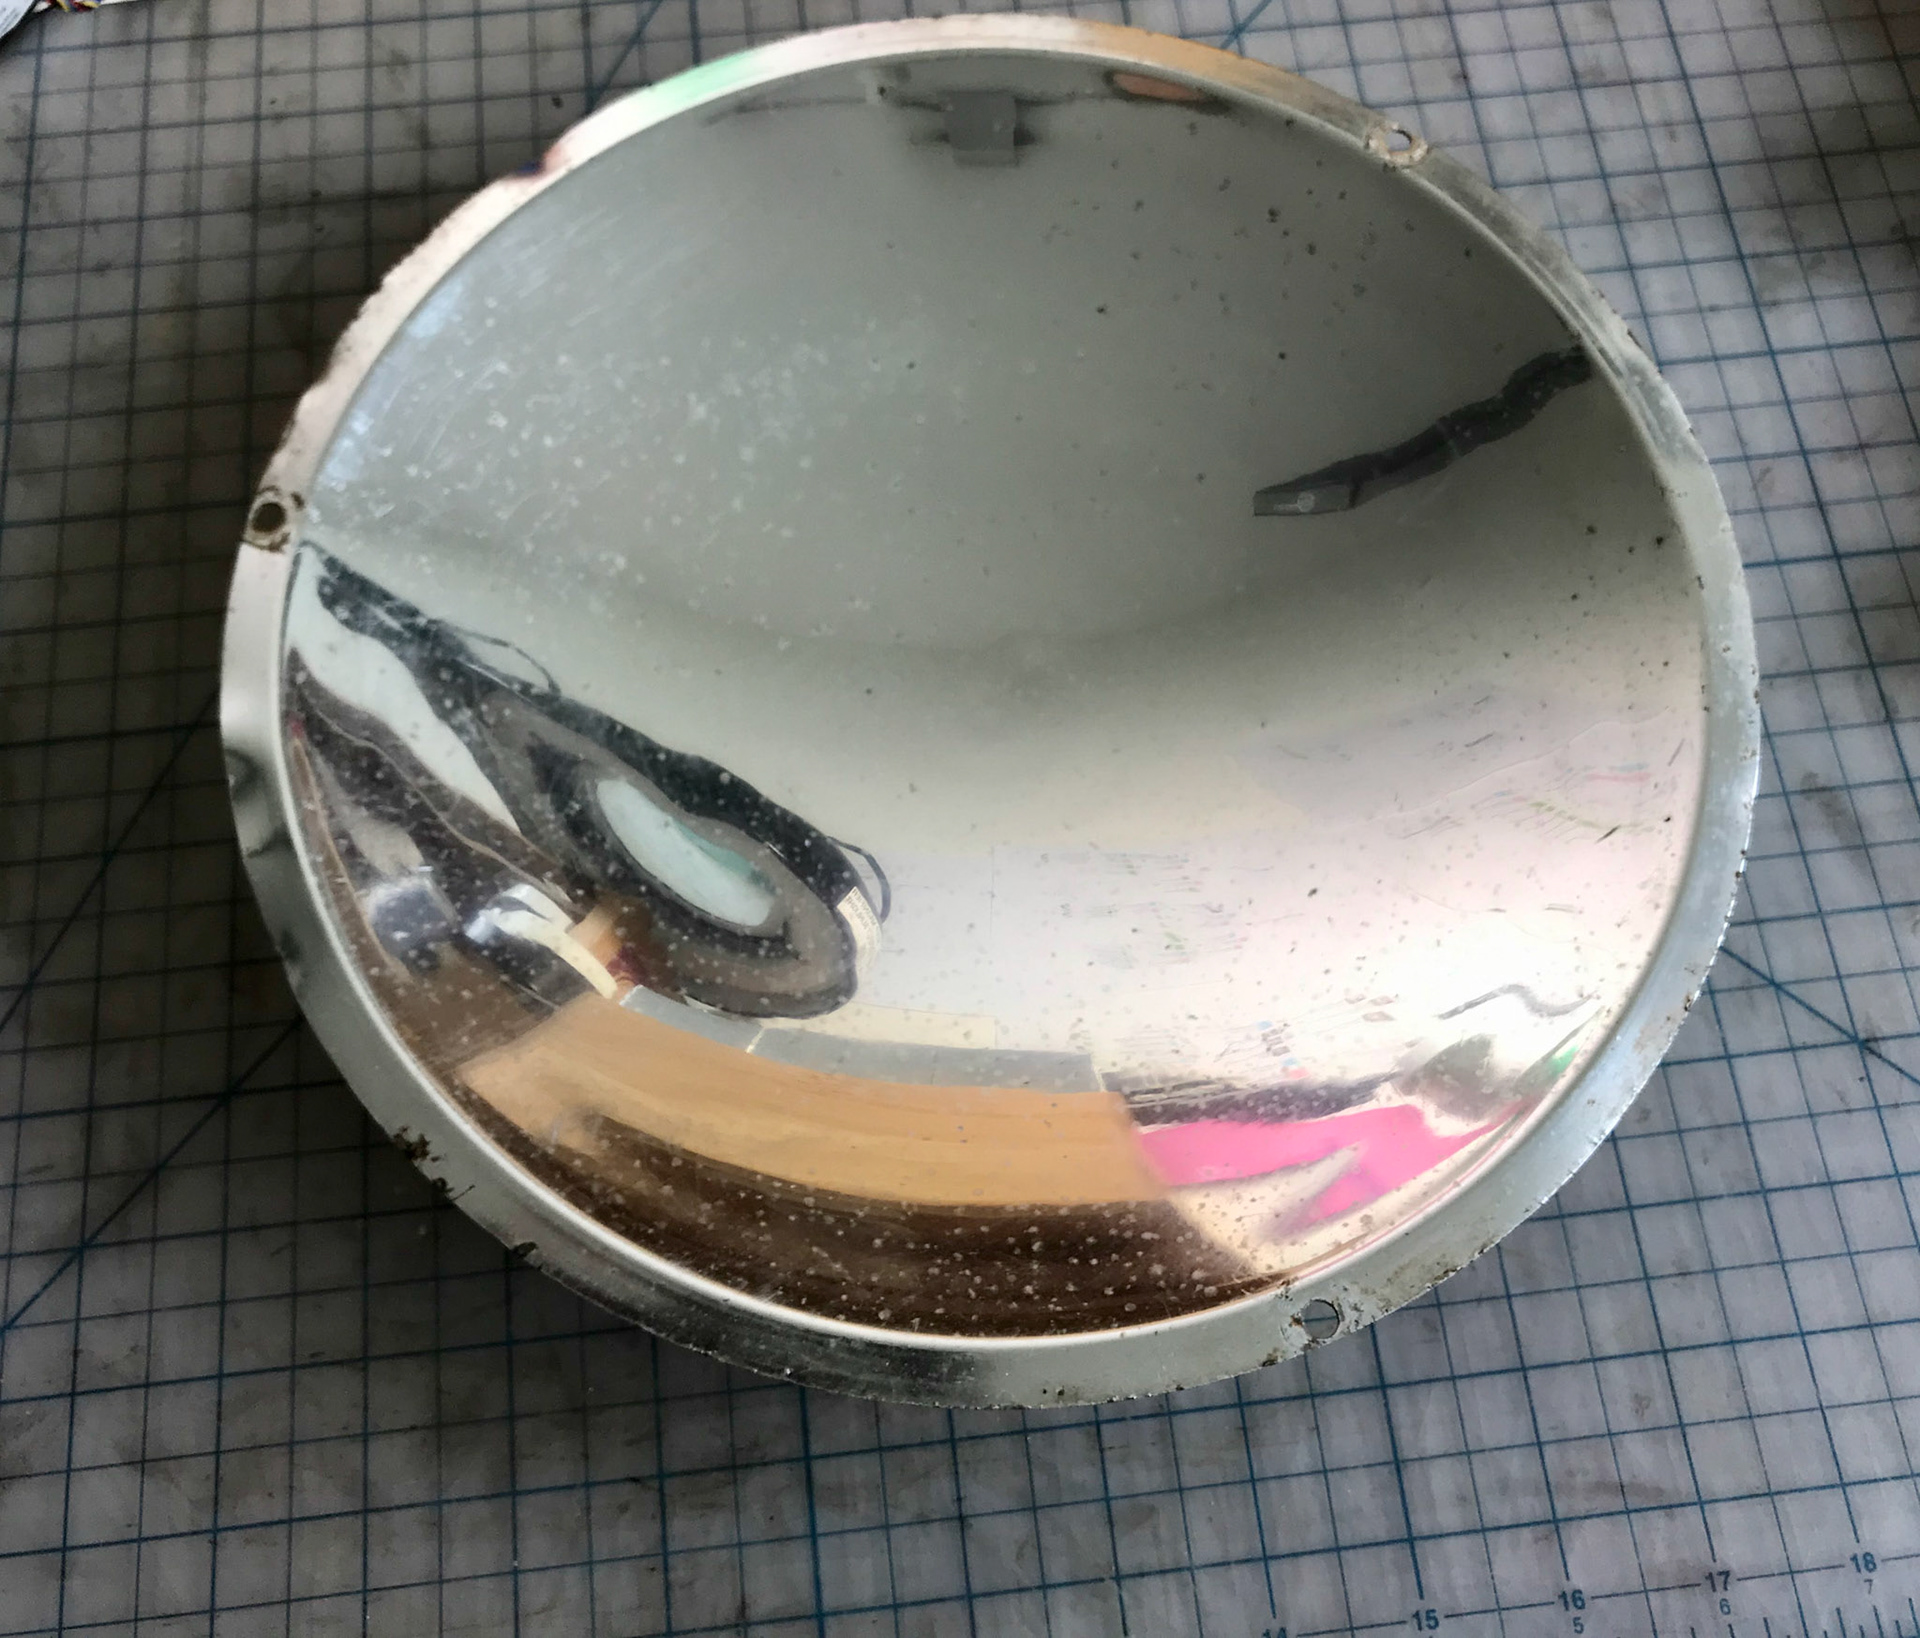
Reflector dish
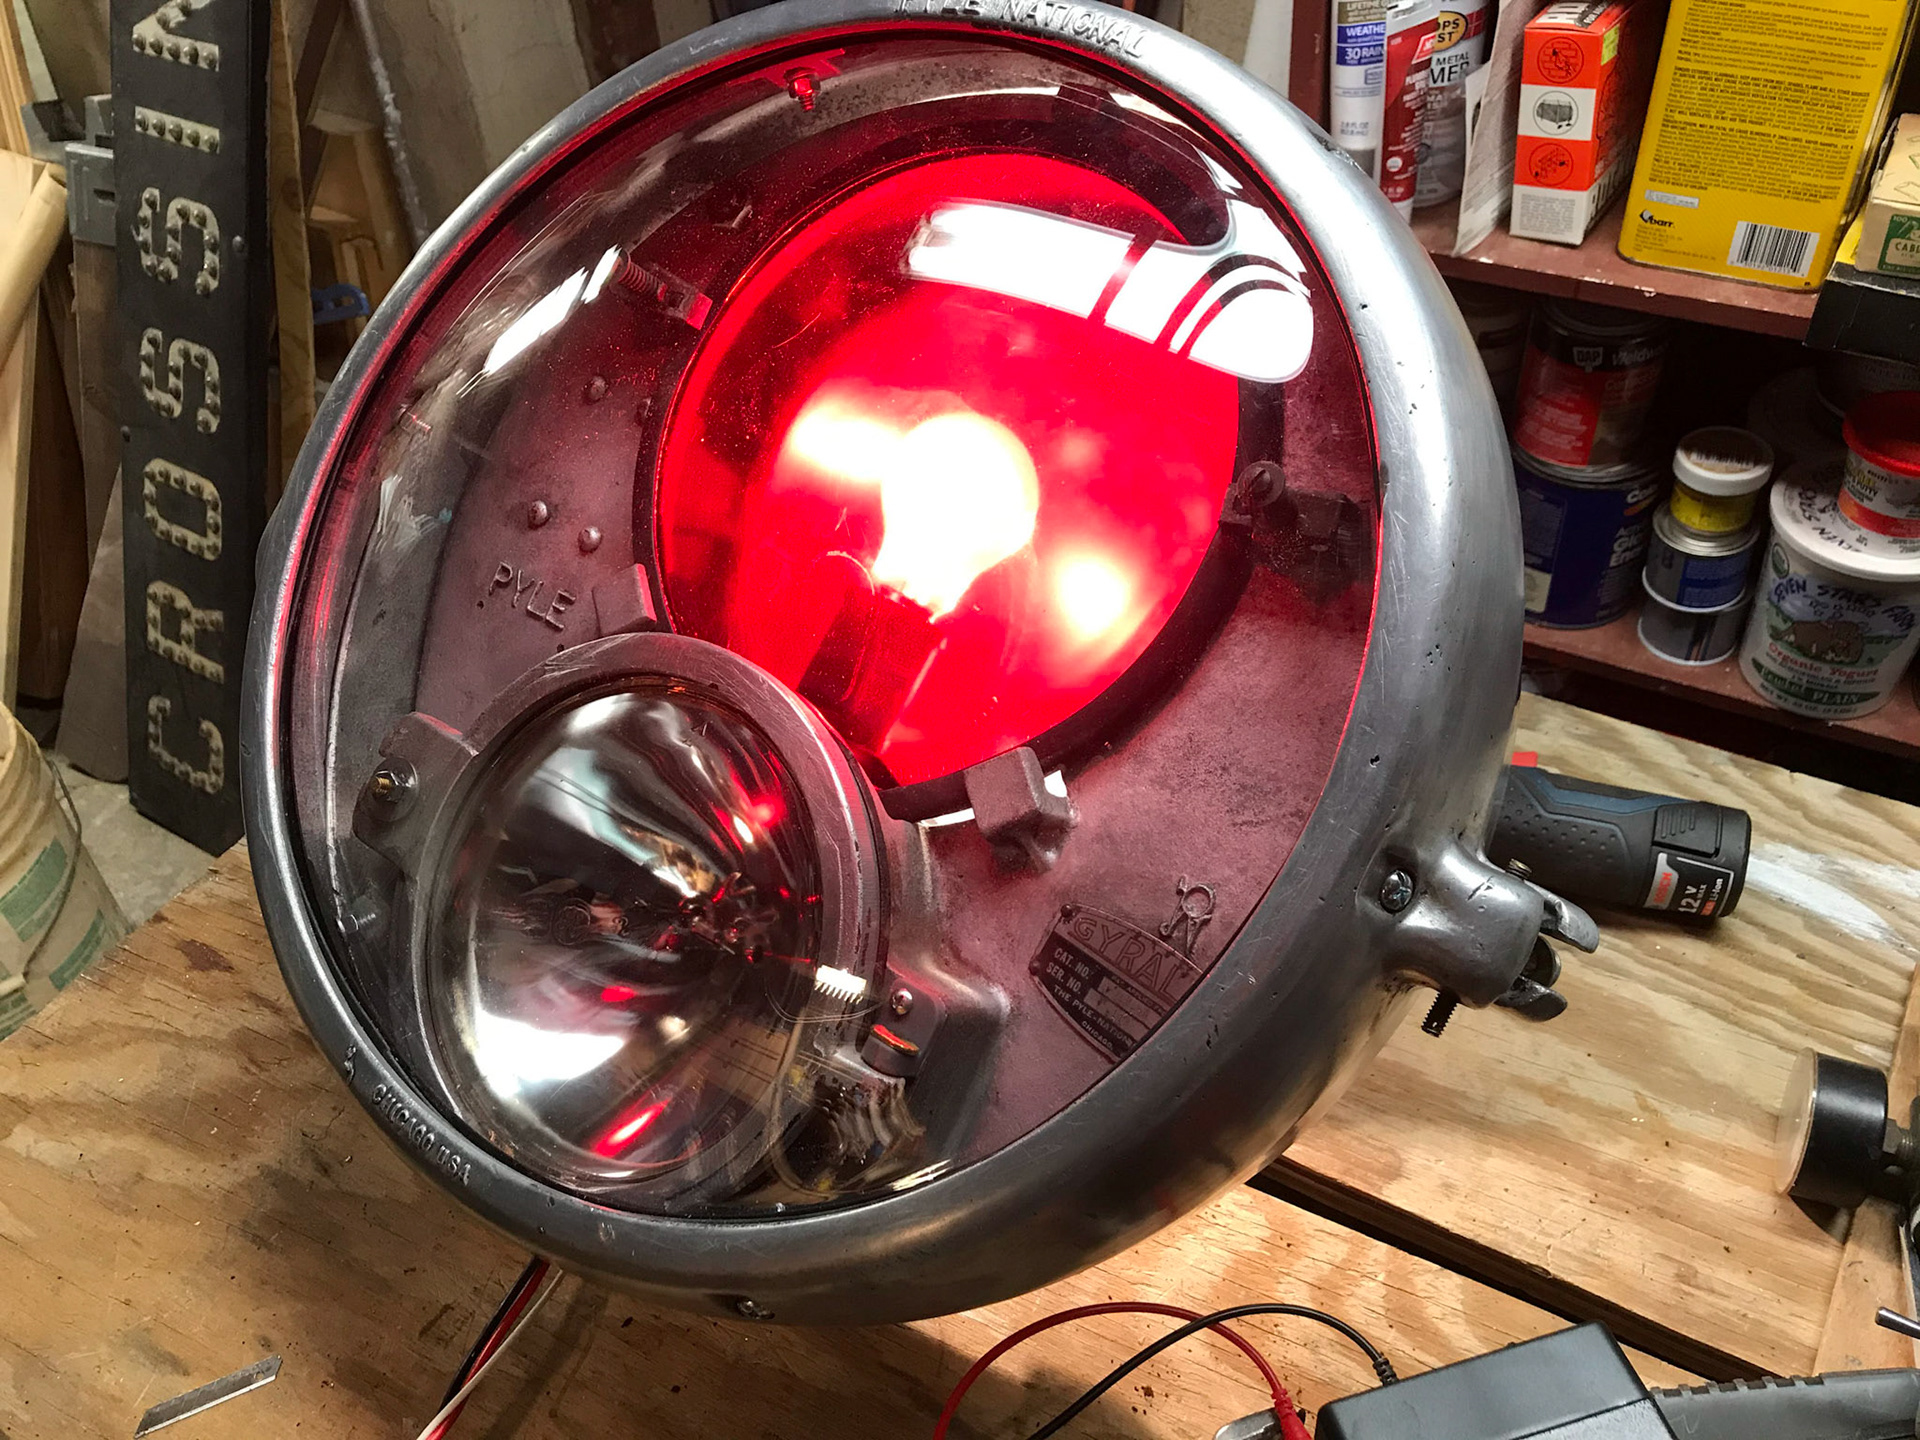
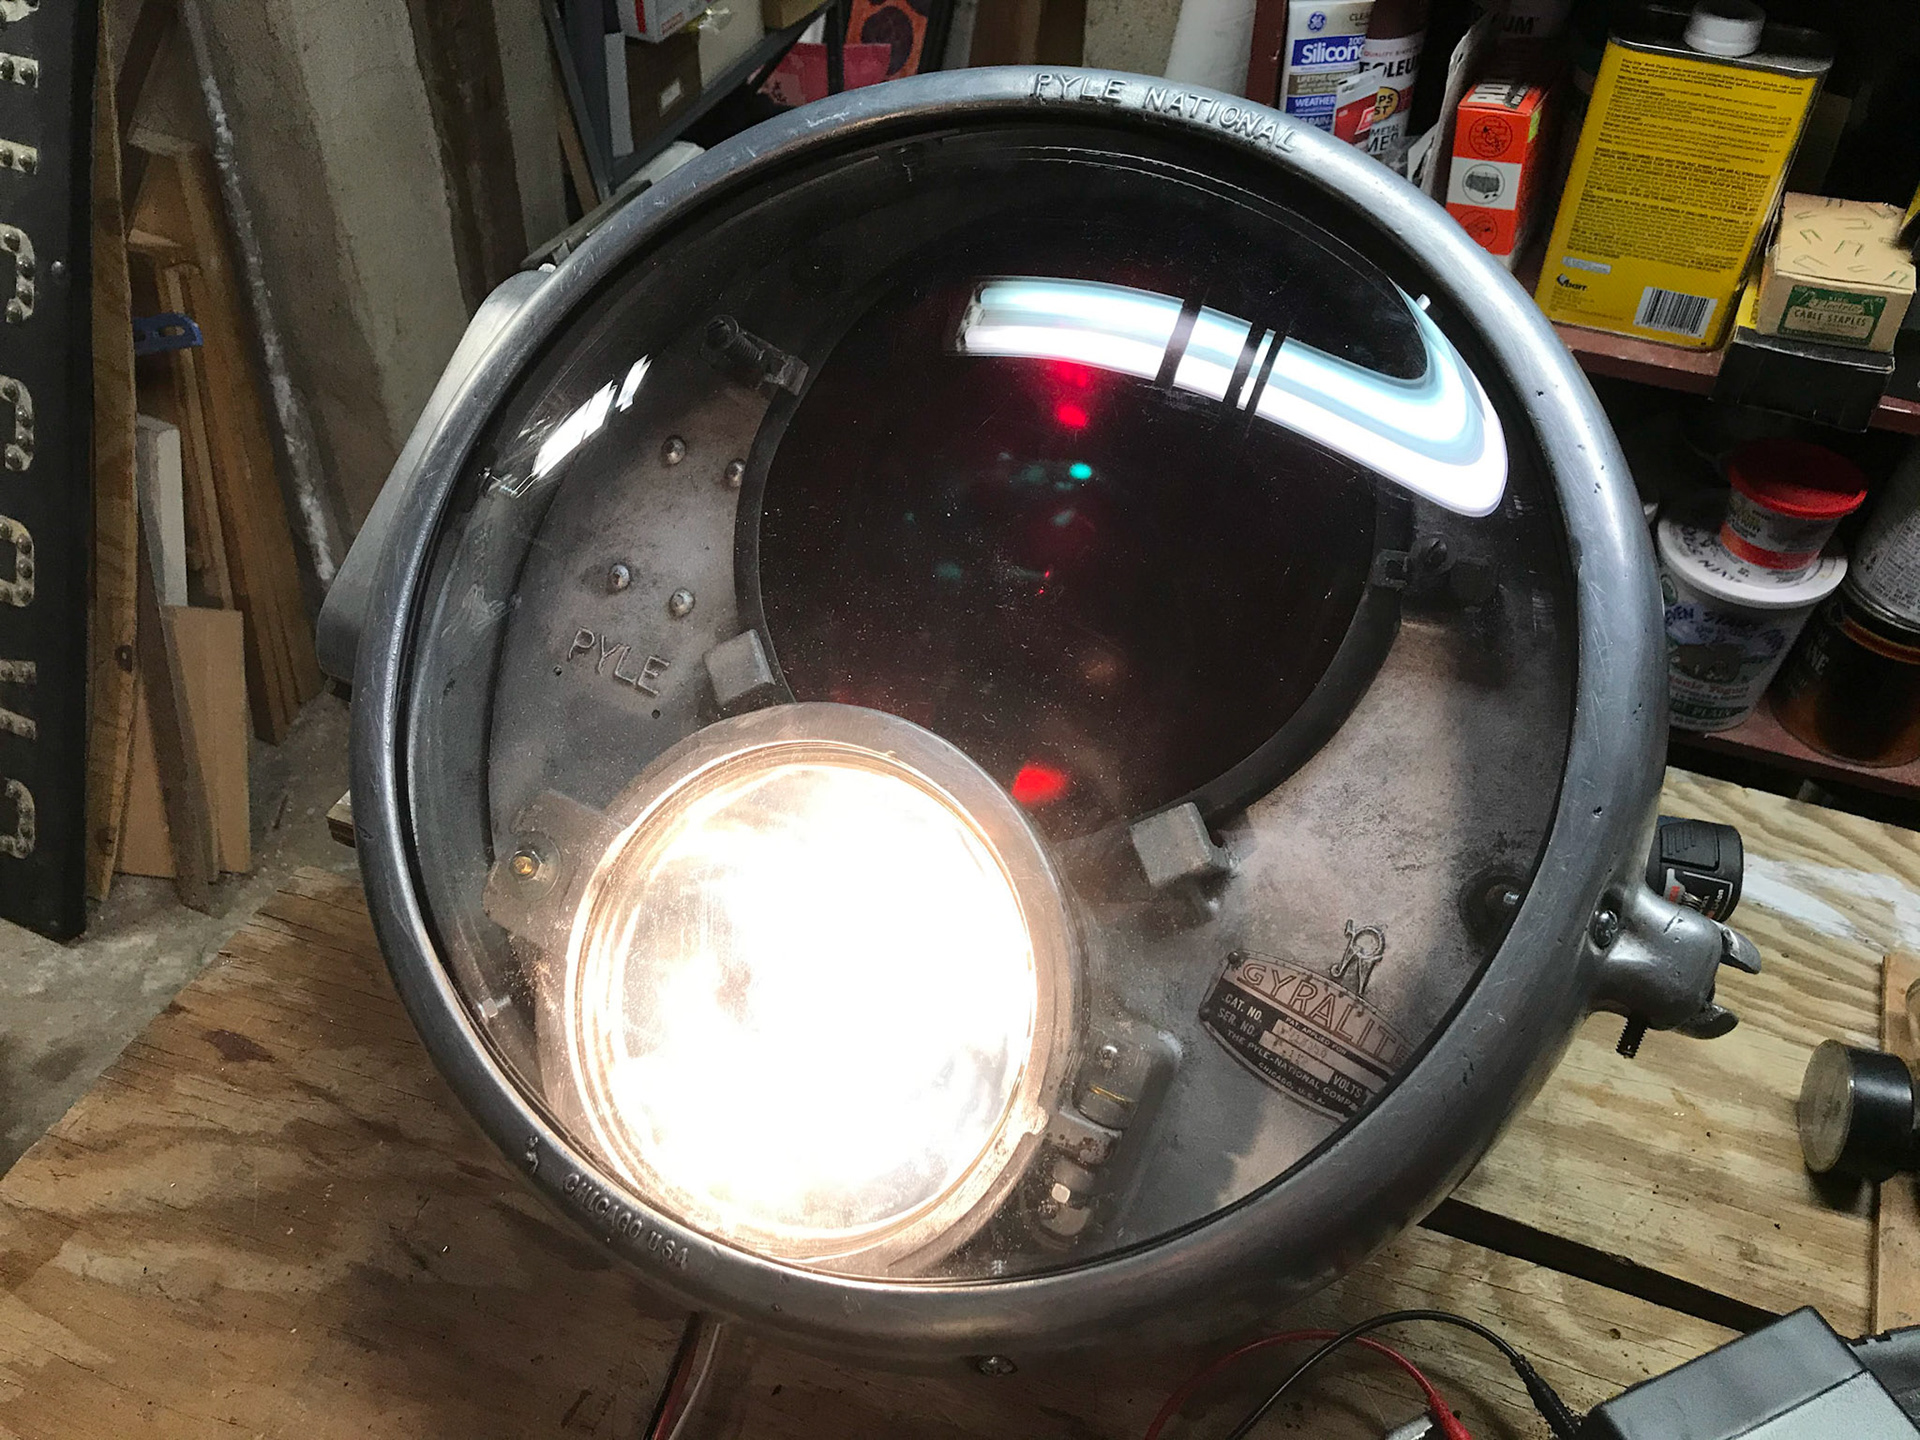
Testing out the mechanism after reassembly...
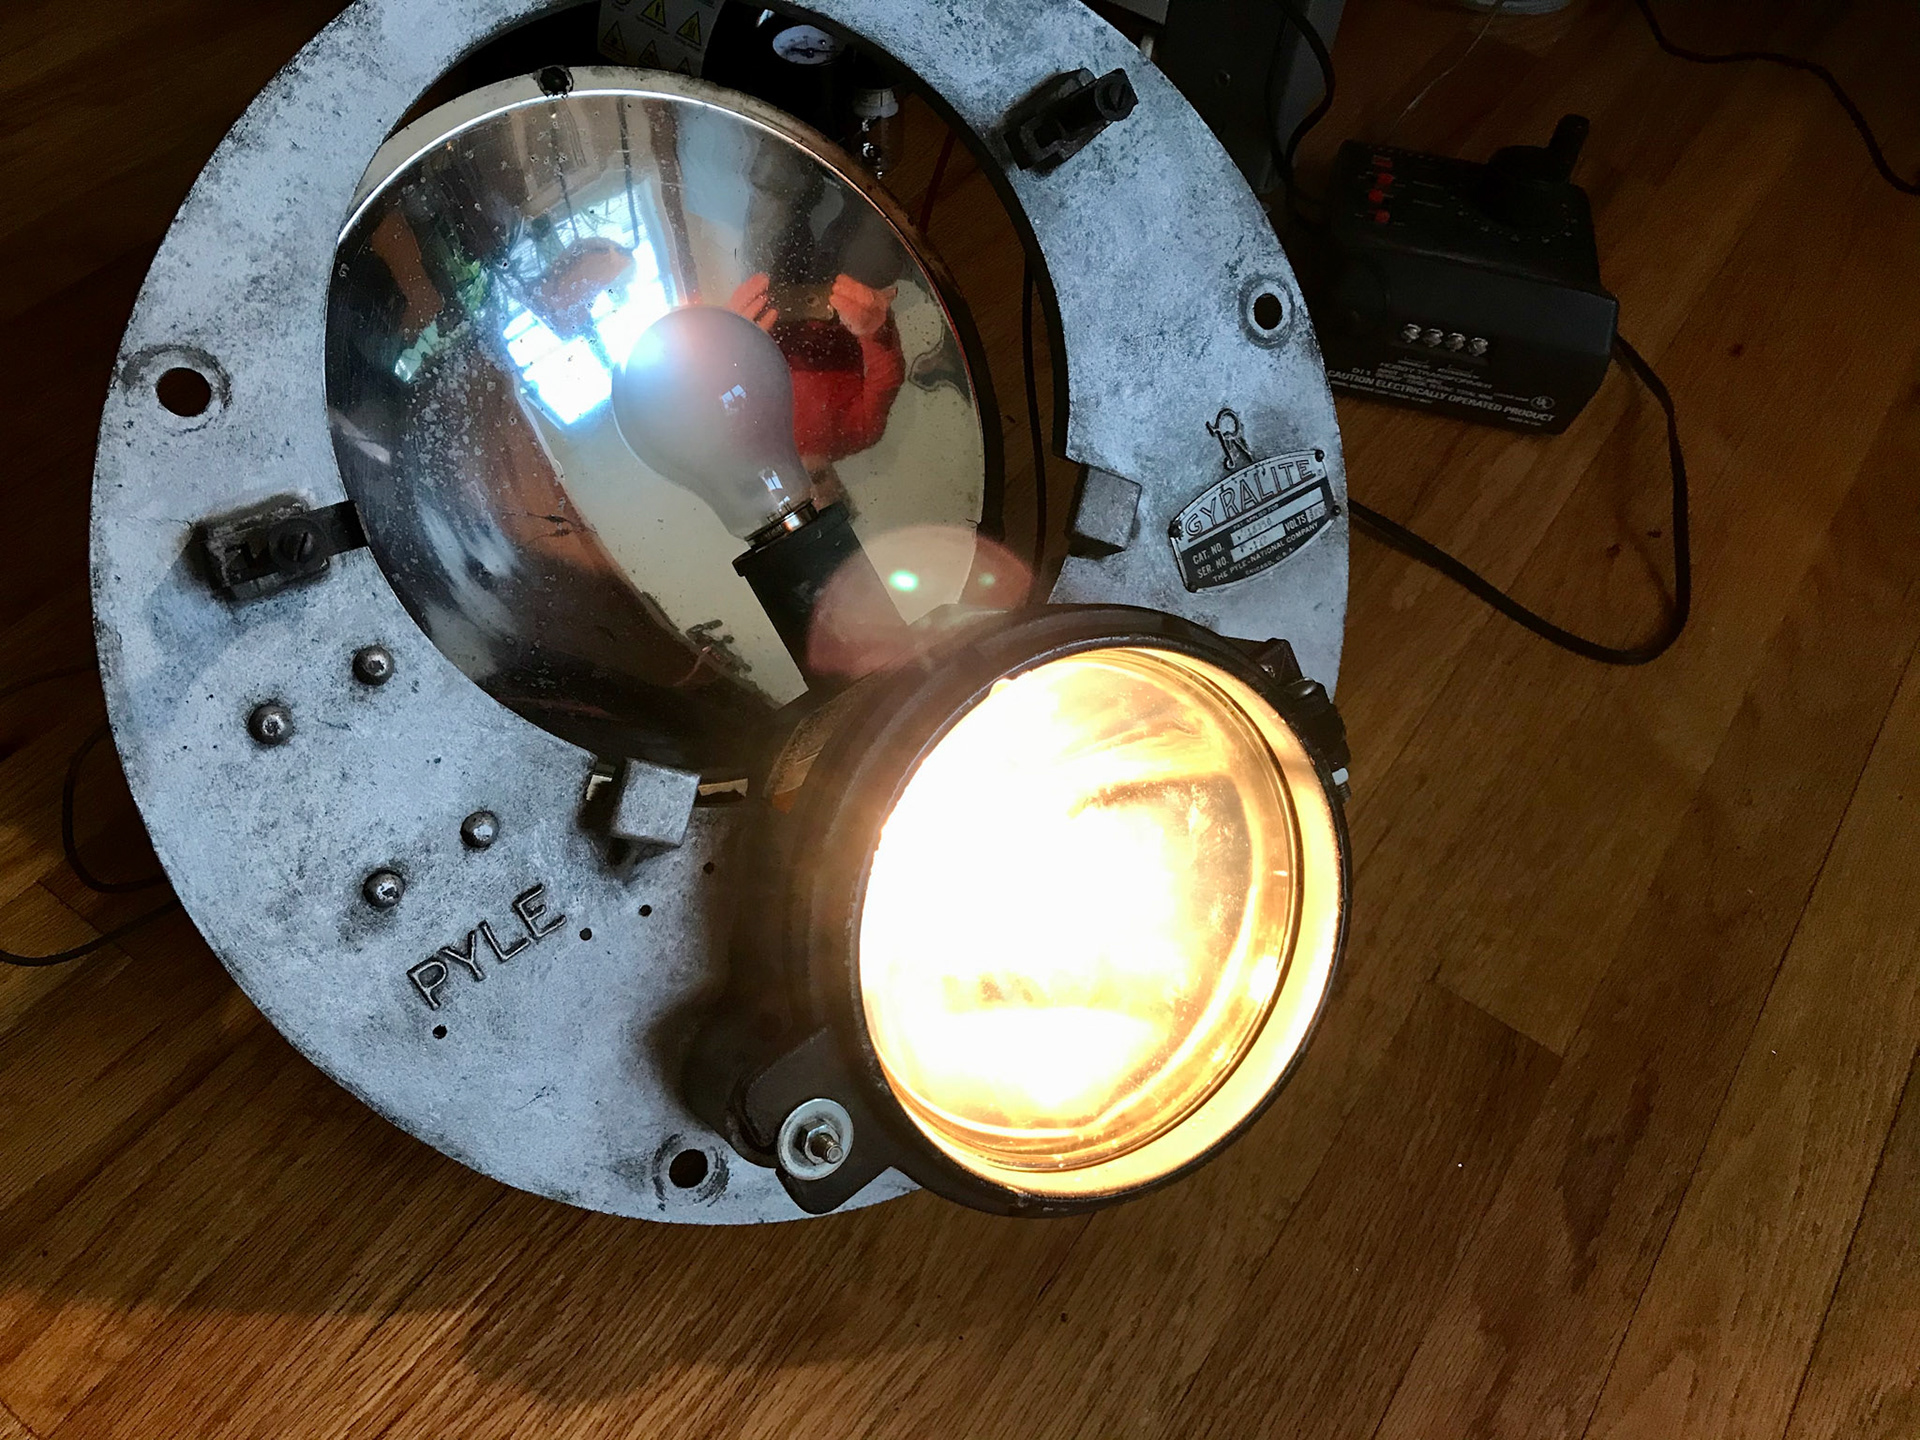
Headlight on

Red light on
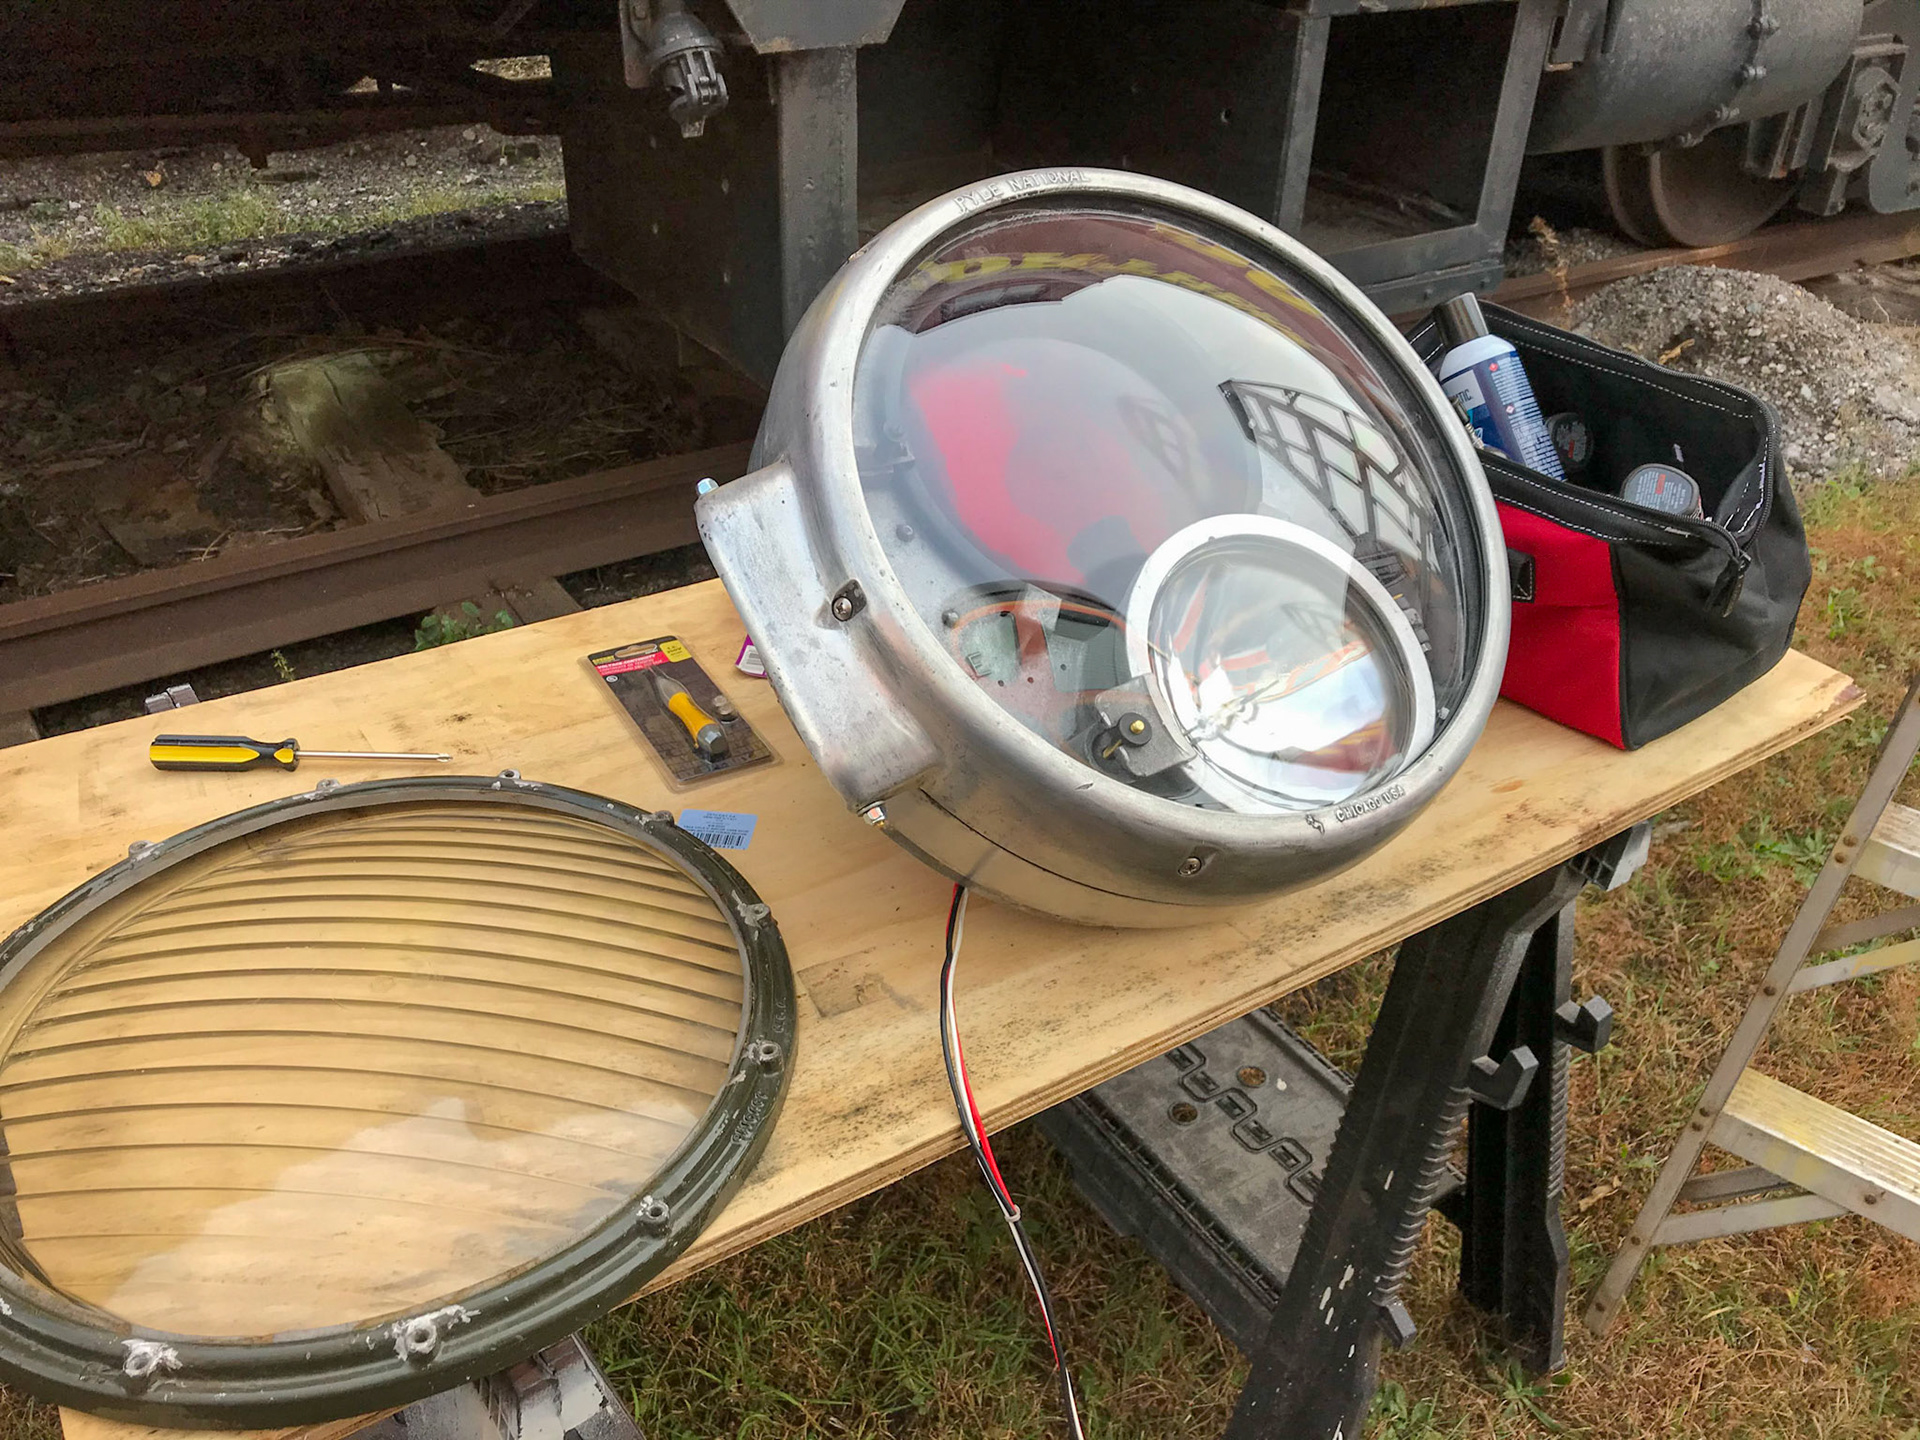
Assembled unit in housing
Headlight clearance is tight!
The bulb for the red light is a standard looking lightbulb, but rated at 32 volts. The headlight bulb is a standard parabolic PAR-56 sealed beam 32 volt locomotive/automotive model made by GE.
The reflector dish is mounted to the motor in an off-axis position, causing it to "wobble" in an oscillating pattern that reflects the light beam through the red lens.
The functions of the Gyralite are controlled by a relay that ensures that the headlight and rotating red beacon functions operate independently, and allow for activation from any of the three control switches throughout the car.
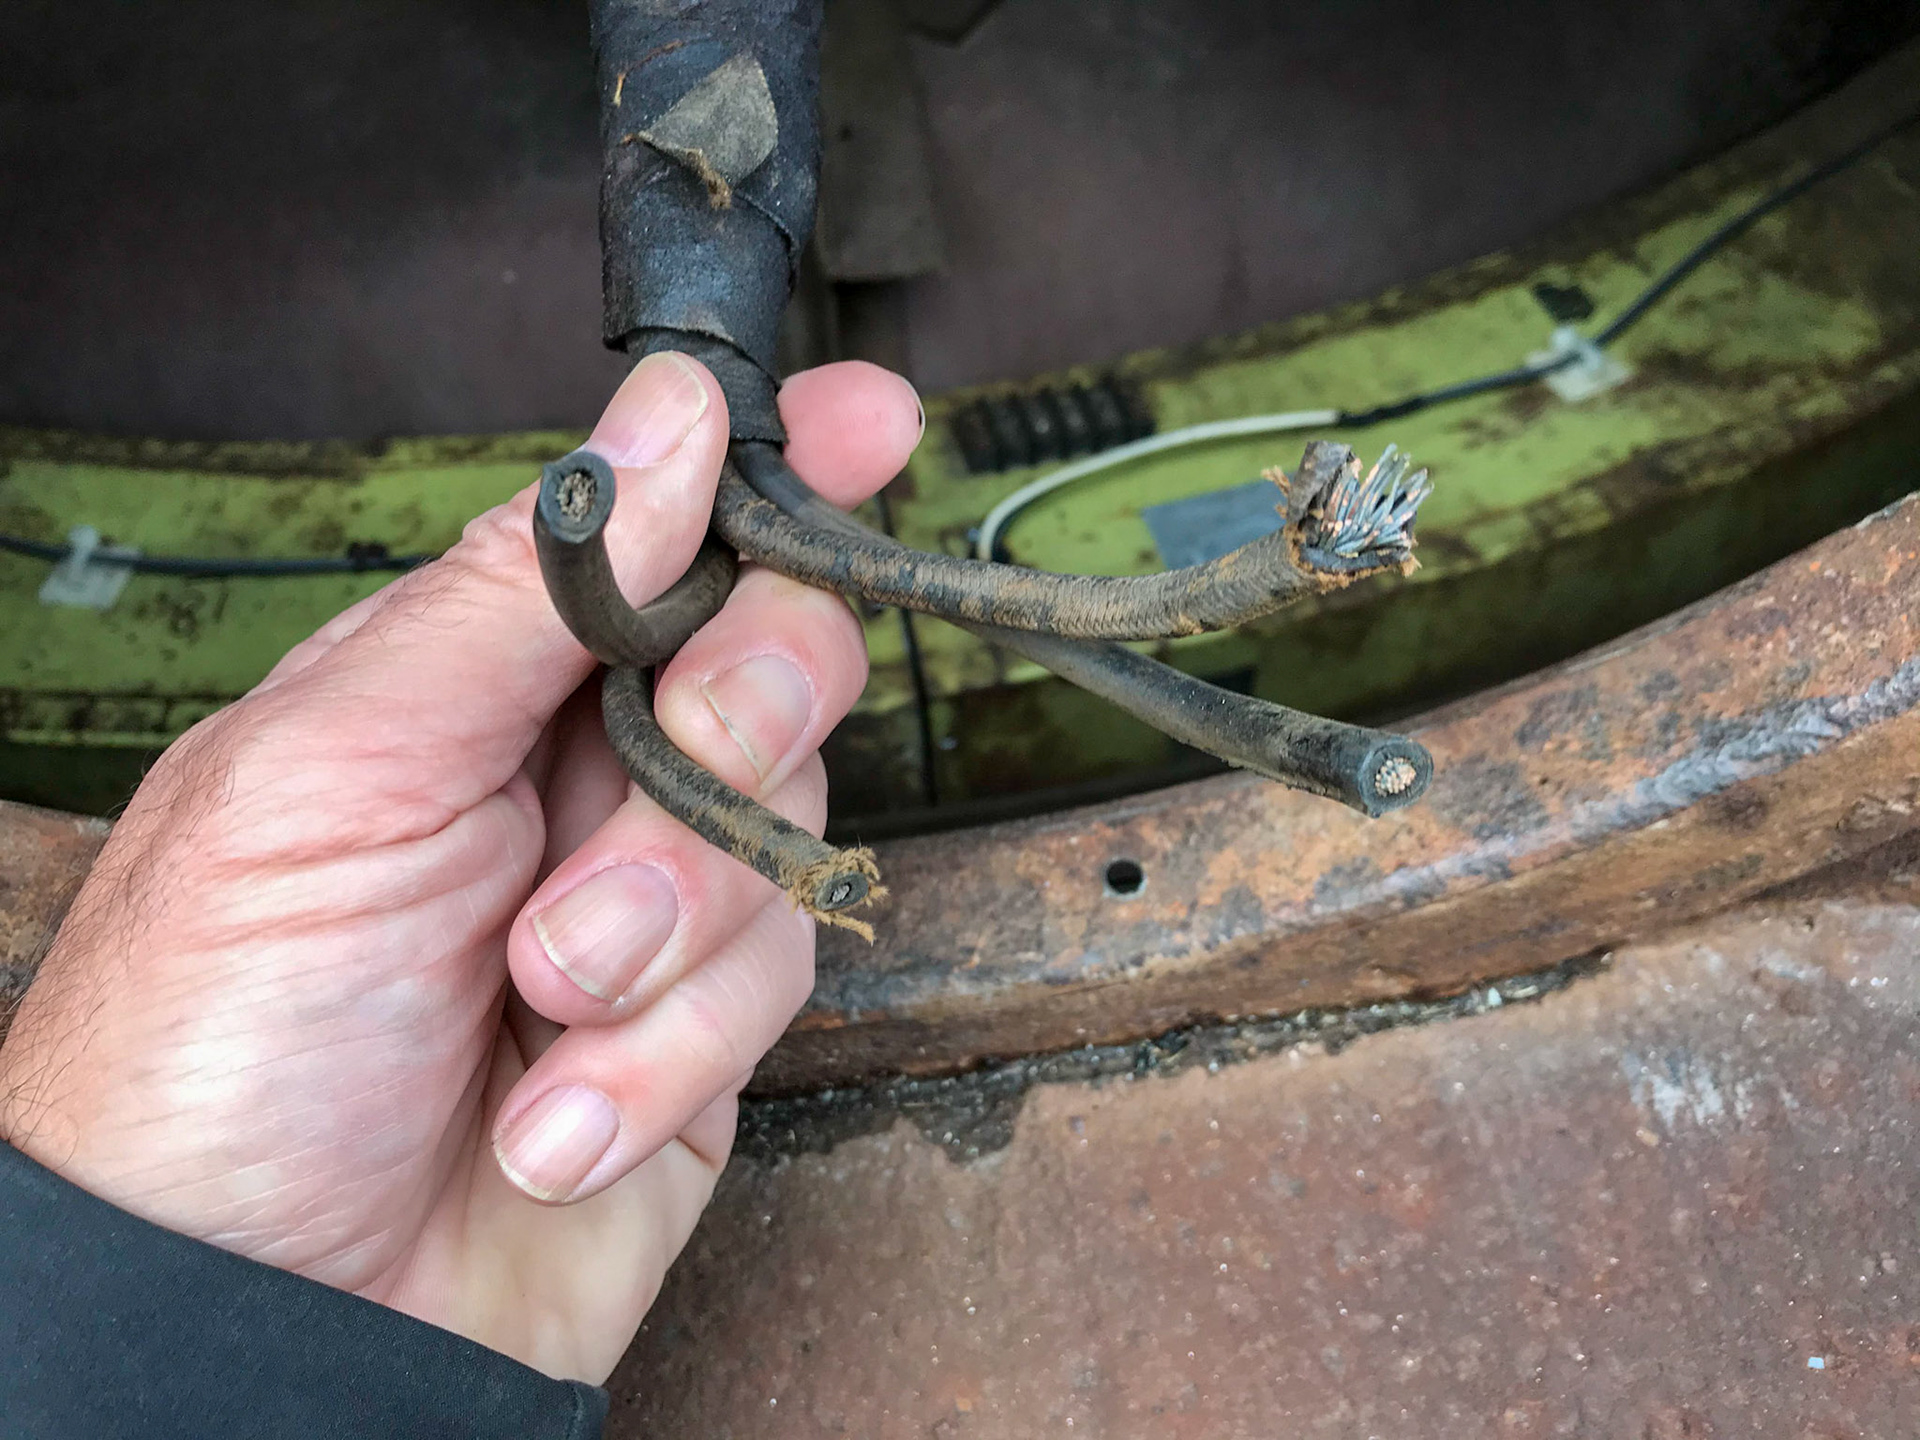
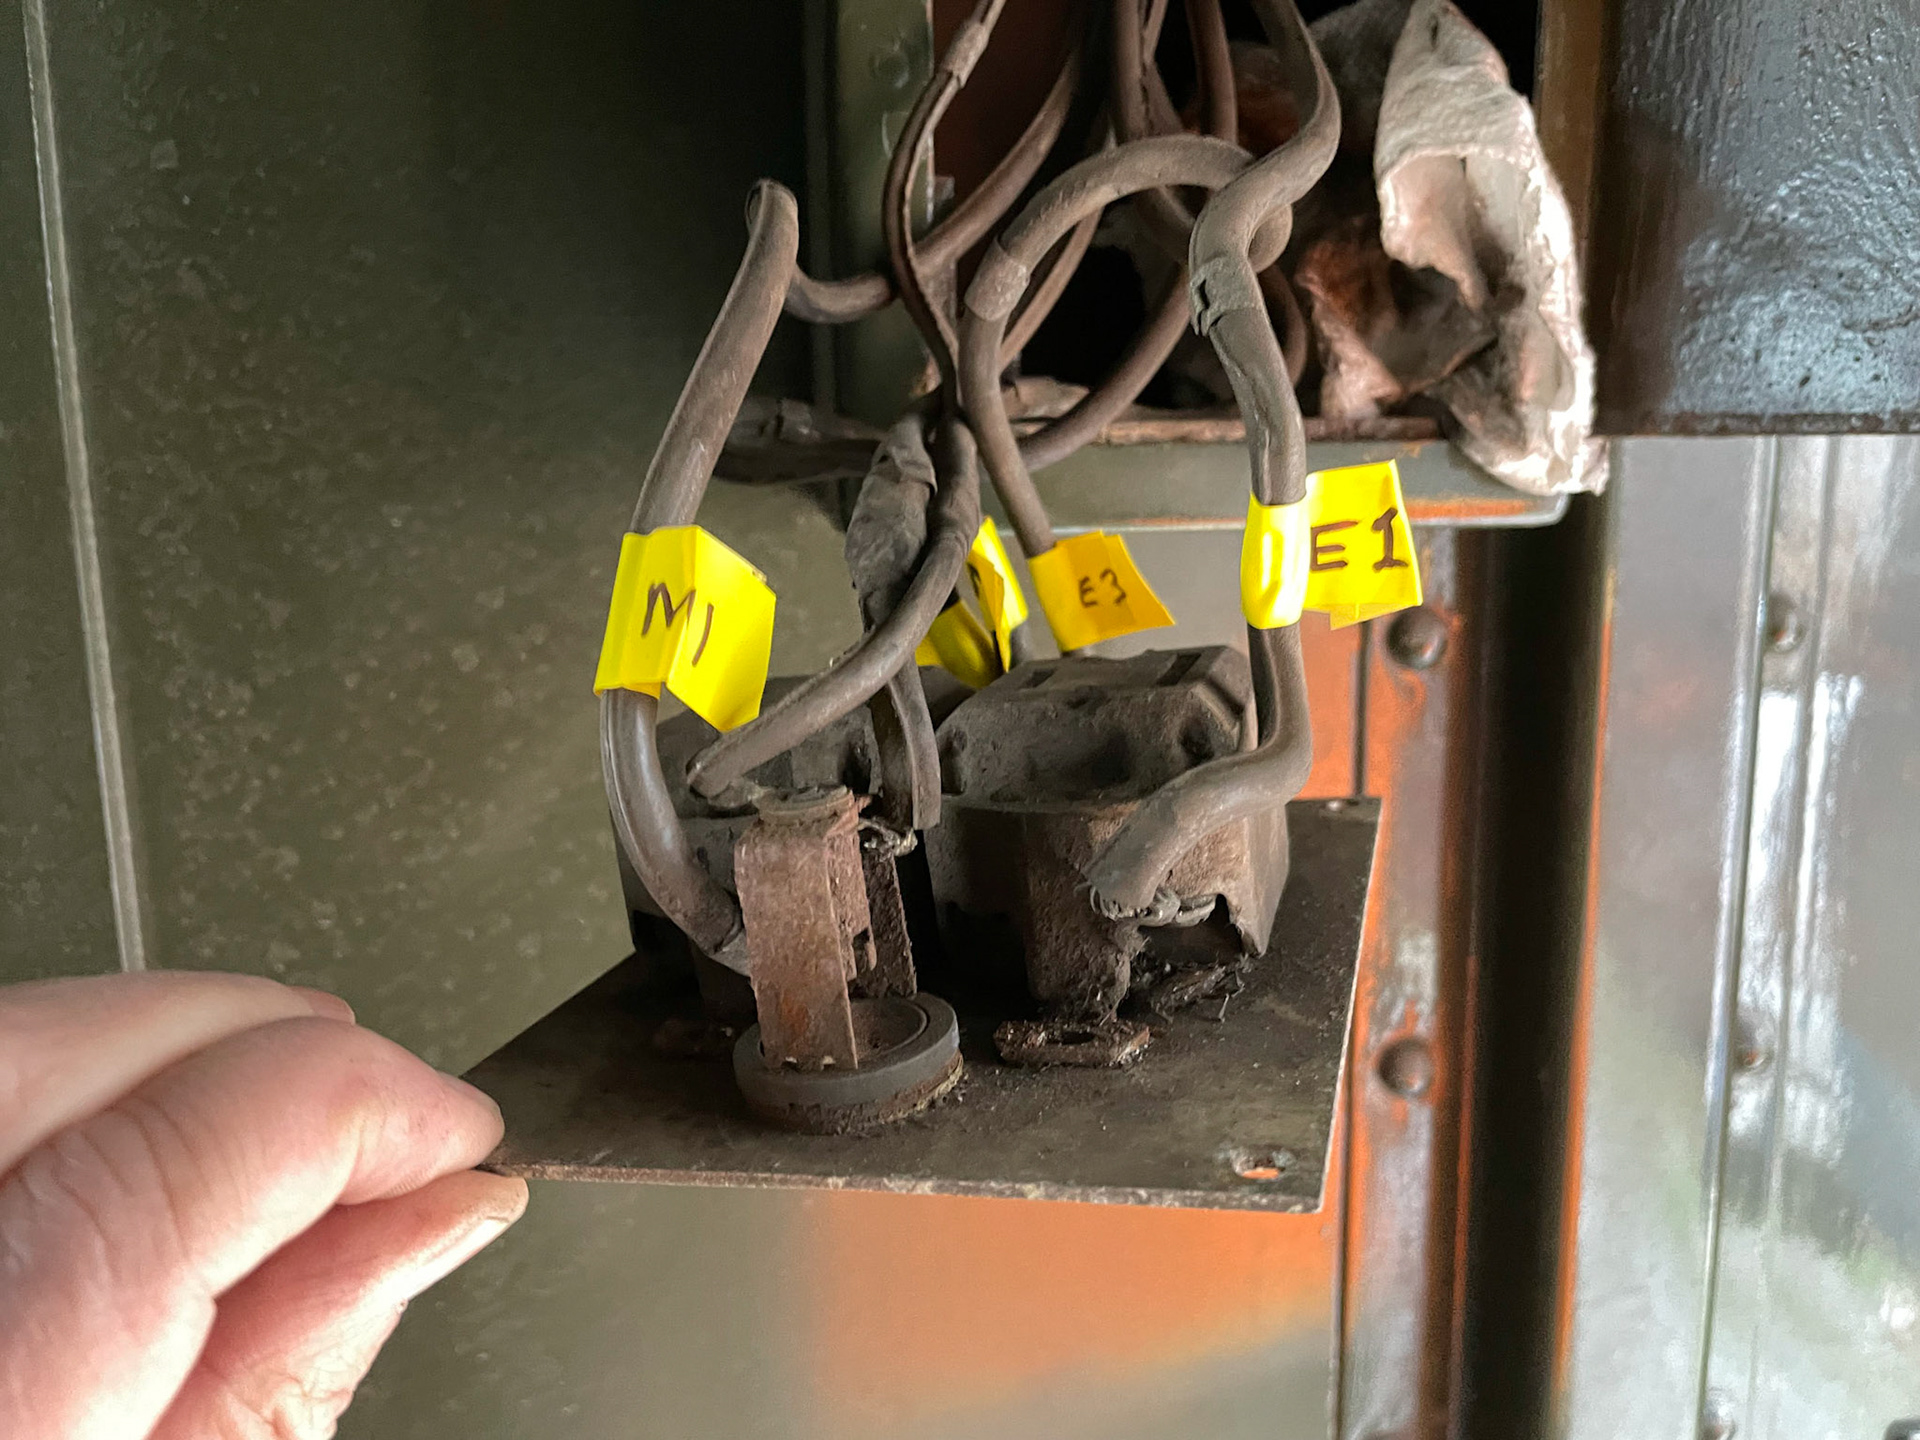
After restoration, the Gyralite mechanism was installed in its roof housing, but then the quest to figure out how the unit was wired through the car began. We weren't sure if the old wires within the car were still intact, and if they were, how they hooked up to and controlled the Gyralite. The wire connections in the roof consisted of three 10# wires and one 14# wire, but it was a mystery as to what went where, and how to supply the 32v D.C. needed to run the thing. Luckily, Ben had the ACF drawing for the wire conduits for reference.
Ready for reinstallation
Three 10# and one 14# wires for operation
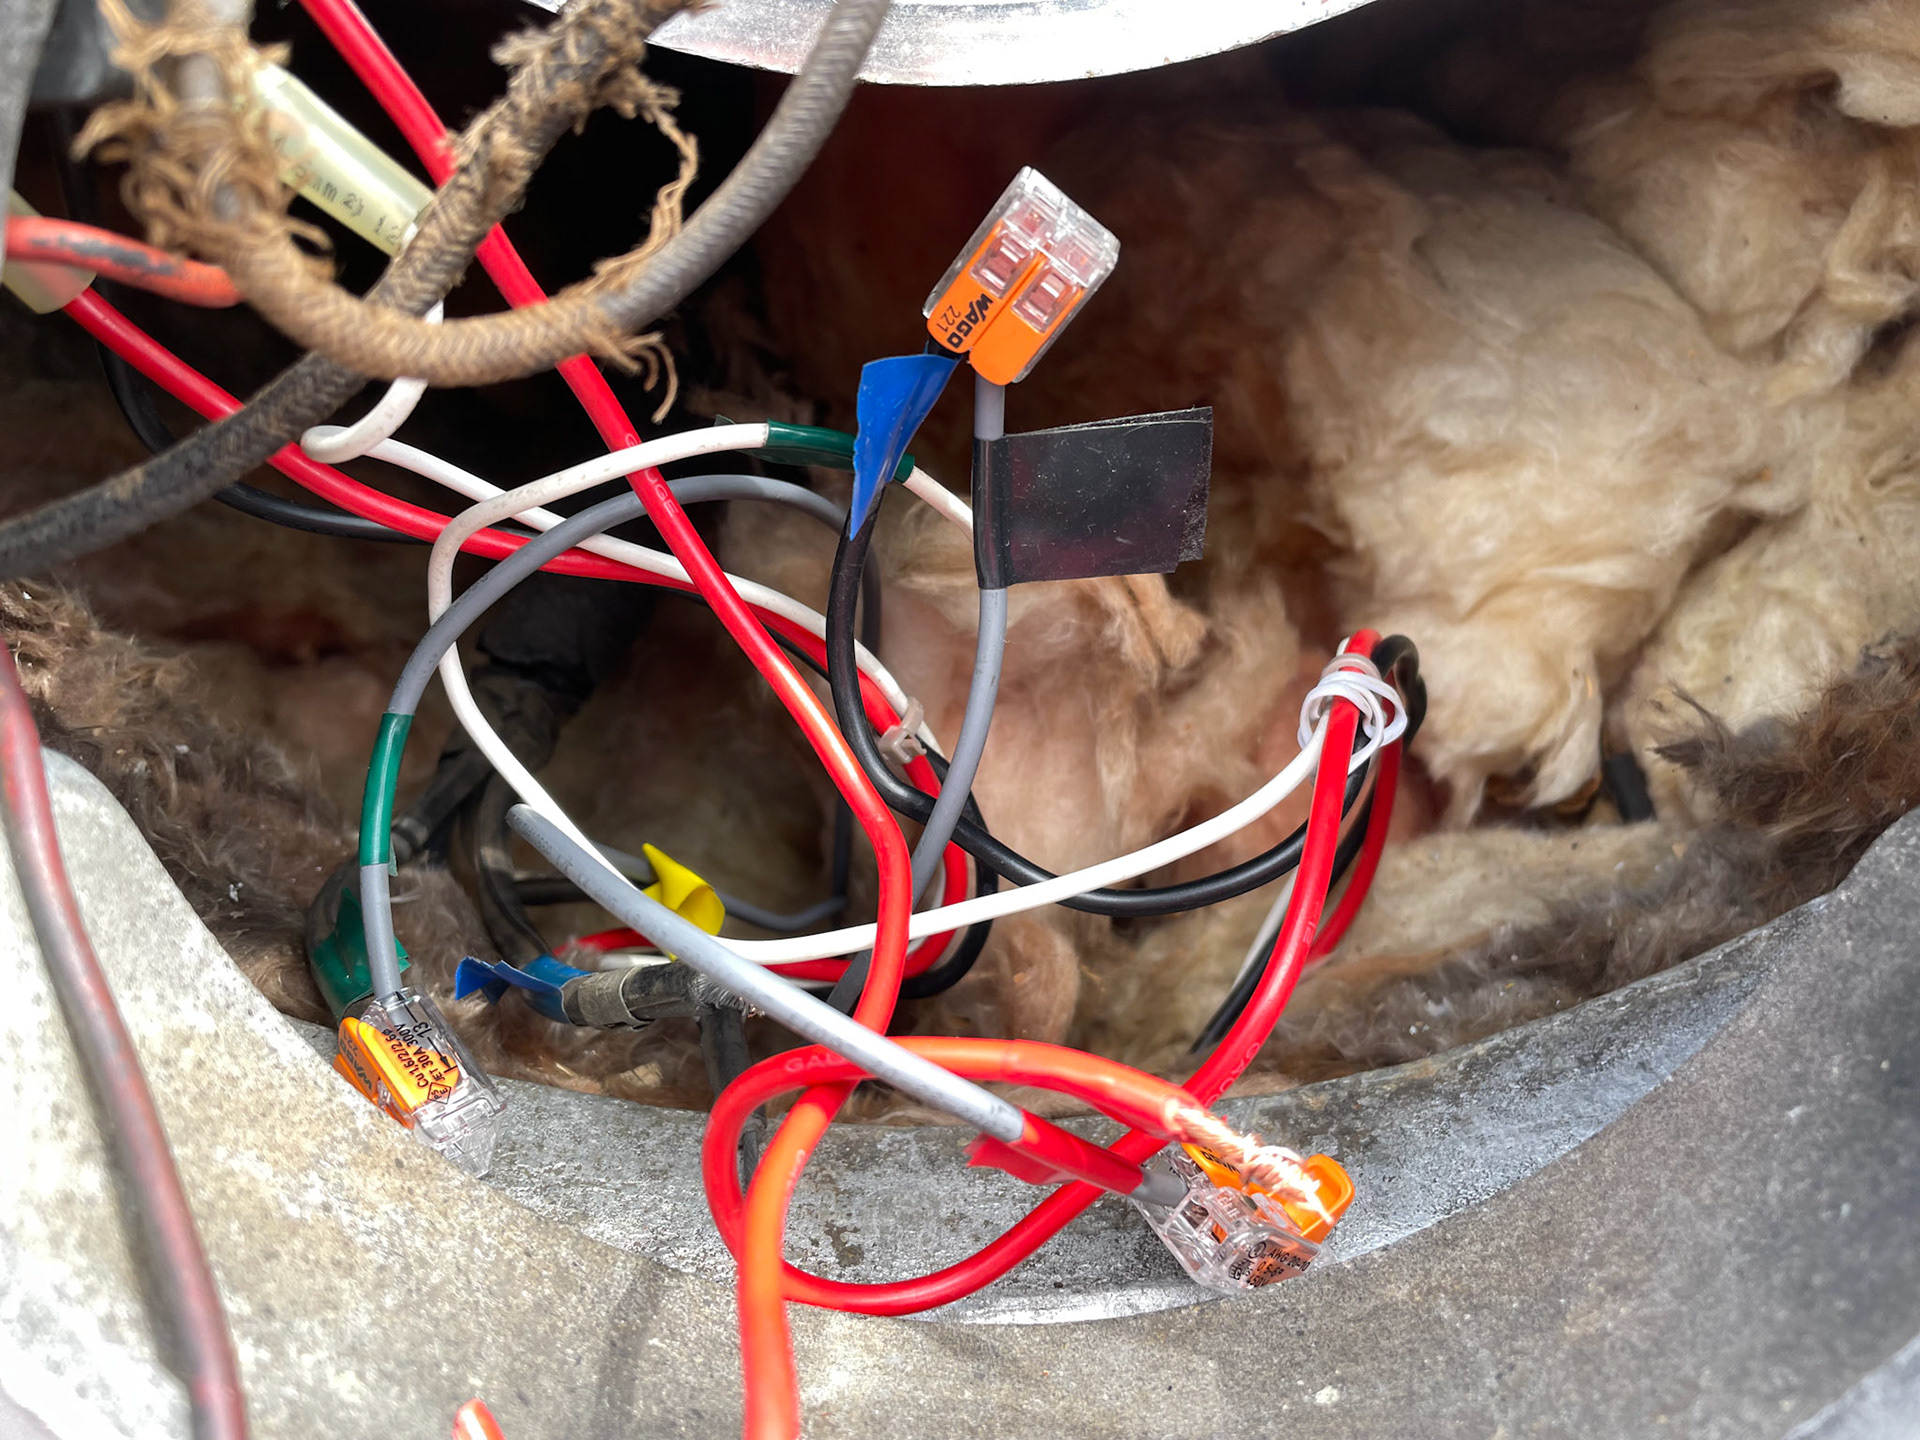
Wago terminals used
Ready to go...
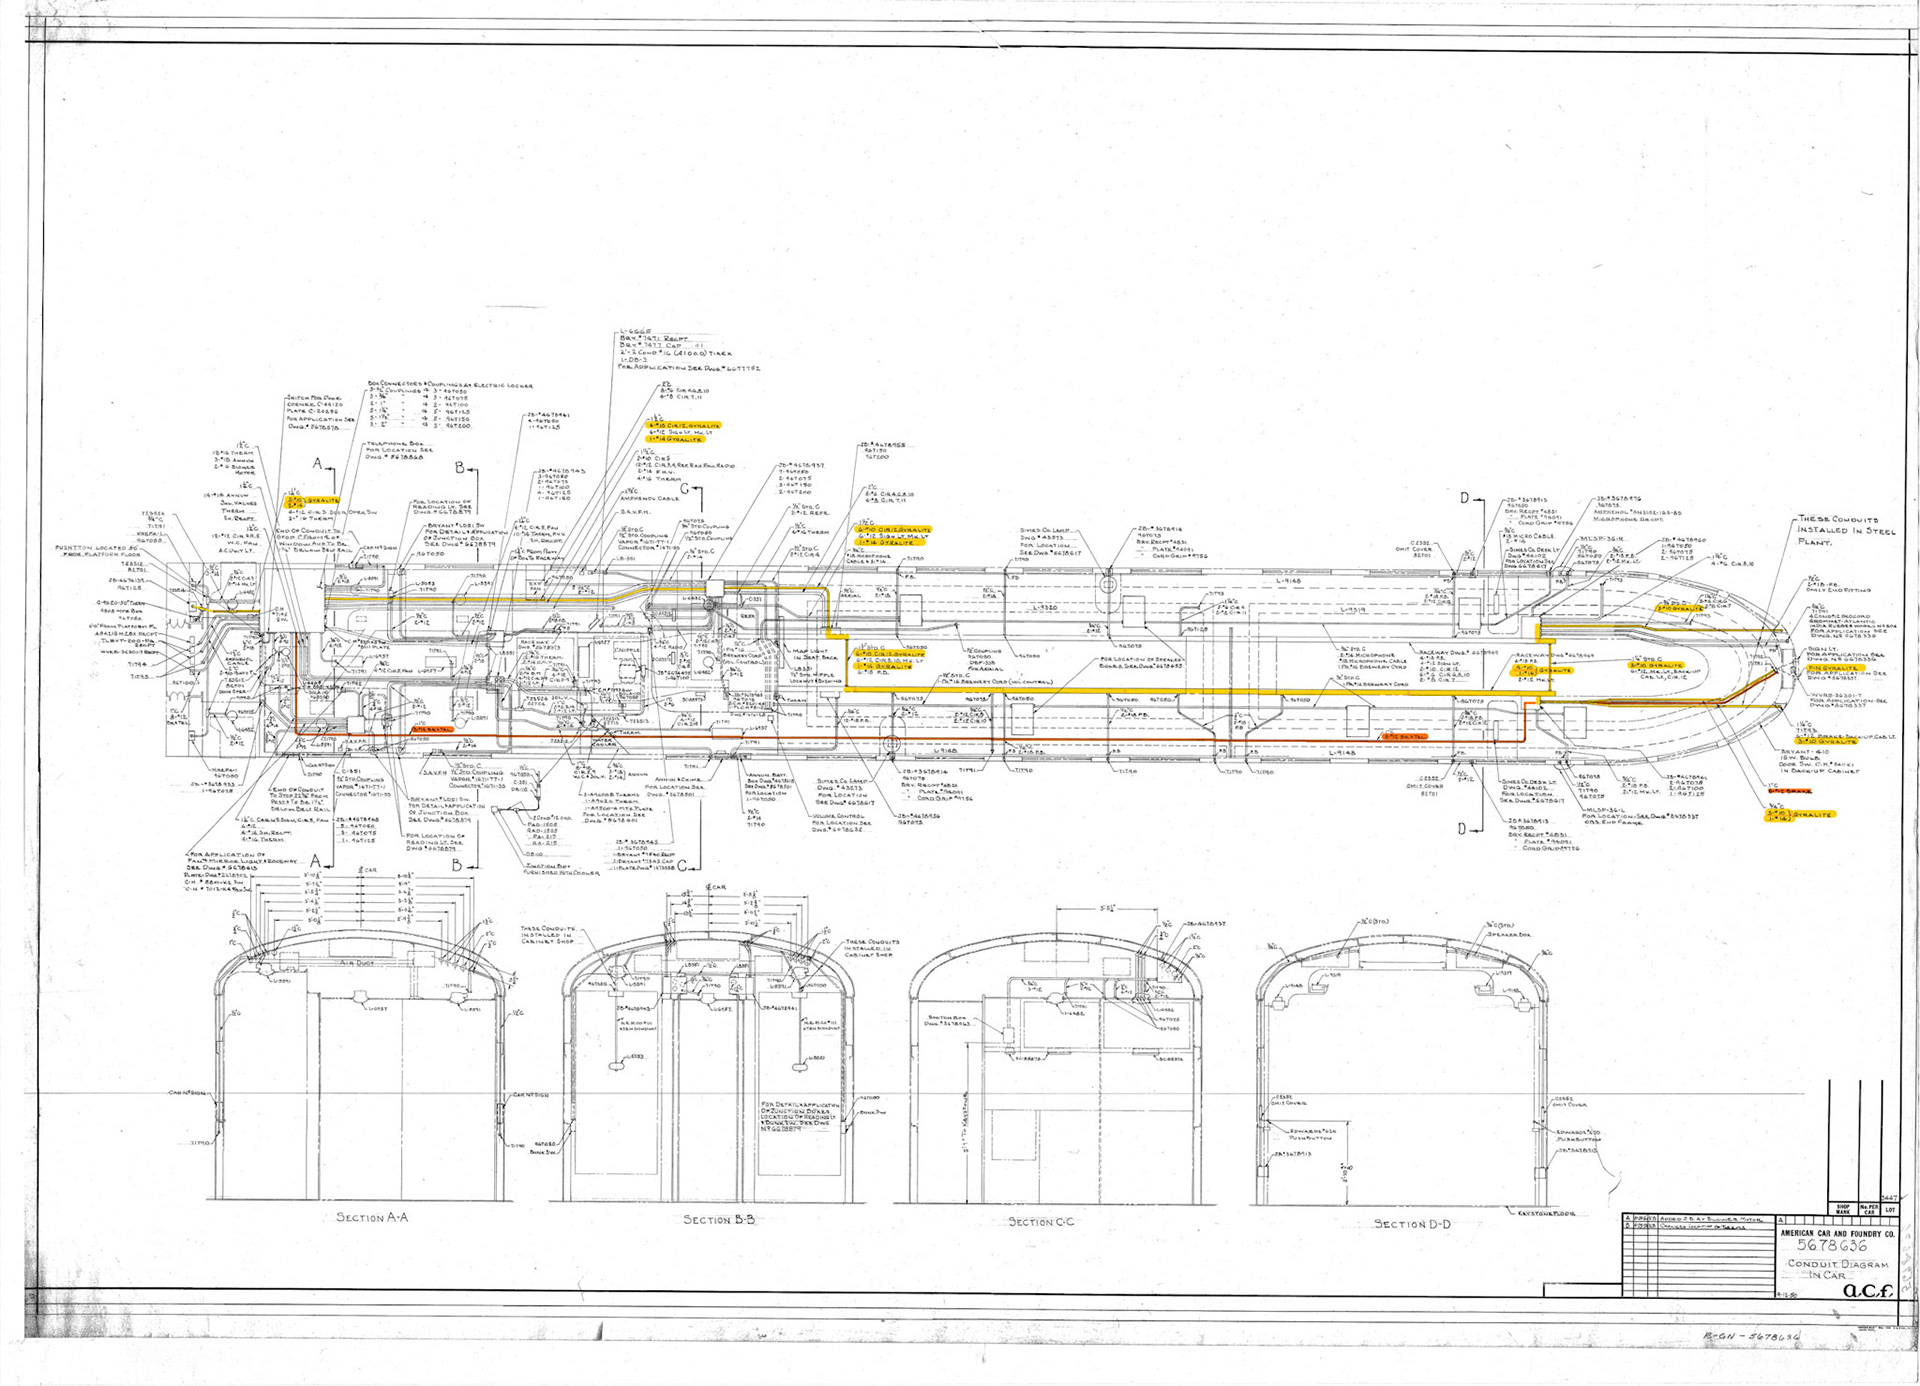
ACF blueprint for ceiling conduit layout
Although we had the ACF conduit drawing, the wires had to be manually traced throughout the car since we had no idea which wire went where. The four control inputs for the system were the master and emergency on/off switch in the vestibule, the speed sensor relays in the electrical cabinet, the selector switch in the conductor's control cabinet at the rear of the lounge, and the exterior emergency switch next to the coupler on the outside rear of the car. The good news was that all of the wire runs were intact, but the power supply leads in the electrical cabinet had been severed. The exterior emergency switch at the rear of the car was badly corroded and had to be removed for replacement. John Blotnick installed a new 110v source for the power supply and helped trace the wiring.

My simplified version of the ACF blueprint
The switches in the vestibule and at the exterior rear of the car were "Emergency" switches whose function was to activate the red rotating beacon under any circumstances. They operated like a three-way switch common in homes for controlling remote light fixtures, so that activating either switch would activate the Gyralite if it was not operating, and would deactivate it if it was on.
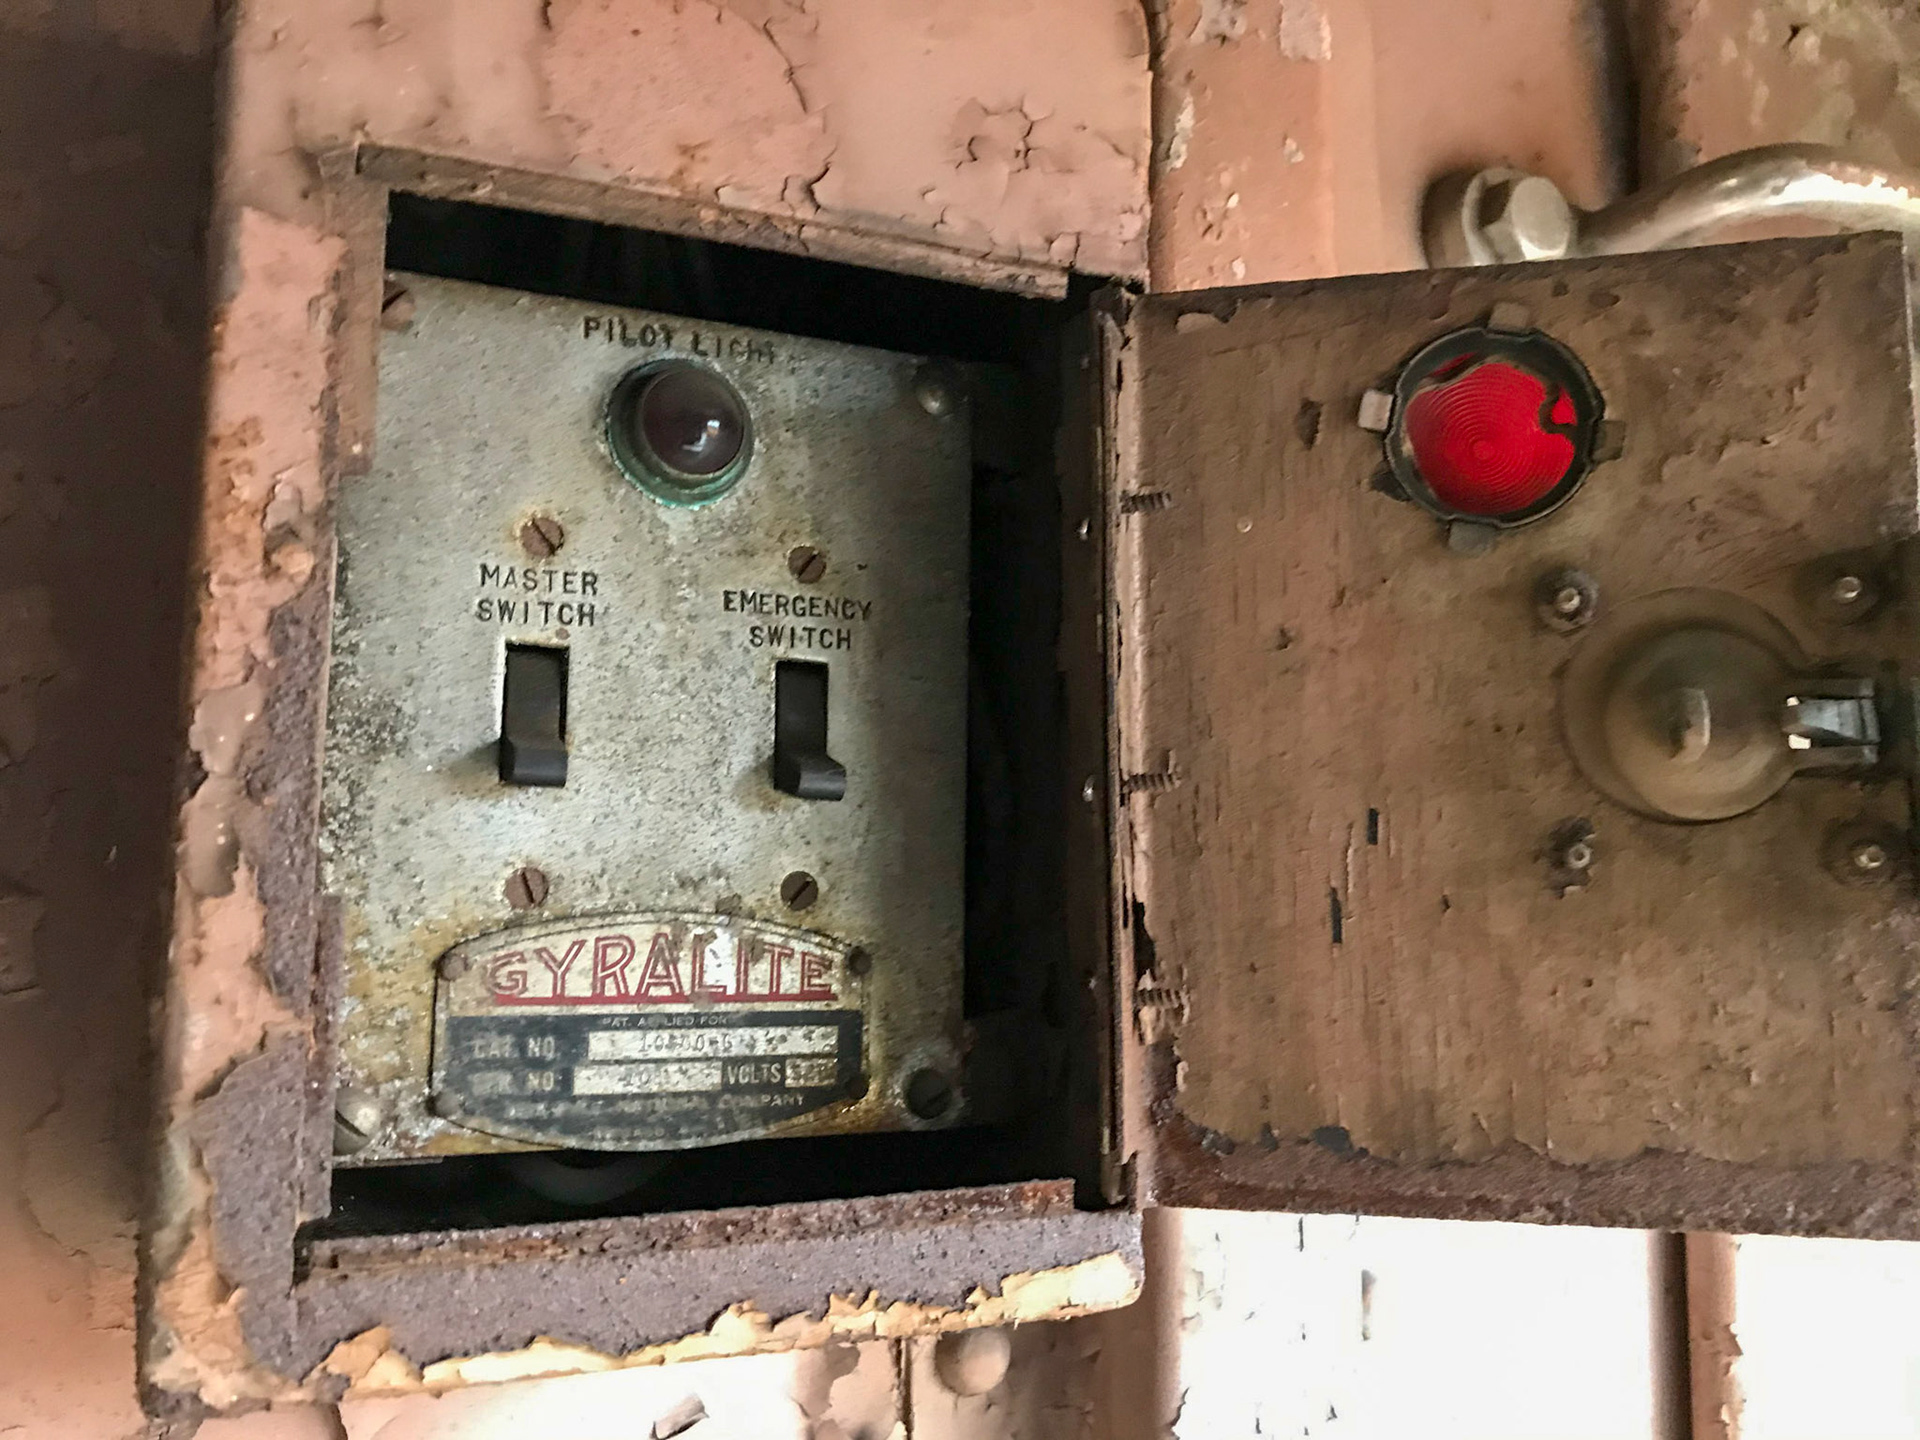
Brakeman's control switches in the vestibule
Inside the switch panel
Emergency switch is inside a weatherproof enclosure with plunger actuator
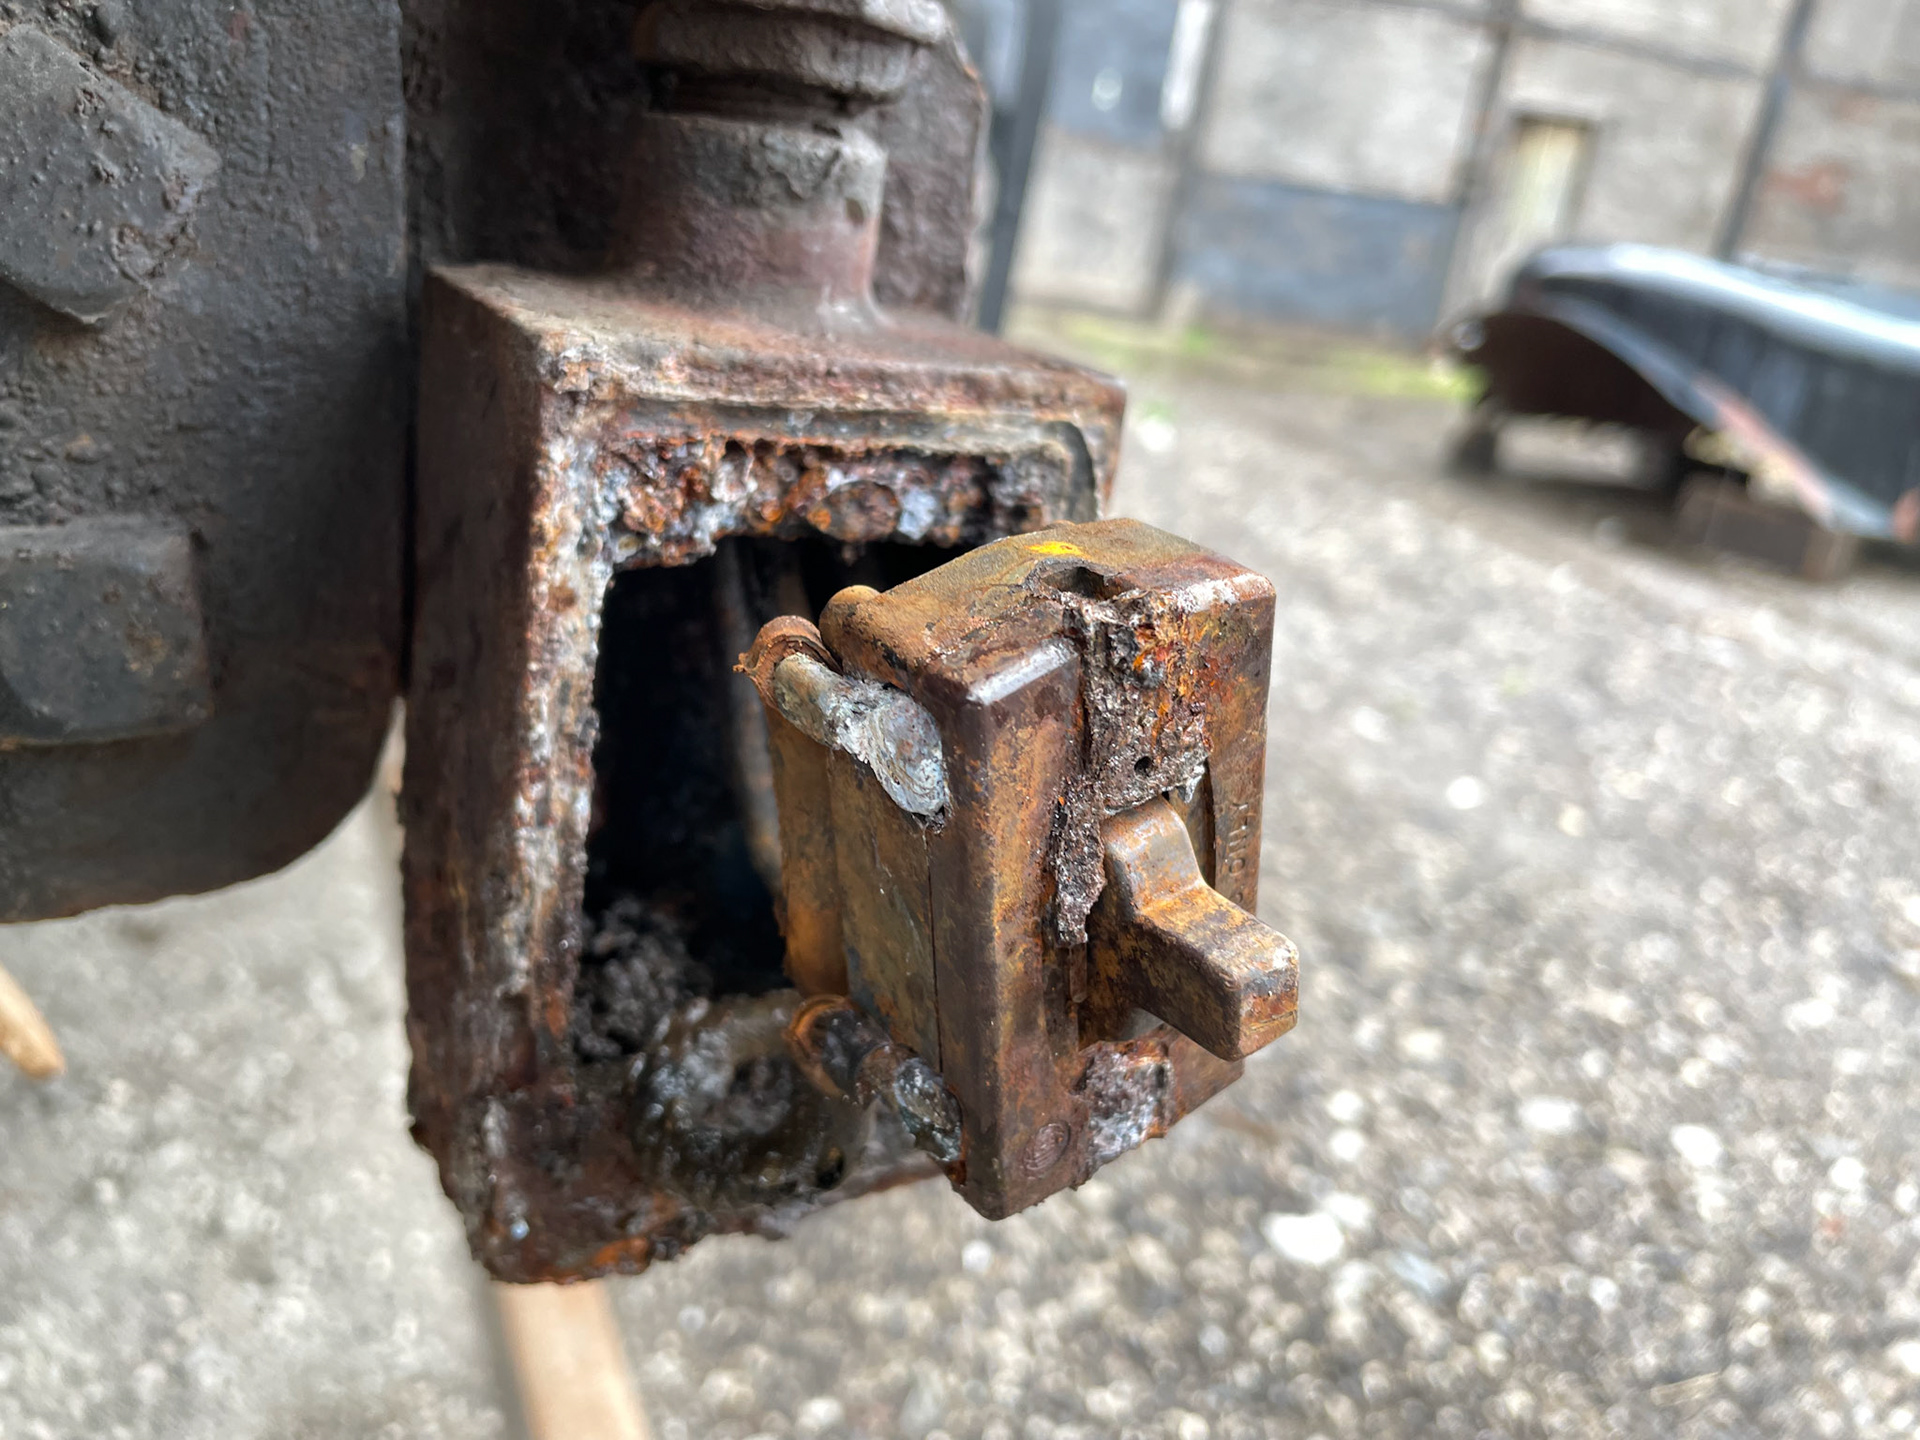
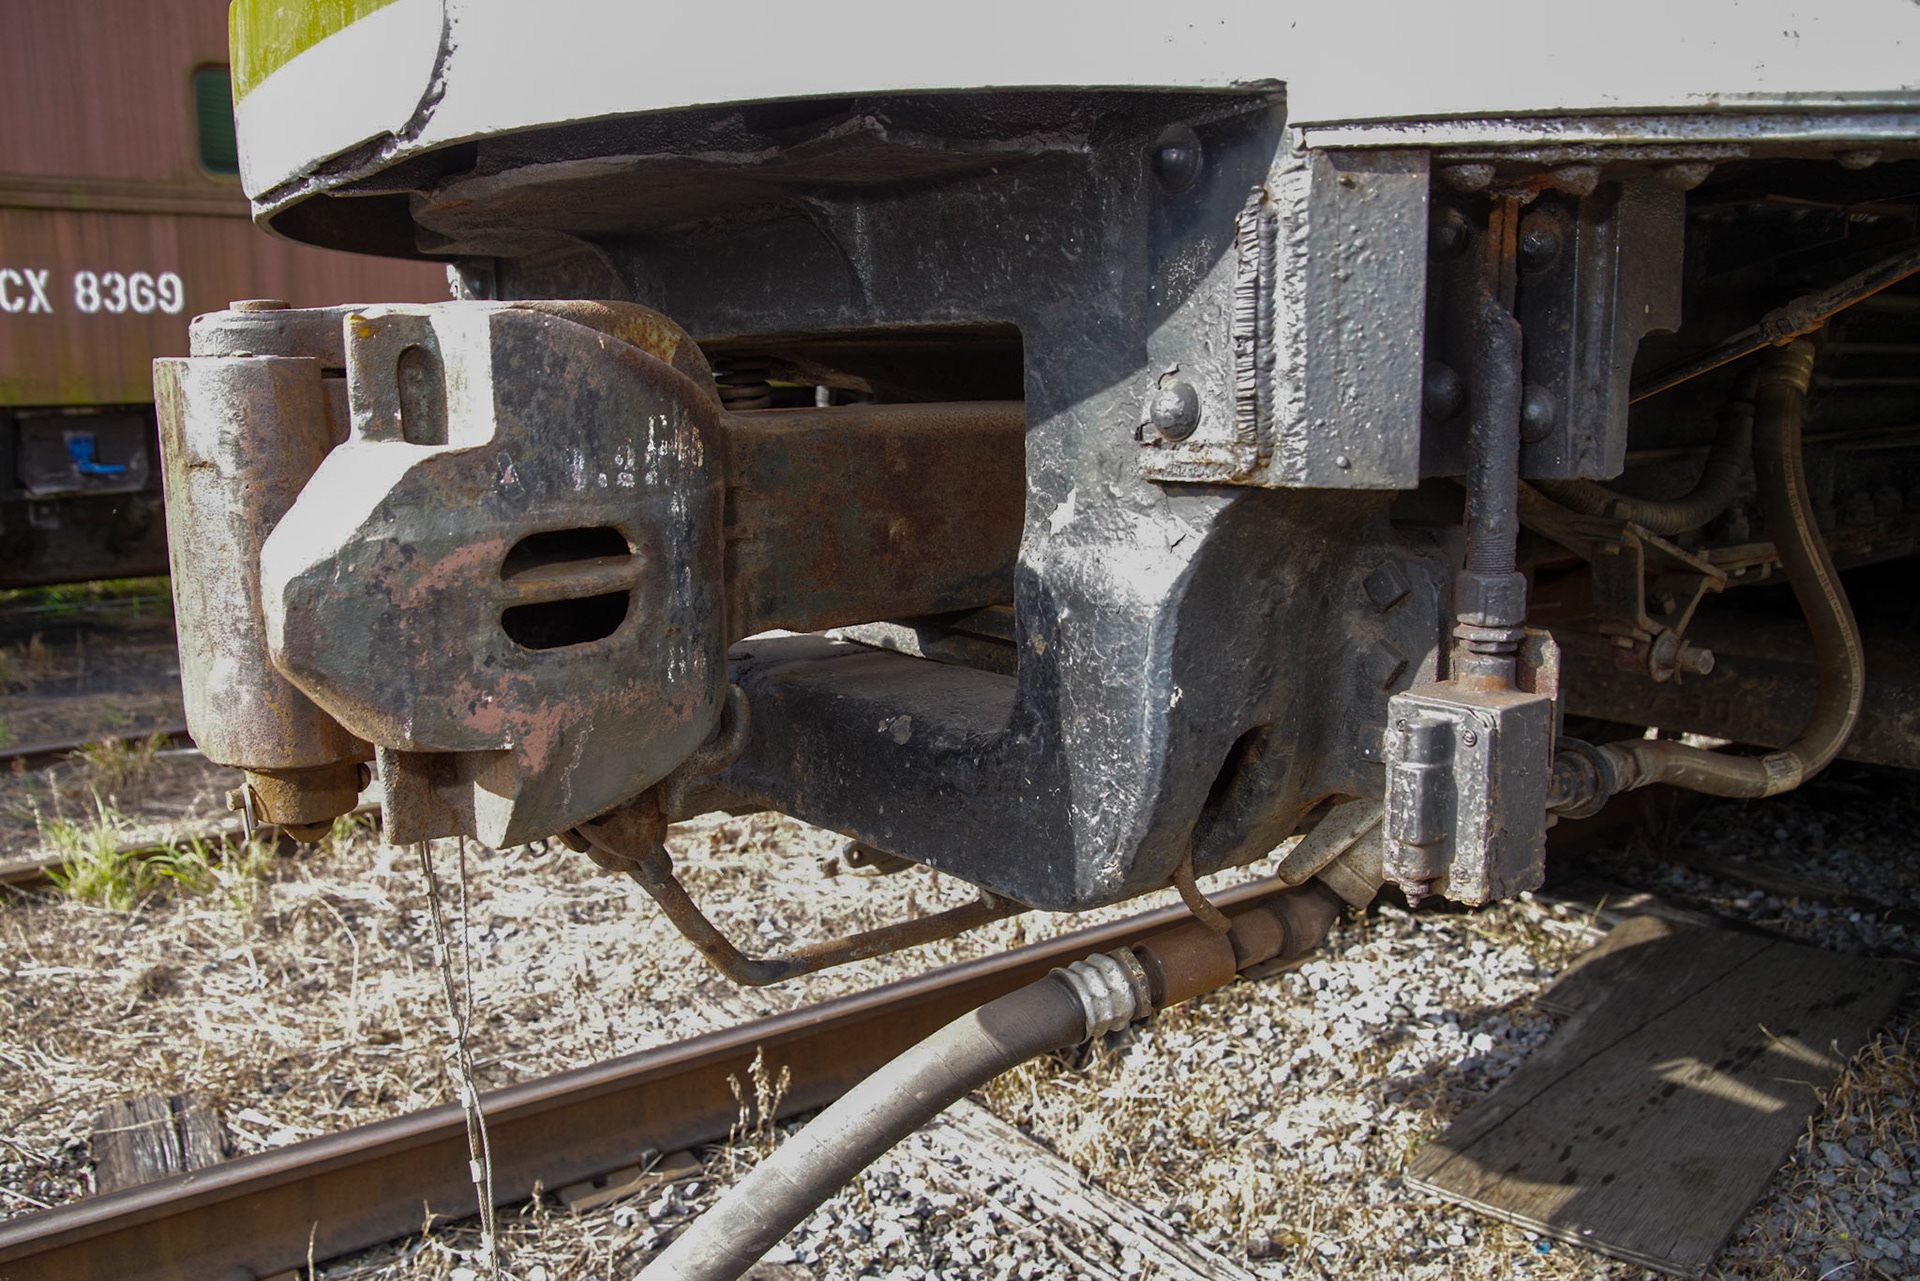
Emergency activation switch outside at the rear of the car
Weatherproof plunger
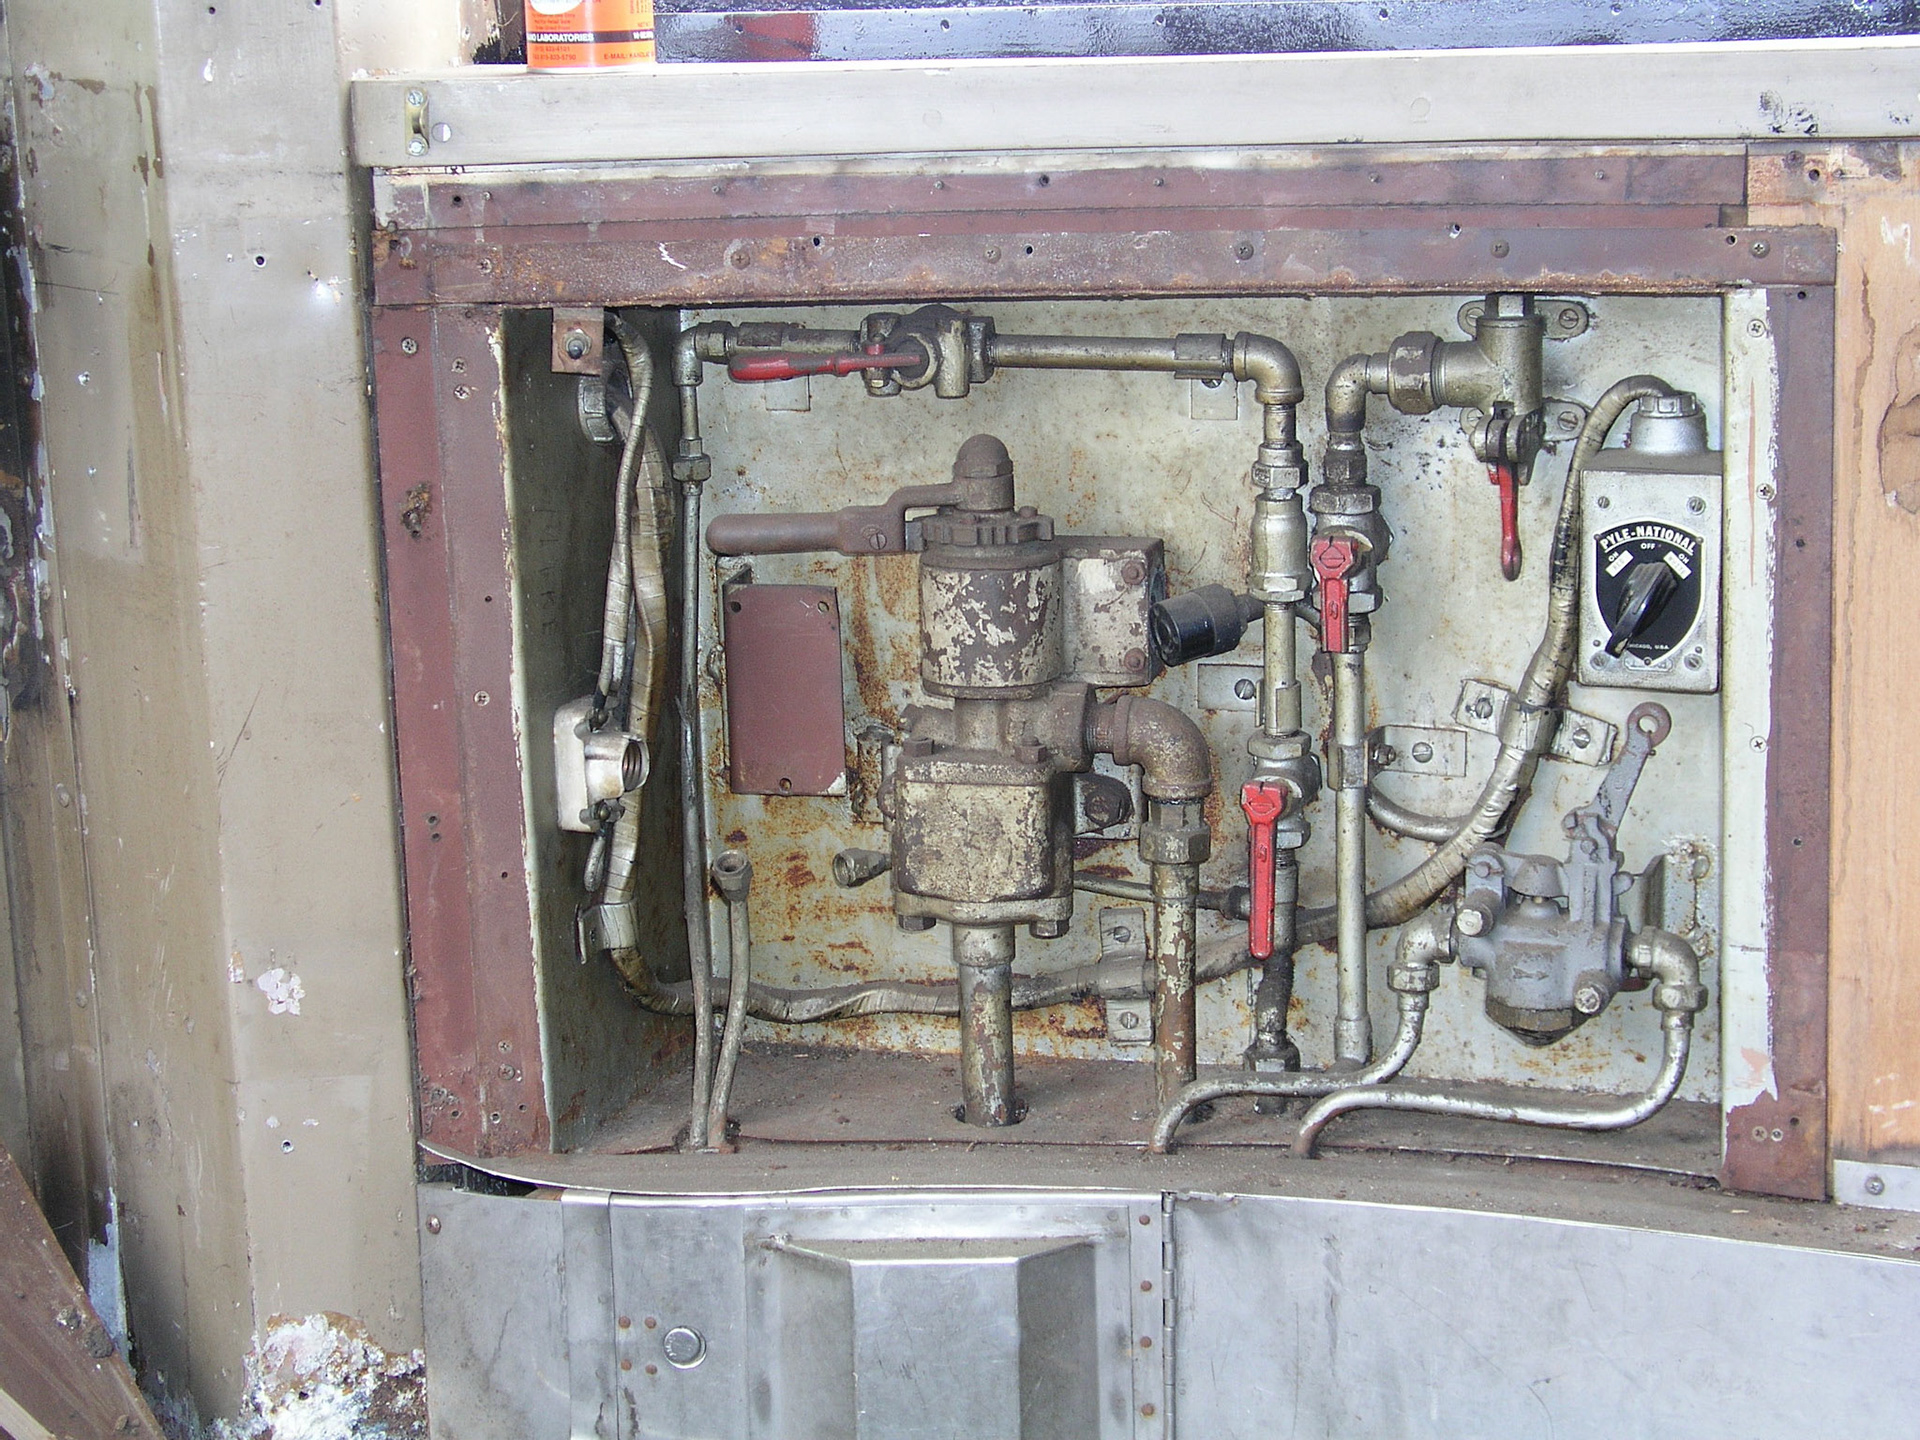
The main electrical cabinet contained the circuit breakers, relays and mechanism that controlled the speed sensor that was set to shut off the Gyralite at speeds over 28 m.p.h. There was also a sensor that would activate the red light in the event of an emergency brake application.
Apparatus in the main electrical cabinet controlled the Gyralite's speed and brake sensors

Main fuses for the Gyralite in the main electrical cabinet
The back up control cabinet at the rear of the car contains all of the controls needed to perform a backup move under the conductor's control. There is a brake lever, horn actuator, bell actuator, train line signal and emergency brake valve in addition to the Gyralite selector switch. This switch would have been set to "White" to activate the headlight function of the Gyralite.
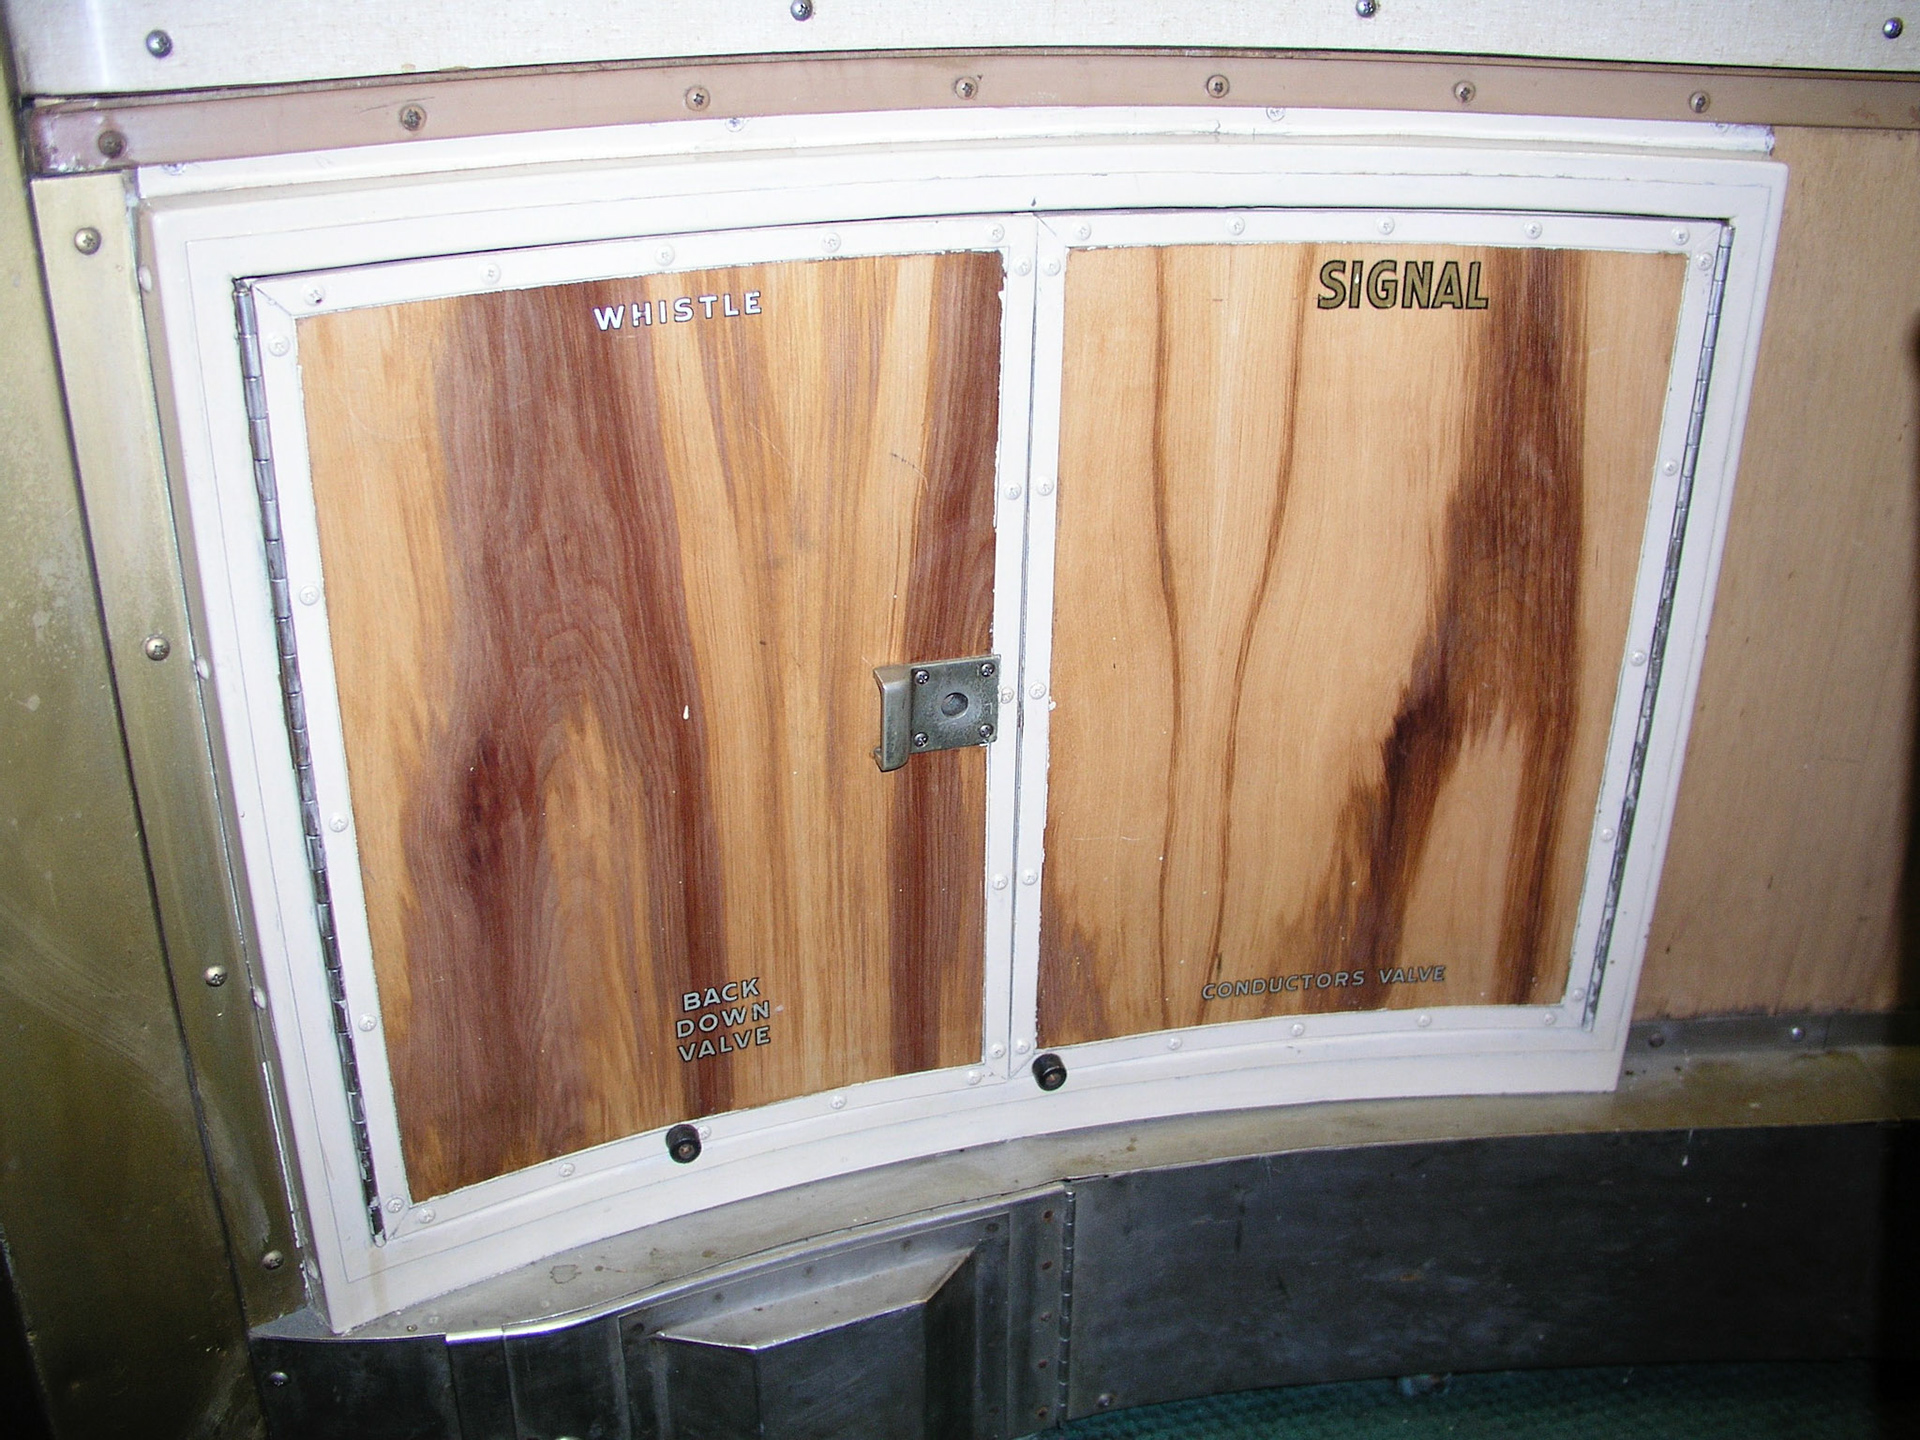
Conductor's cabinet
Gyralite selector switch is at upper right
This schematic shows the Gyralite components and their functions. When the selector switch is set to red, power is supplied to the motor, red light and pilot light in the vestibule switch panel. When set to white, only the headlight illuminates. Activating either of the emergency switches will activate the red light, even if the white headlight, or off position has been selected on the conductor's panel switch.
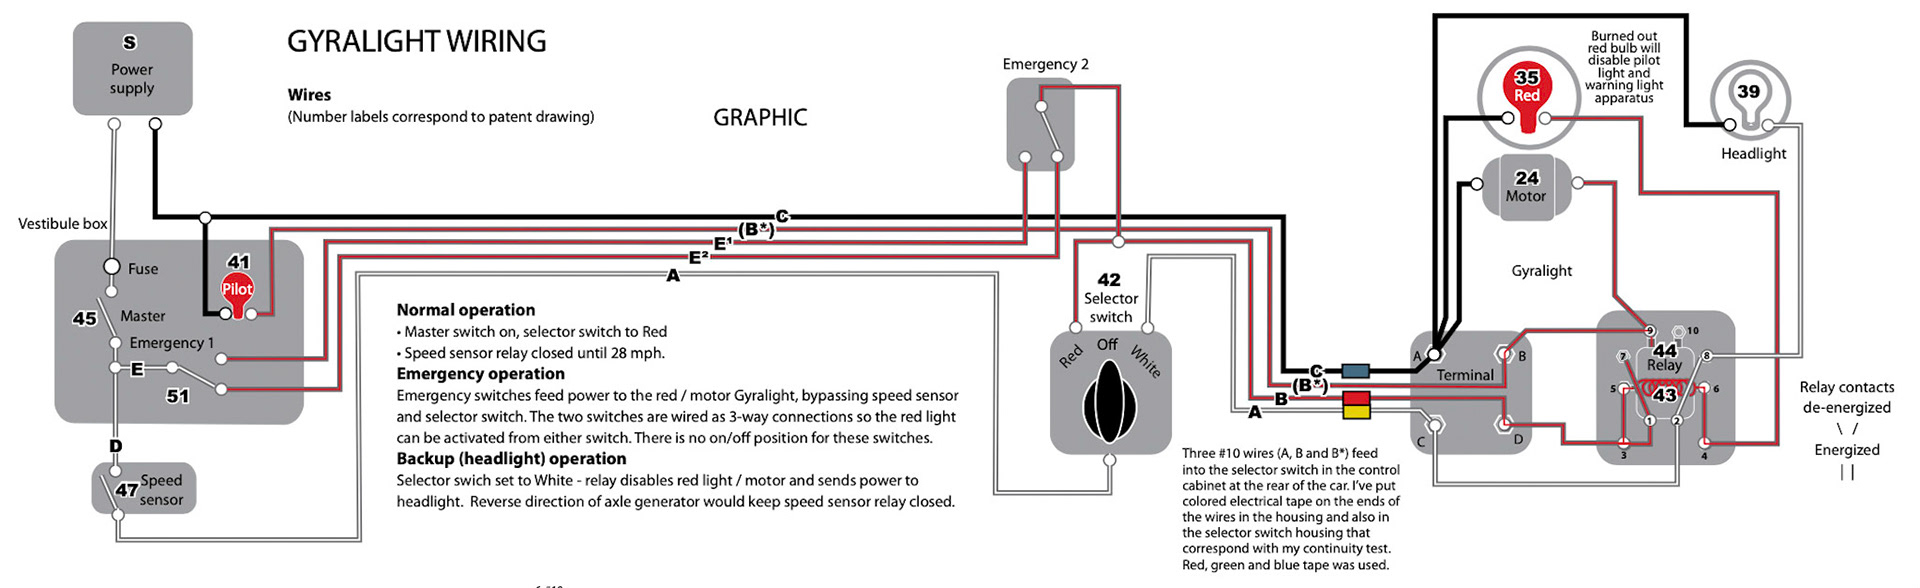
My simplified diagram of the wiring and components for the Gyralite operations
A 32-volt D.C. power supply was installed in the electrical cabinet and hooked up to the power leads and...it actually worked! Below are videos from Jan. 2022 tests.
In the video you can really see the pulsating effect the rotating beacon produces.
The instructions in this 1950 GN Trainmen's operating manual give some insight as to how the Gyralite functioned, and the rules governing its use...
The entire Trainmen's Instruction Book can be seen here https://www.gnarchive.com/trainmens_instr.html
Ben eventually found a defunct Pyle Gyralite on eBay that had the headlight retaining door bezel we needed, so the temporary GE piece was swapped out with the Pyle part.
The replacement headlight retainer ring and hinge were taken from this broken twin sealed beam Pyle Gyralite model.

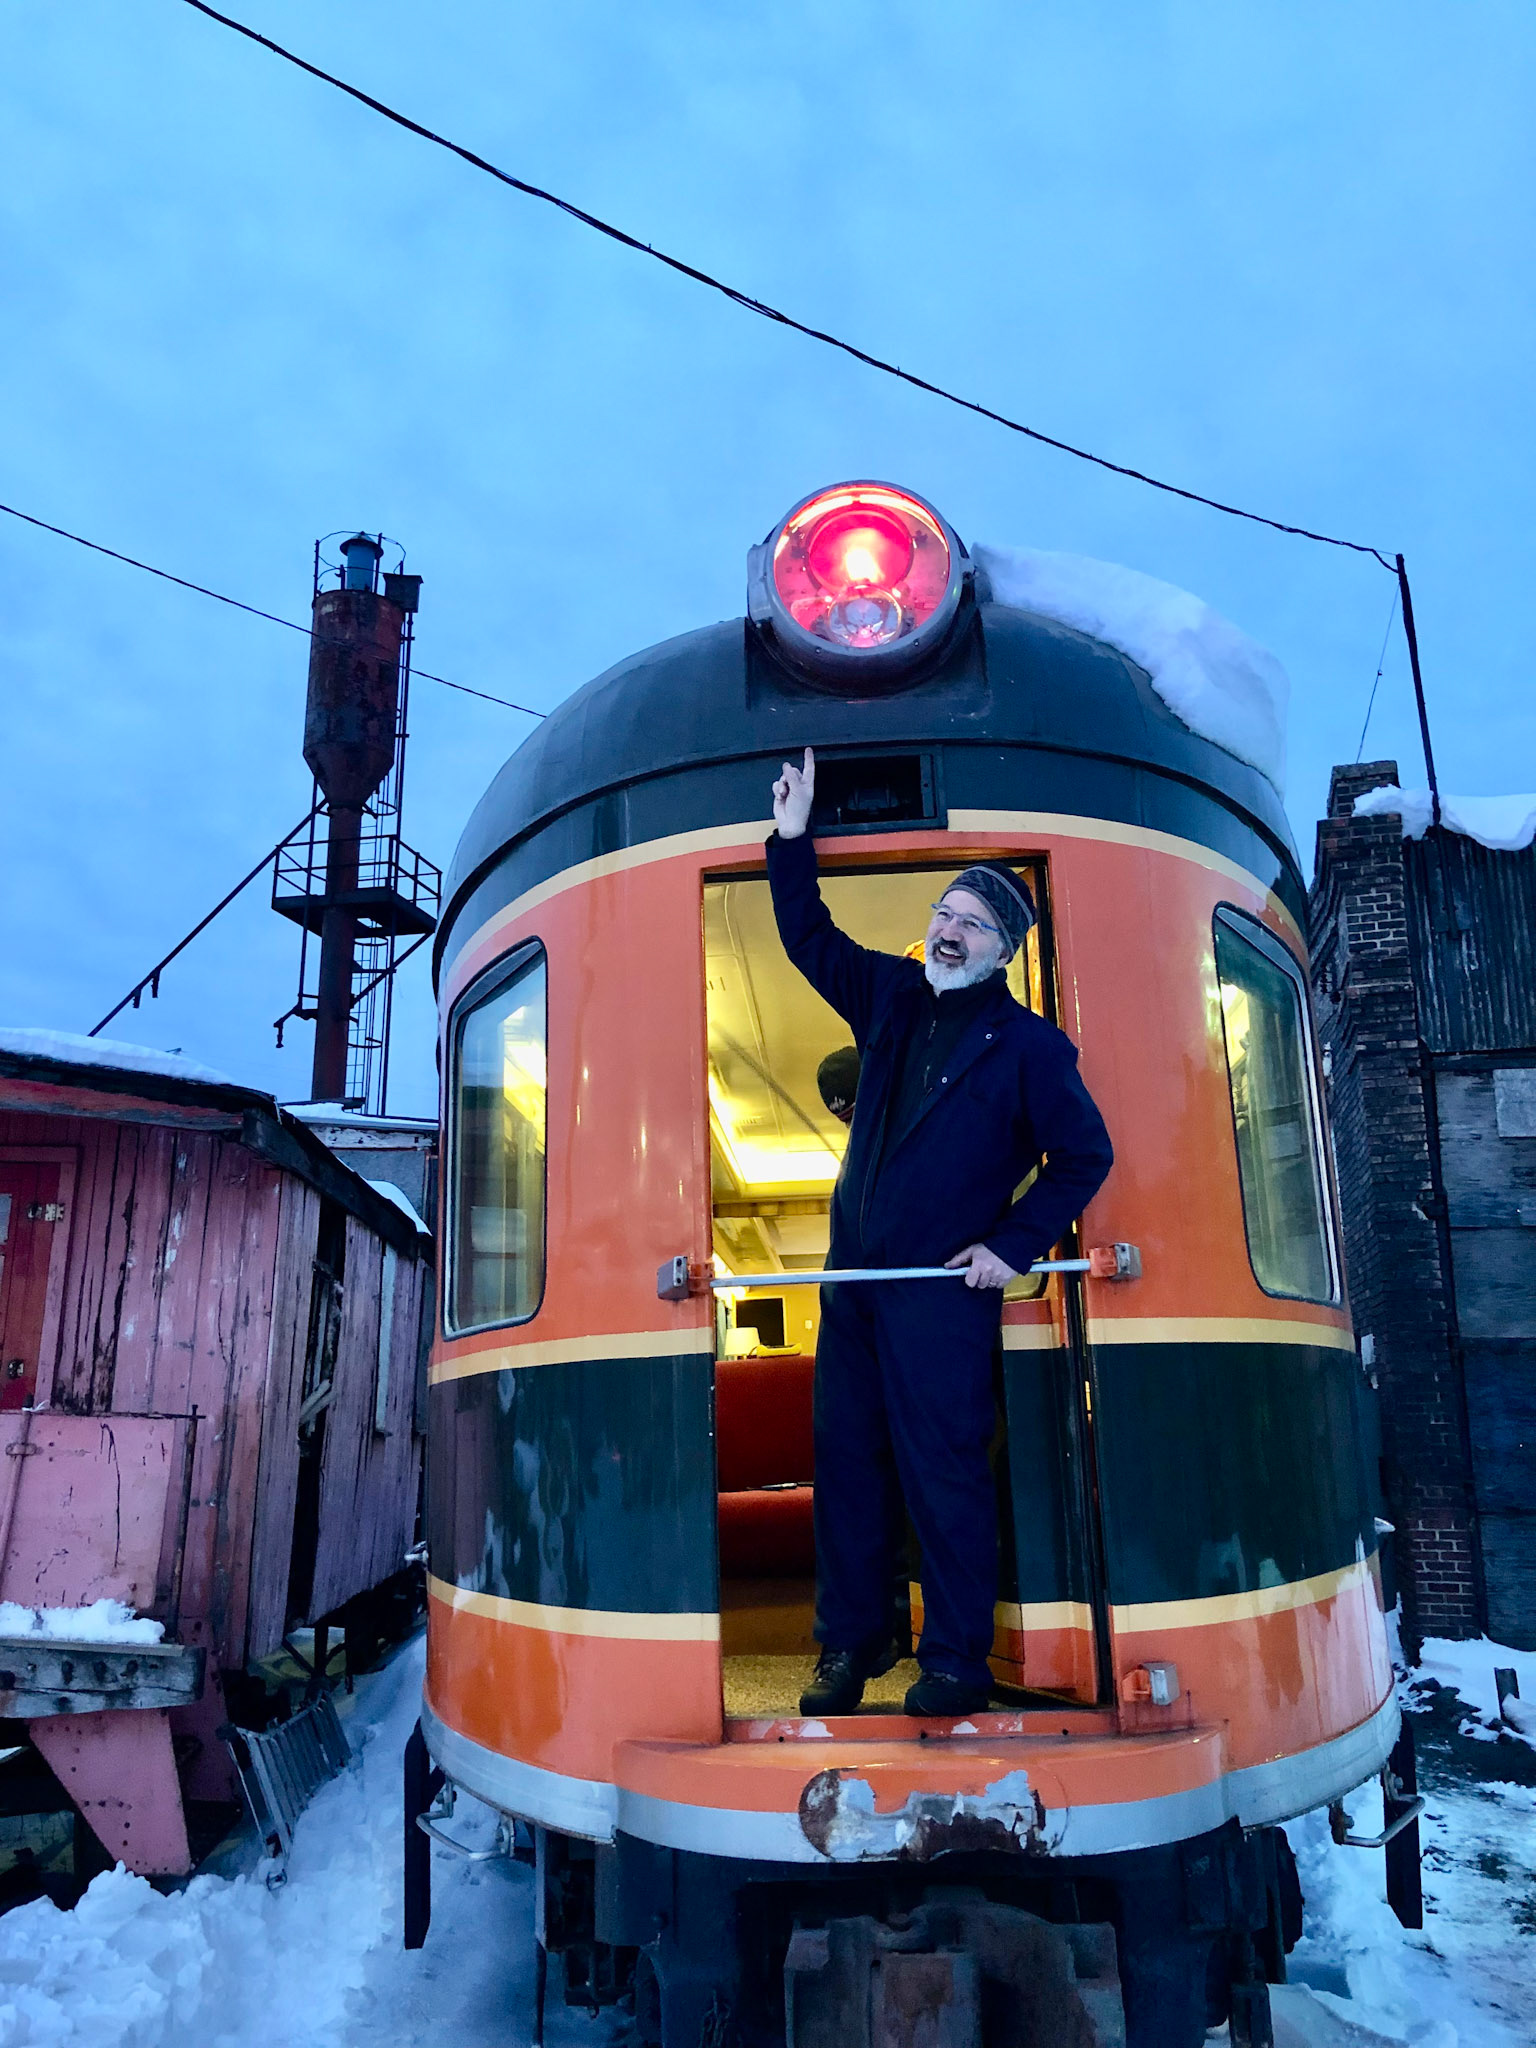
The Gyralight is a signature element of the Mountain series cars, and it's gratifying to be able to restore Going-to-the-Sun Mountain's to working order.
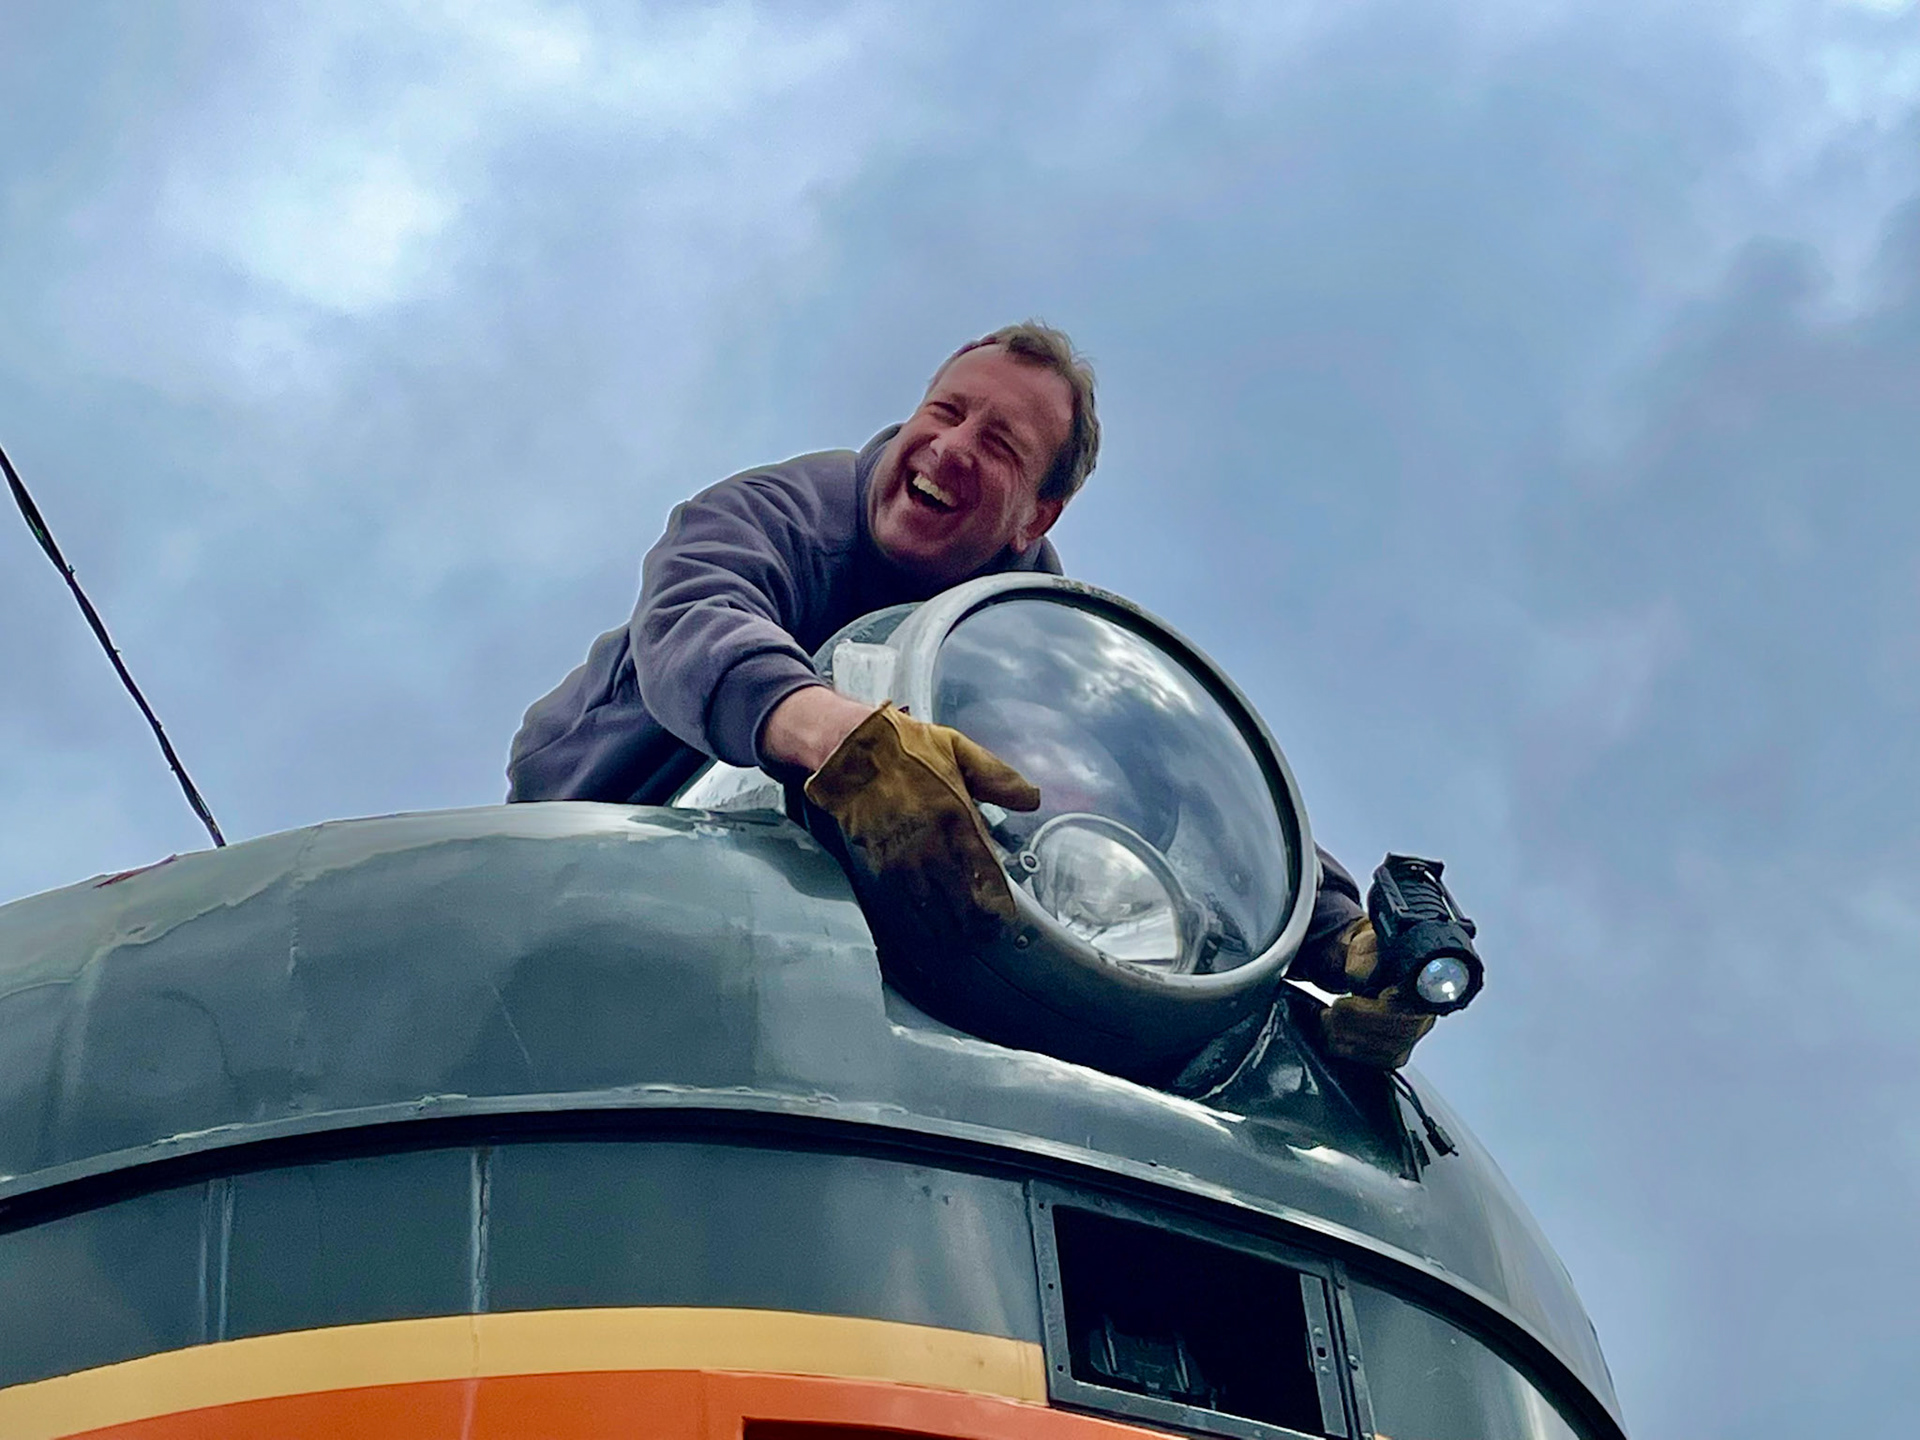
Ben loves his Gyralite!
Jon does too
For further information about the restoration of Ben's cars, see my page about the Mountain cars and caboose X-7 projects >>>